Advanced Custom Fields is a powerful plugin used to create and manage custom fields and custom post types efficiently. Previously, users had to create custom post types and taxonomies manually by code or with another plugin like CPT UI. This process was often time-consuming and complex, particularly when working with custom content types or managing multiple CPTs.
However, since the ACF 6.1 version has been released, users can now seamlessly create custom post types and taxonomies directly within the ACF plugin itself, eliminating the need for external plugins or complex coding. It provides a user-friendly interface that simplifies defining custom fields and associating them with specific content types.
In this article, we will walk you through the process of creating custom post types, taxonomies, and custom fields using the ACF plugin.
Let’s take a closer look at creating custom post types, taxonomies, and custom fields using ACF.
- First install and activate the Advanced Custom Fields(ACF) plugin.
Table of Contents
Key Takeaways
- Learn how to create custom post types and taxonomies directly in ACF, eliminating the need for extra plugins or complex coding.
- Understand how ACF helps streamline content structure by associating custom fields with specific post types and taxonomies.
- See how ACF simplifies complex WordPress setups, making it ideal for developers, content managers, and agencies building custom content experiences.
- Explore how to add and manage custom taxonomies to improve content classification and filtering.
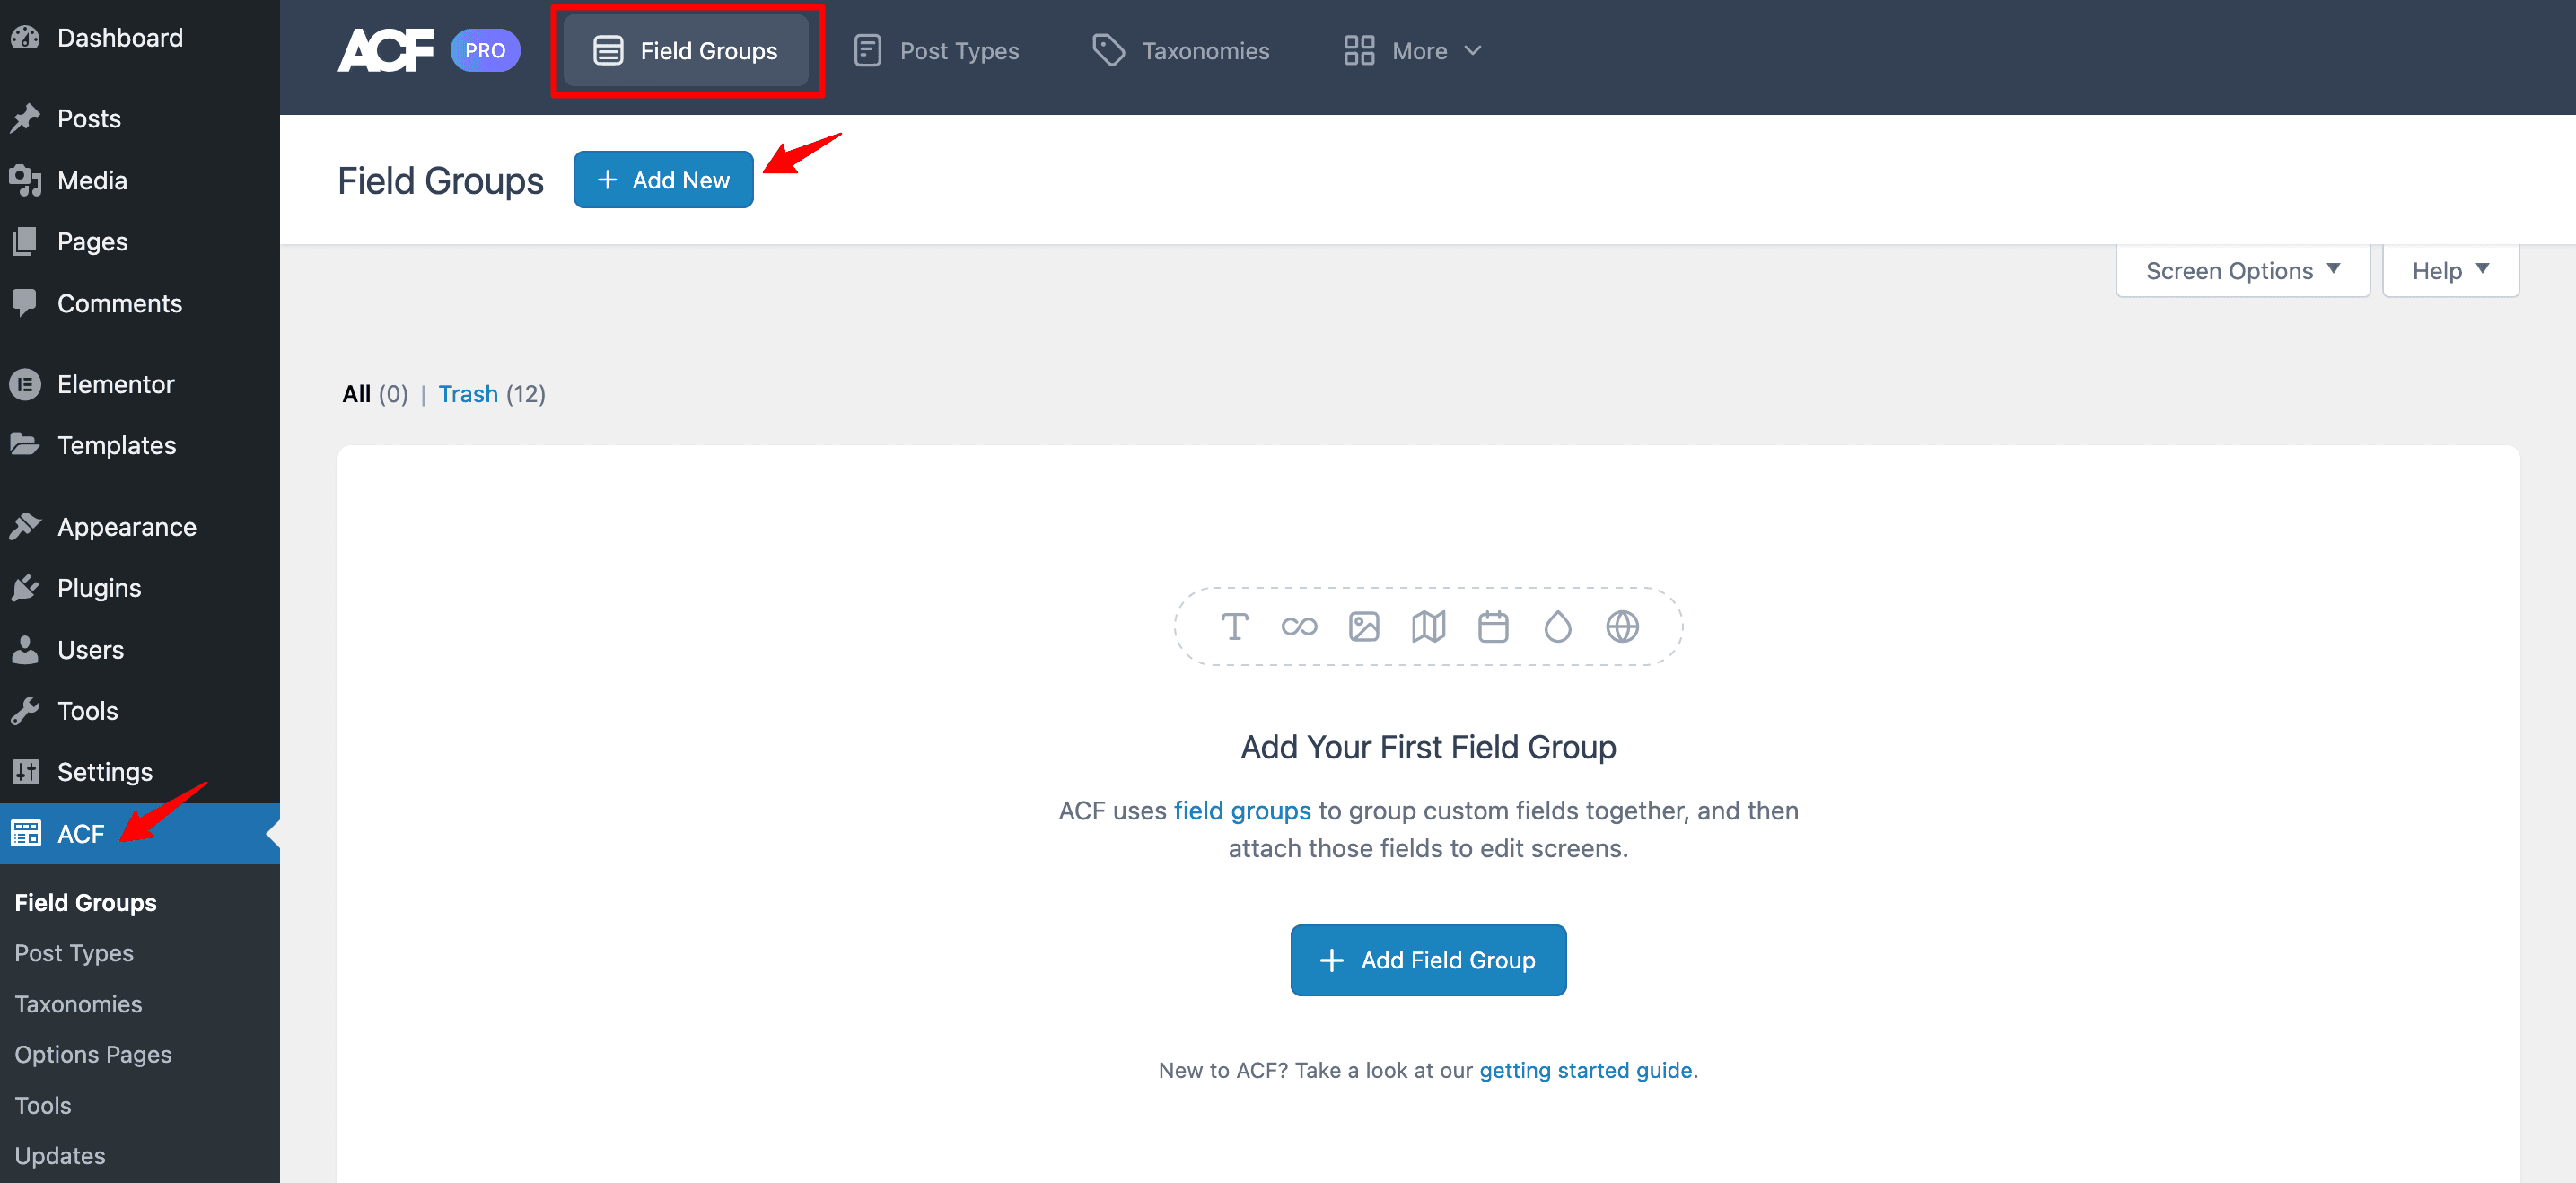
How to Add ACF Custom Field Groups
To register a new Field Group, go to ACF, then click on Field Groups, and finally, click the “Add New” button.
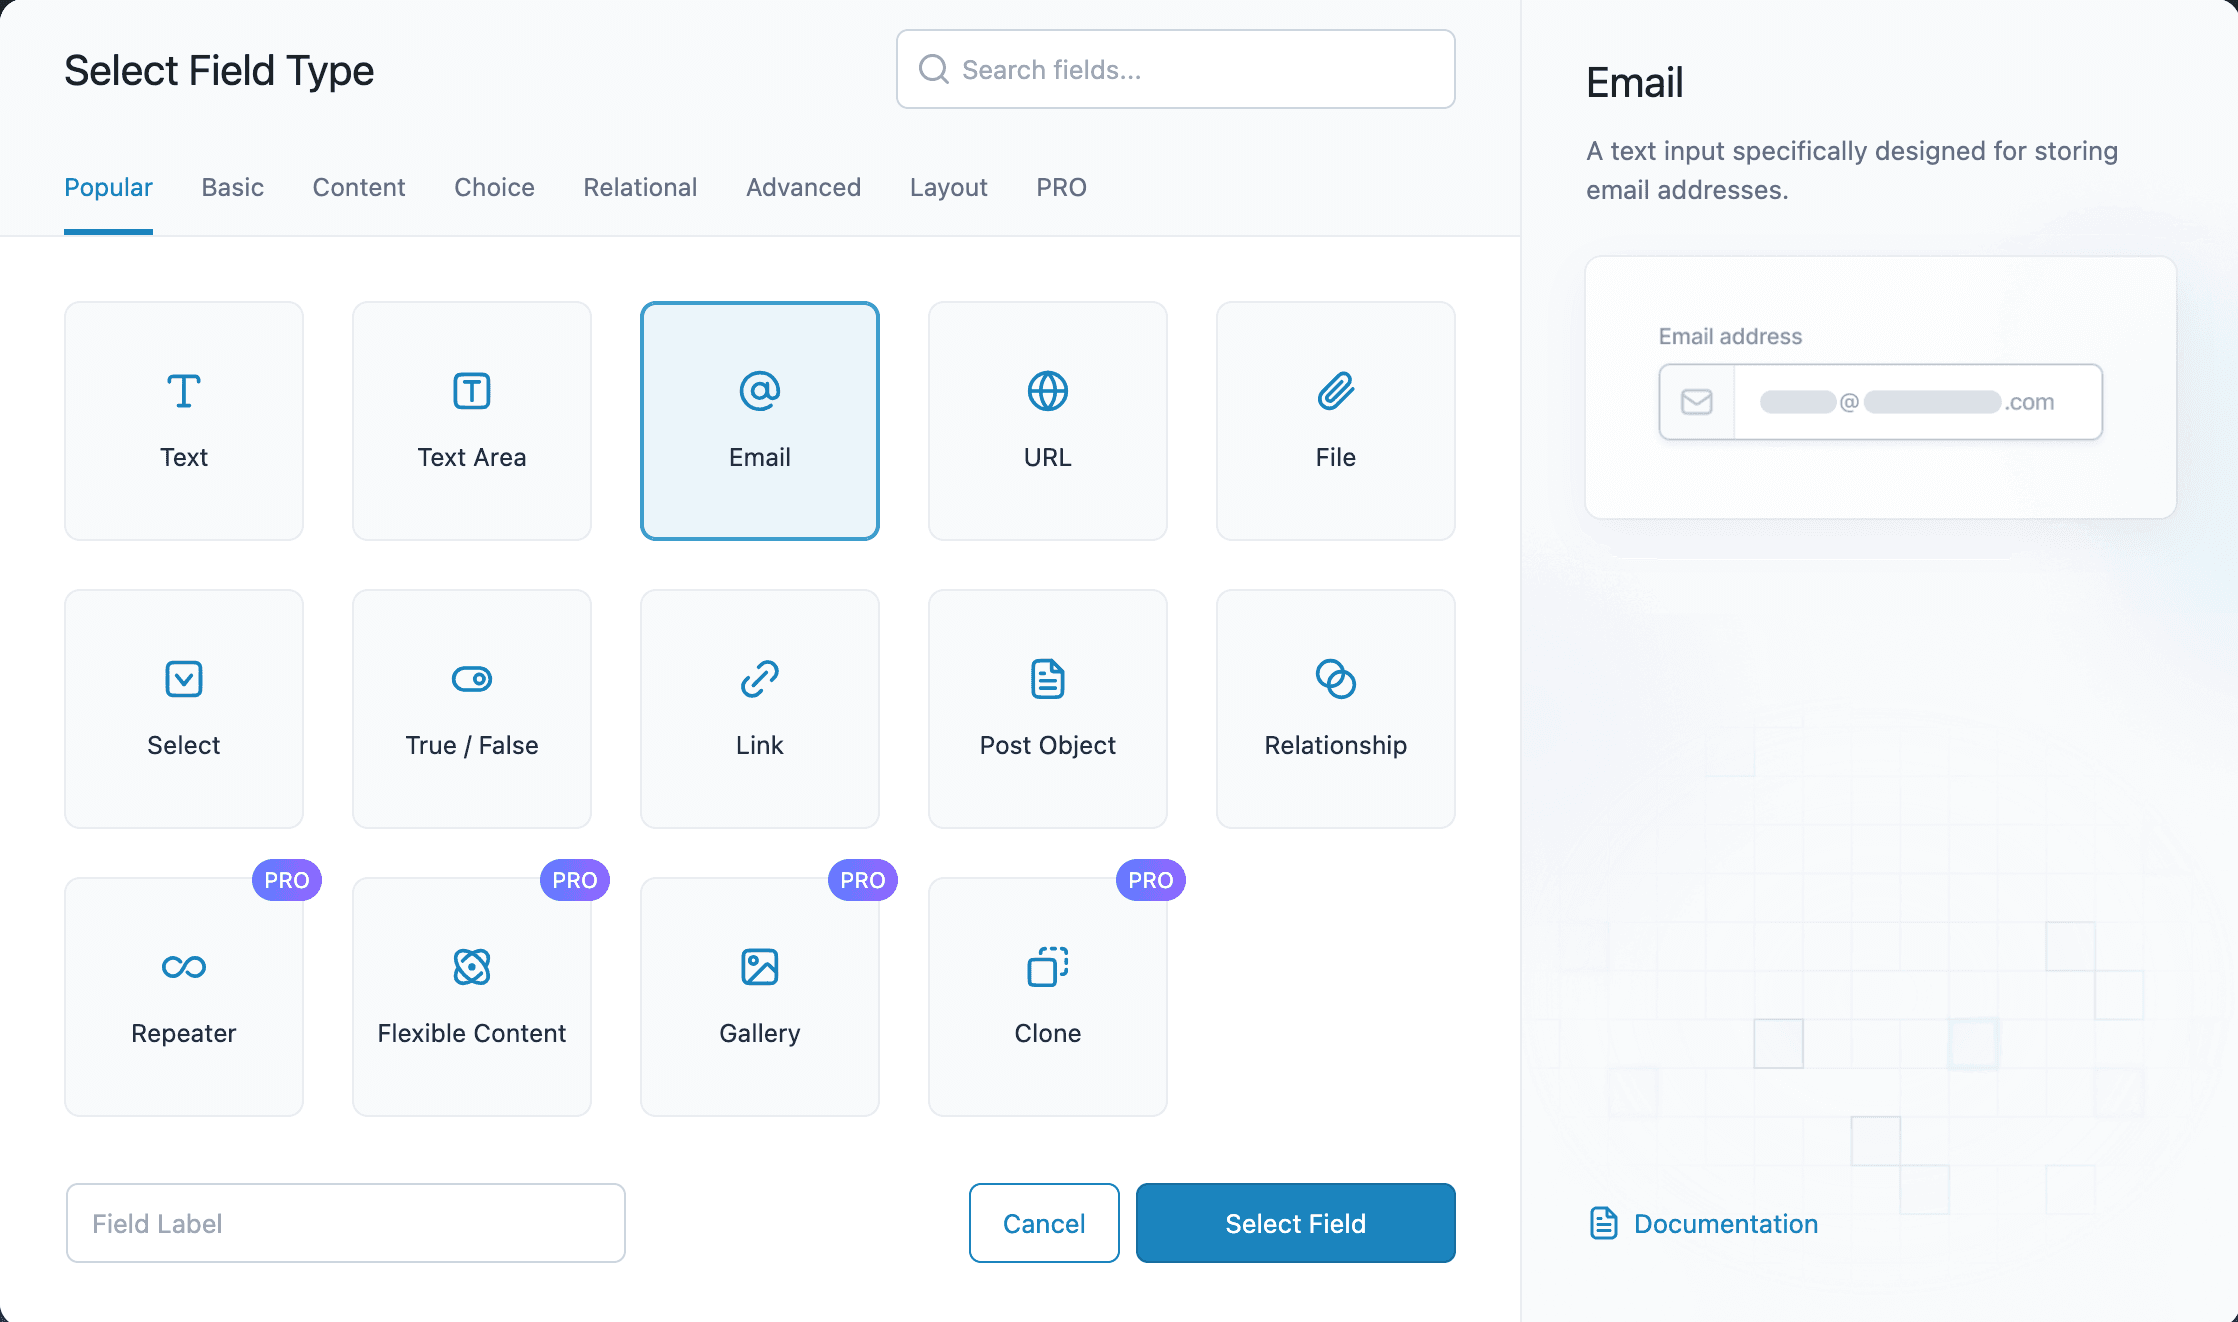
Once you click the “Add New” button, you’ll see a screen where you can create custom fields for a specific group. To begin, type in the name of the field group.
Settings
- Field Type: Select the type of field from the various types available.
- Field Label: Enter the label of the field.
- Field Name: Enter the name of the field.
- Default Value: Enter the default value that will appear when creating a new post.
- Character Limit: Specify the limit of characters you want to be entered.
Once you have configured all the necessary settings, click on the “Save Changes” button to save your settings.

To choose a different field, click on “Browse Fields.” This will open a window with various tabs organizing the fields. If you click on a specific field within this window, you’ll see a brief description, a visual representation, and links to more information in the documentation.
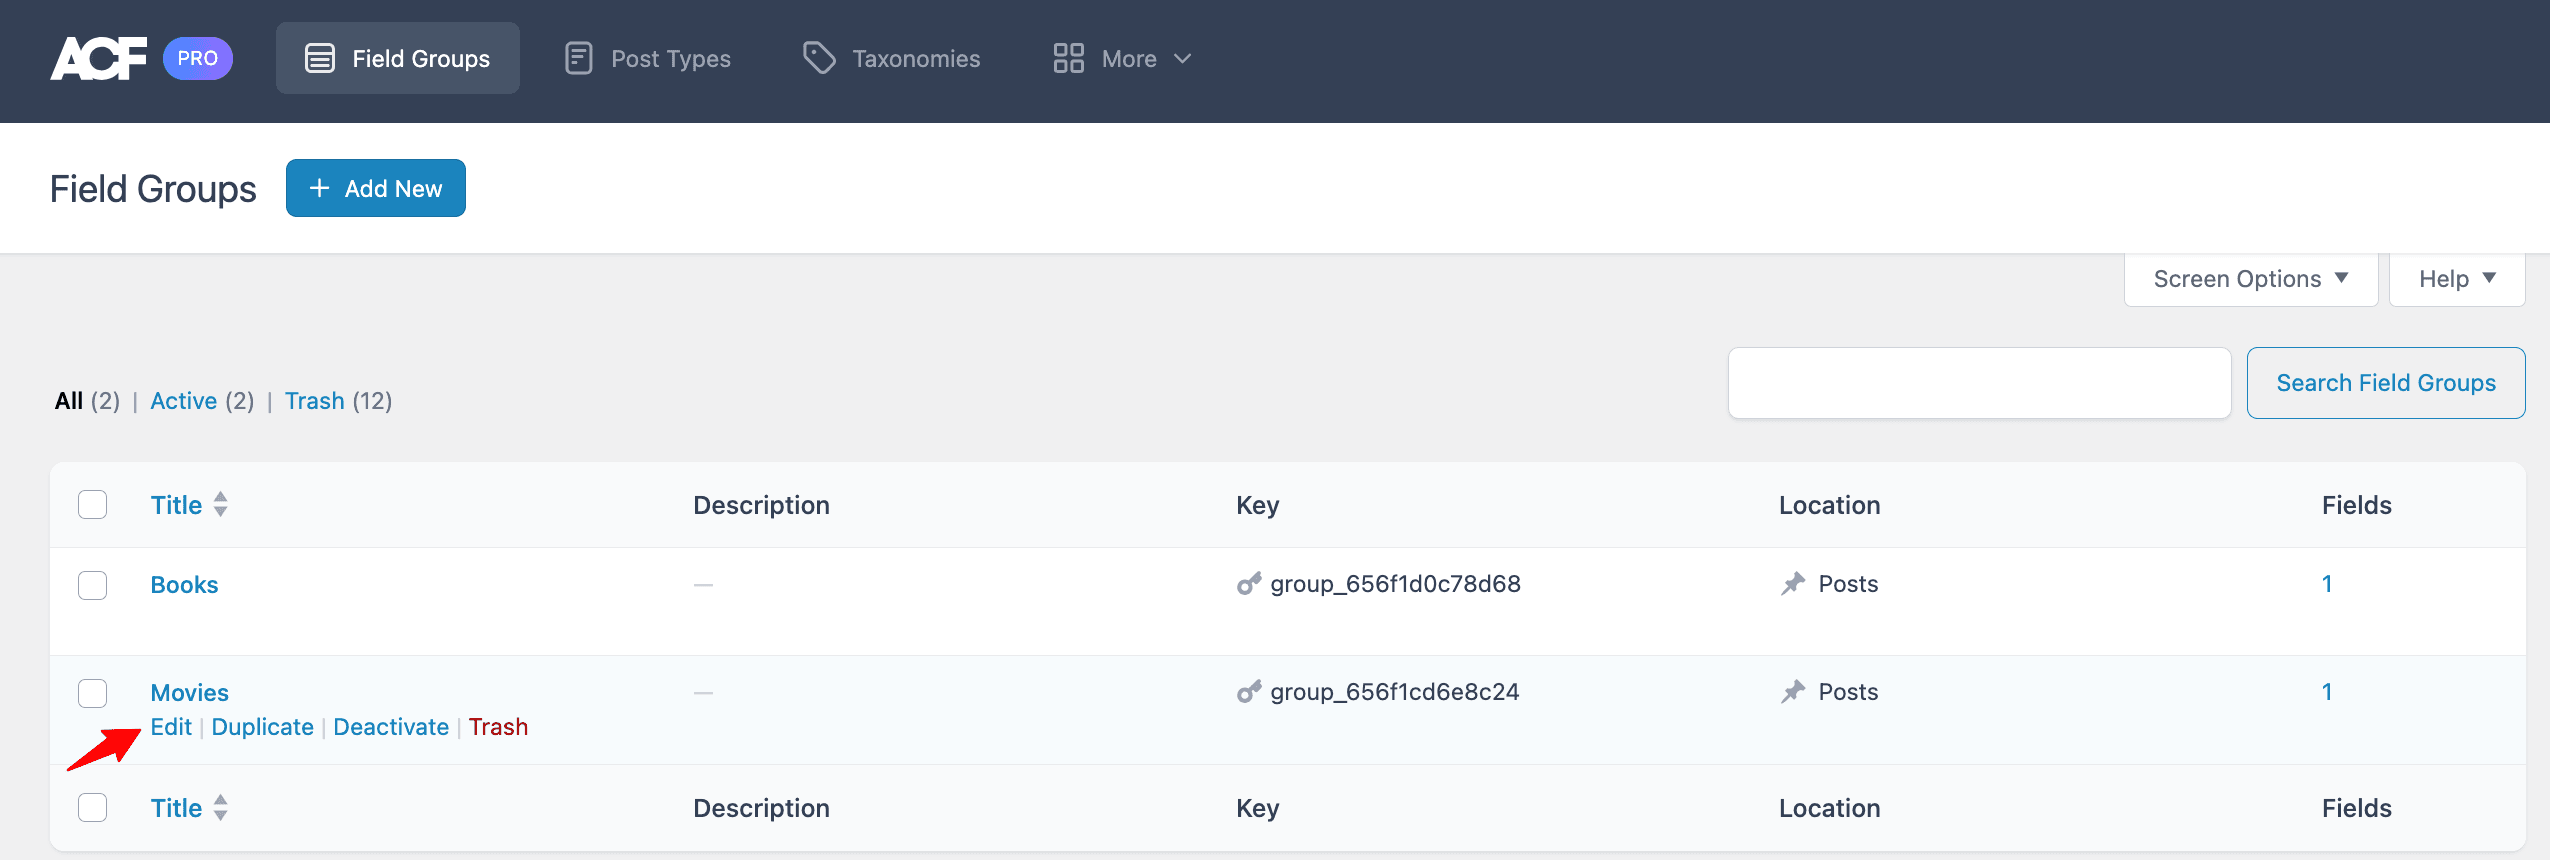
Edit Existing Custom Field Groups
To change a field group, just click on the “Edit” button. You’ll see all the options there for you to customize.
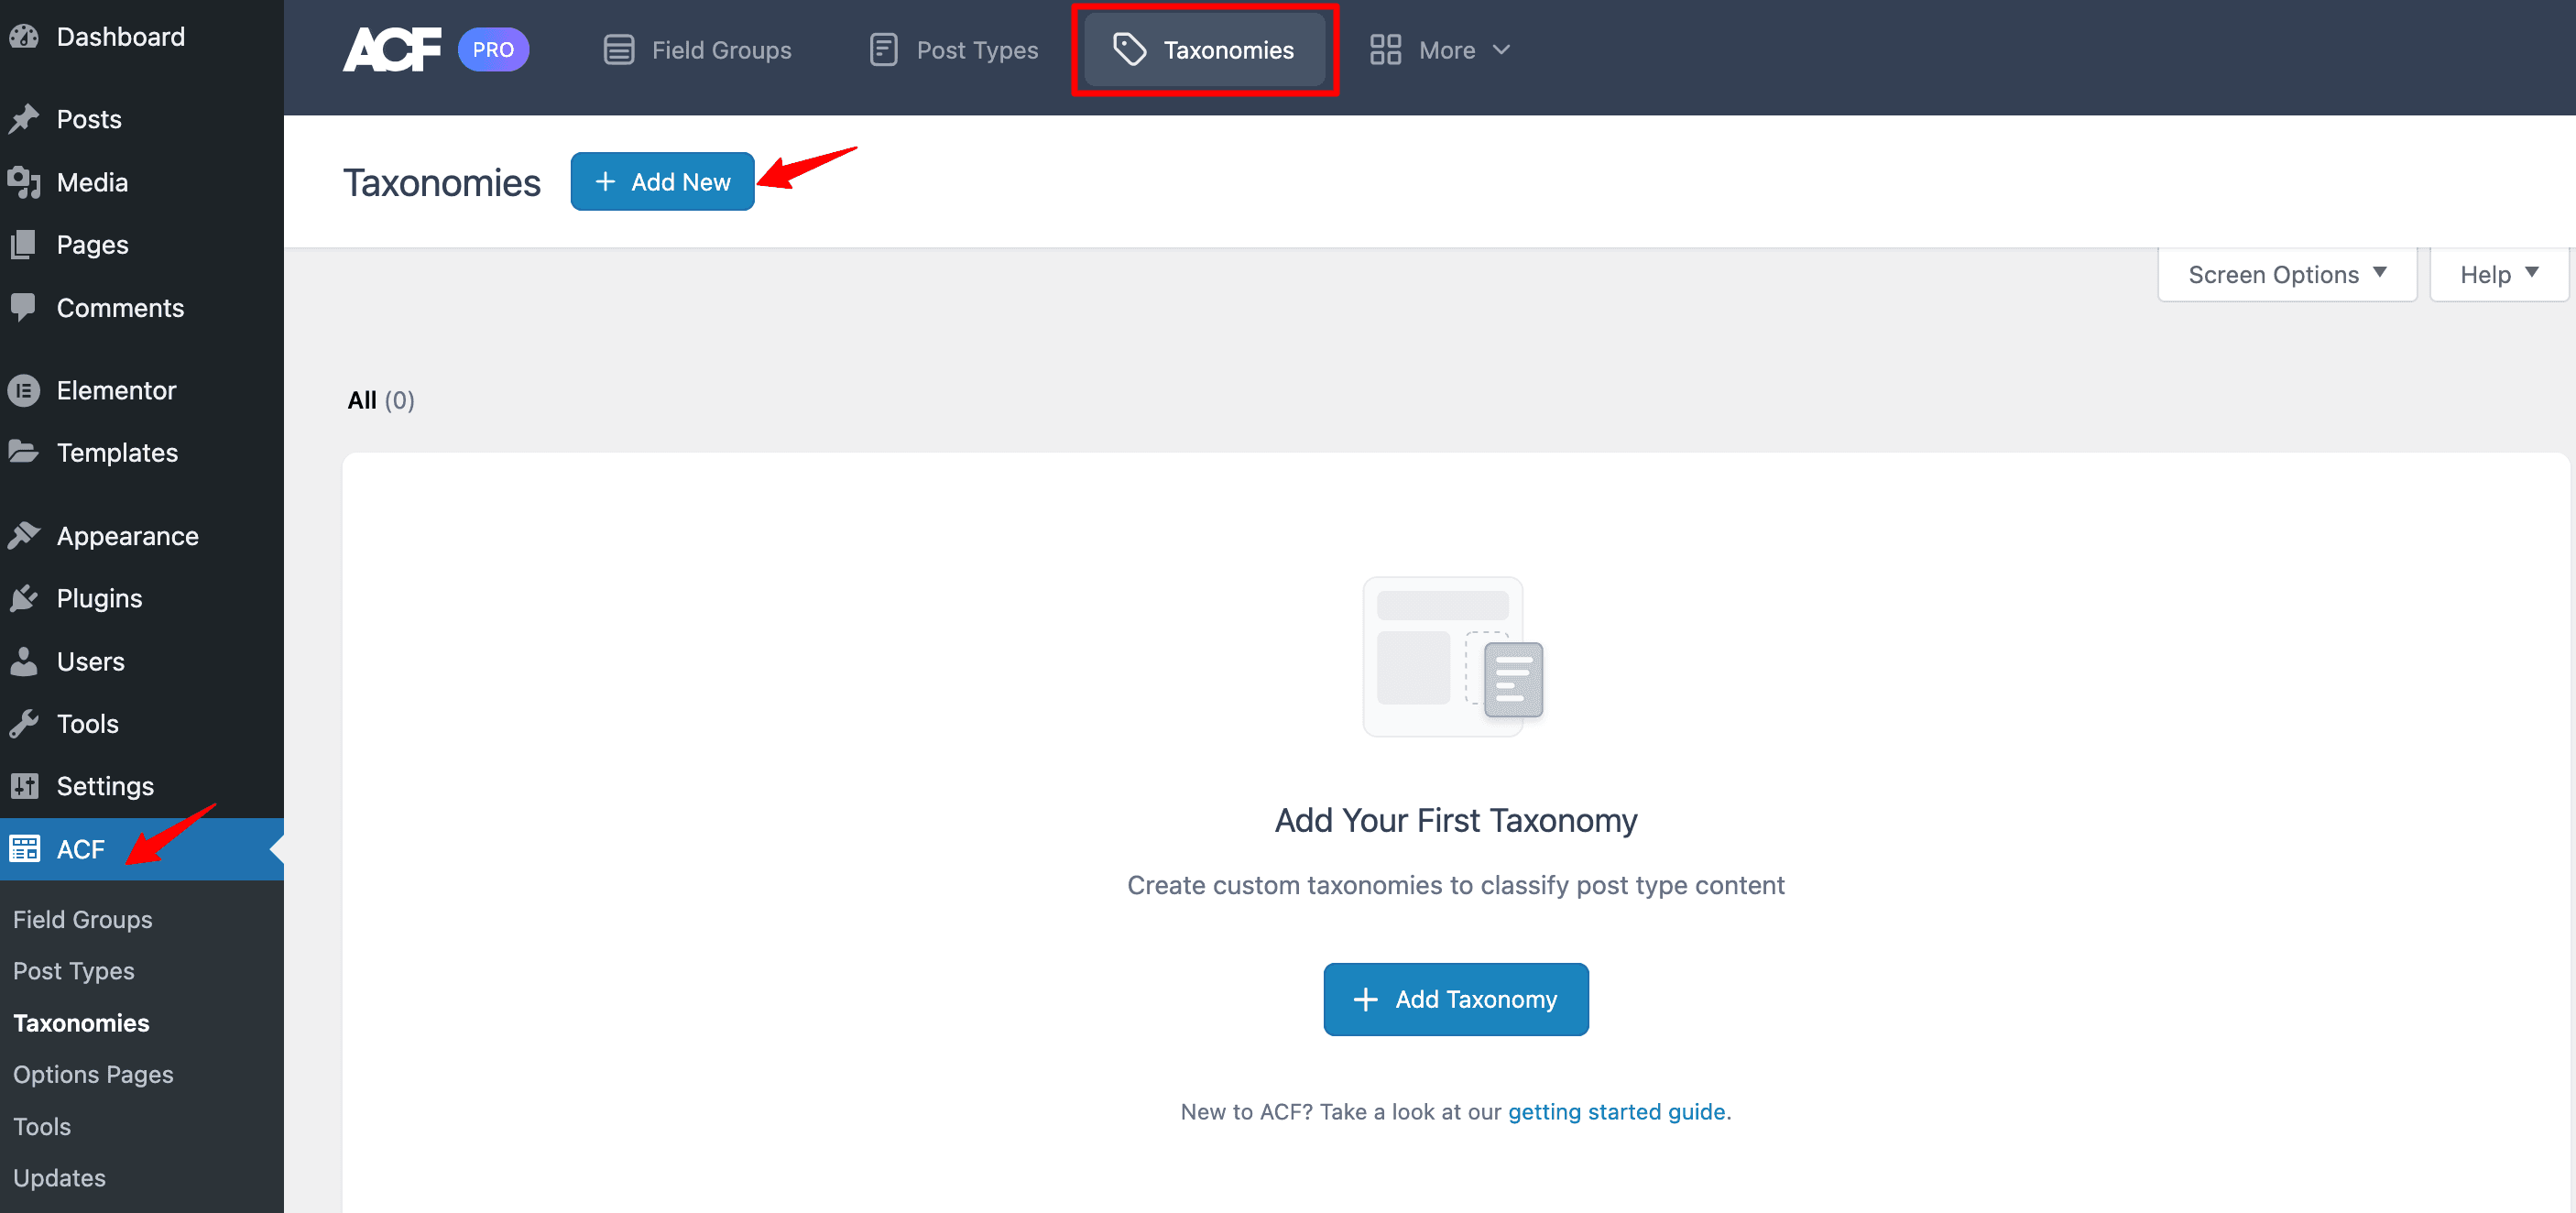
How to Add Taxonomy in ACF
To create a new taxonomy, go to ACF, select “Taxonomies,” and finally, choose the “Add New” option and access a screen with settings for the taxonomies.
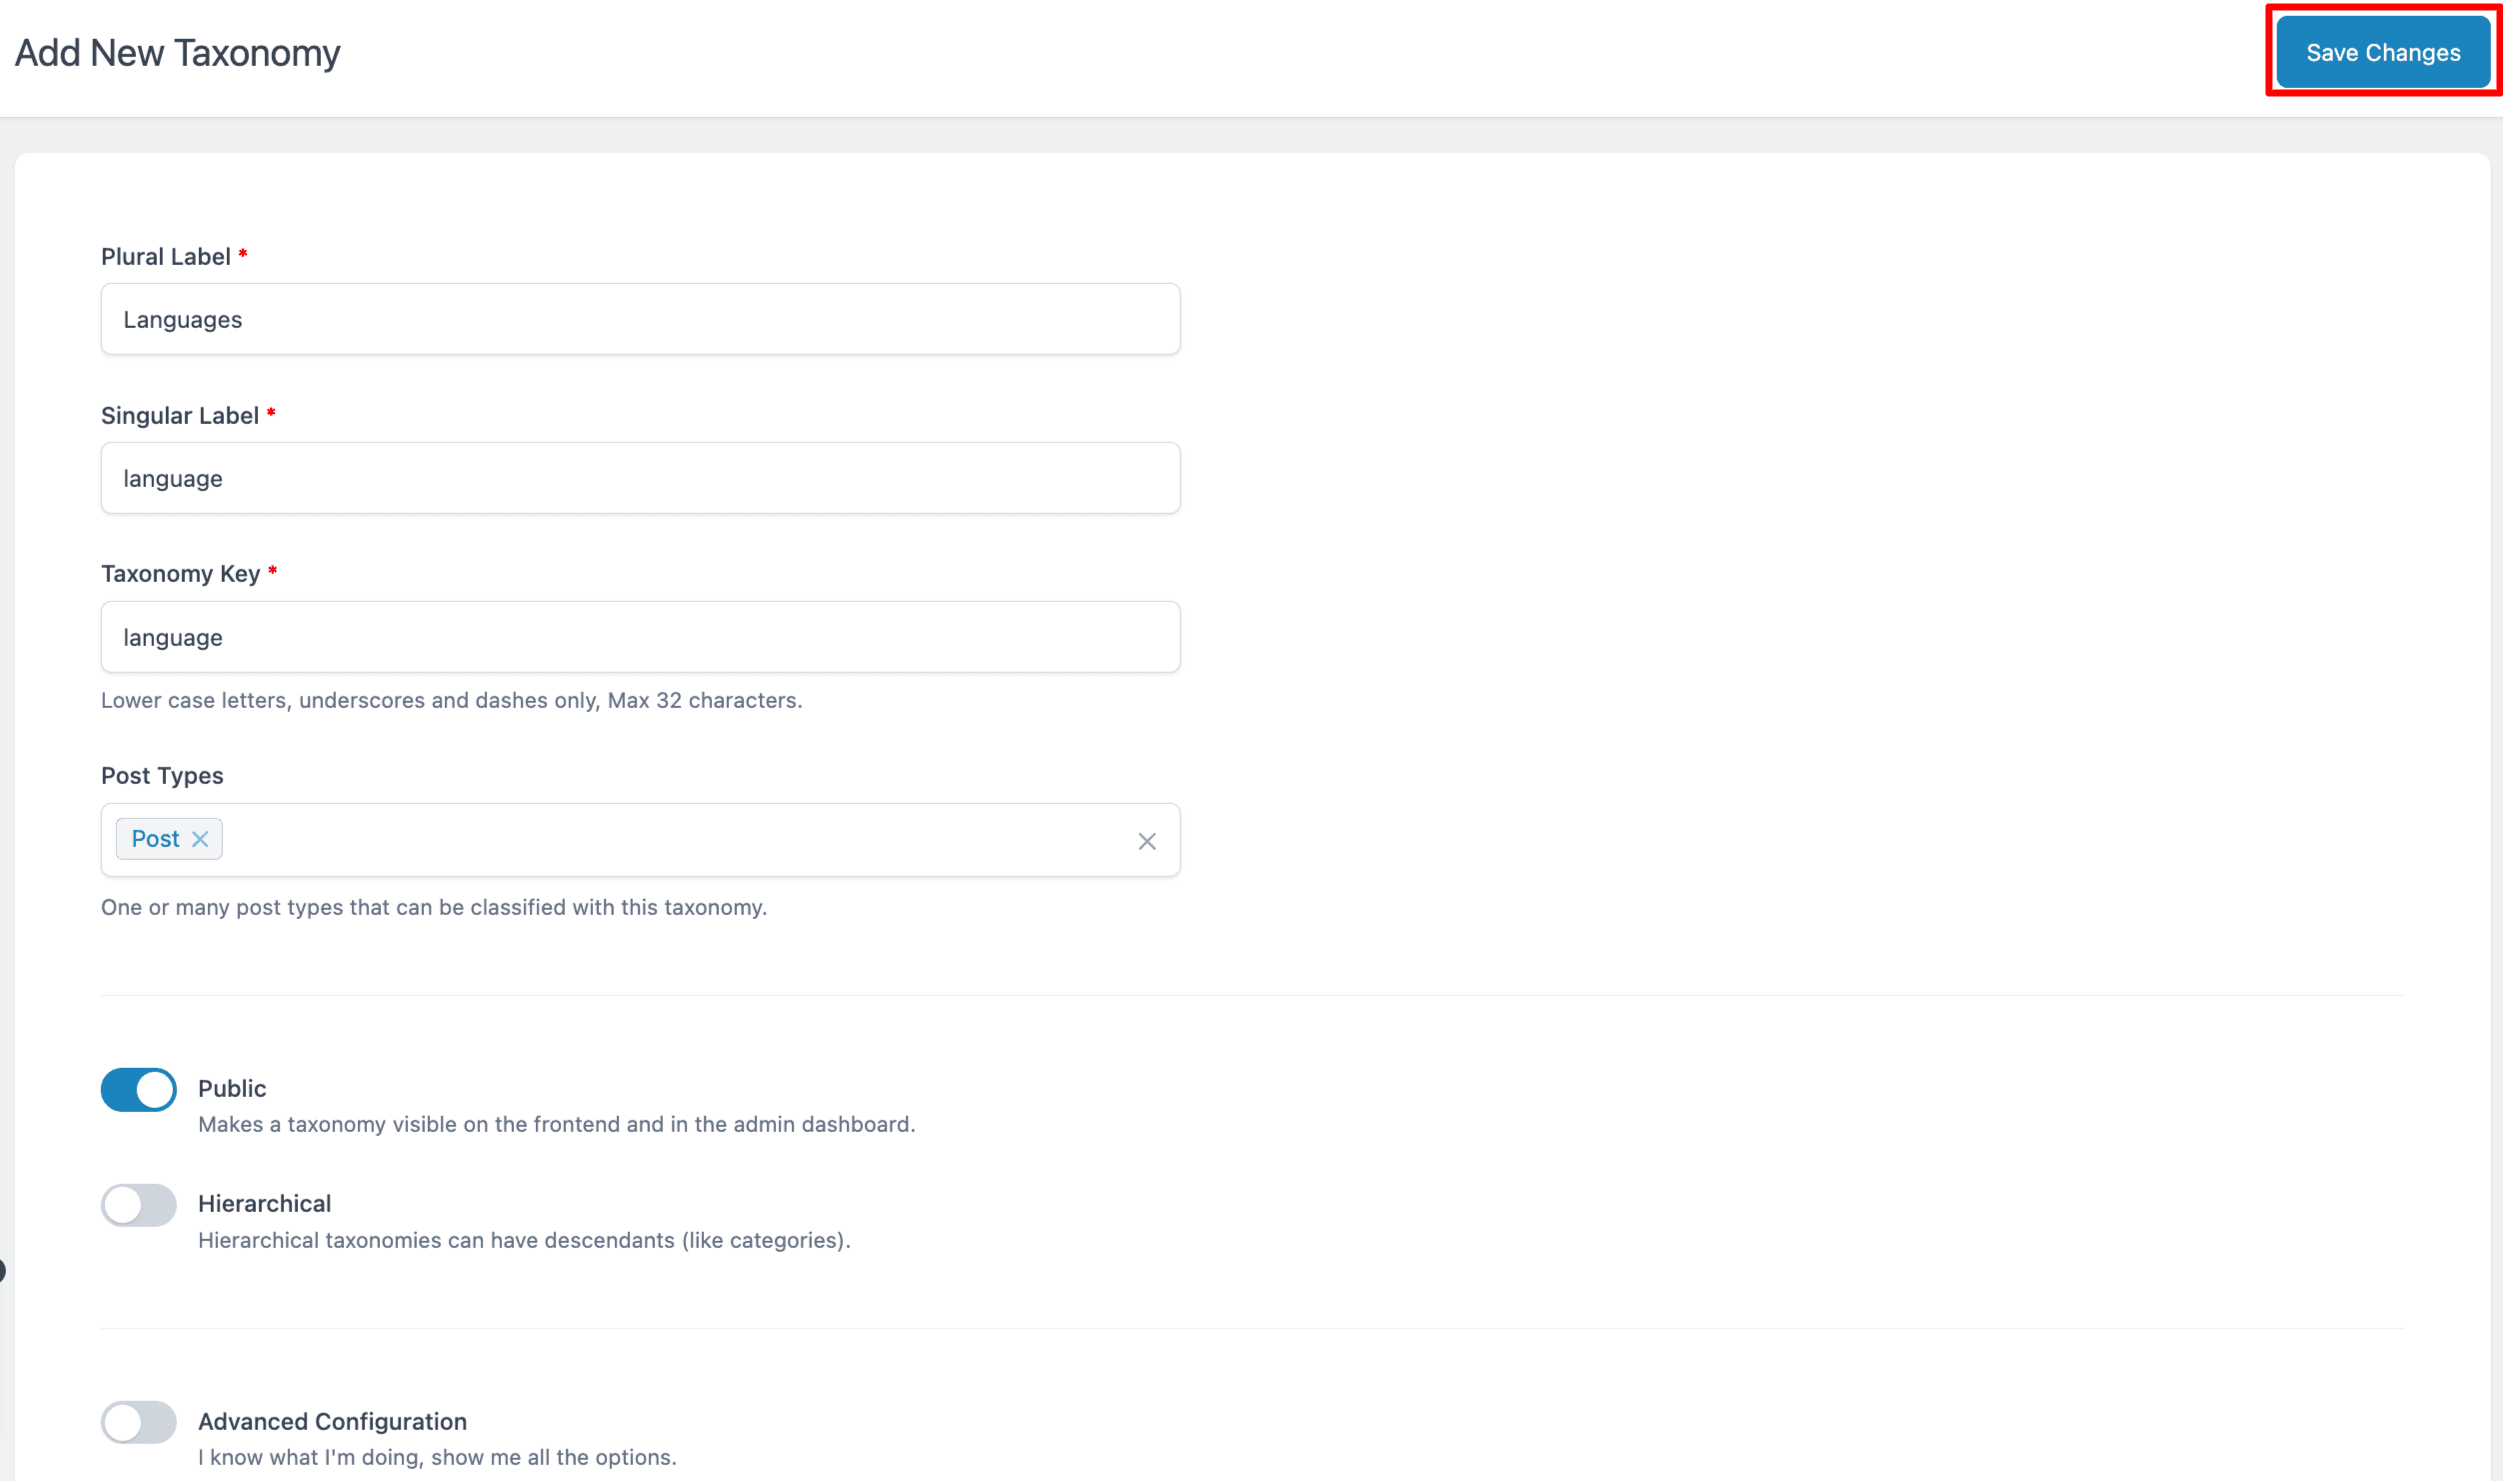
Settings
- Plural Level: Enter the plural level of the object.
- Singular Level: Enter the singular level of the object.
- Taxonomy Key: Enter the name of the taxonomy key.
- Post Types: Select the post types that can be classified with a particular taxonomy.
- Public: This setting decides if the taxonomy is open for everyone to see or kept private. When turned on, the taxonomy shows up in the admin dashboard and can be viewed by the public on the front of the website.
- Hierarchical: By default, this option is turned off, and it decides how the taxonomy behaves in relation to having parent and child connections among items, much like how it works for ‘Pages’ in WordPress.
- Advanced Configuration: To make it easier to register, ACF doesn’t show all the settings right away. But, if you turn on the ‘Advanced Configuration’ option, you can control and customize different settings for registering taxonomies.
After you’ve set everything up the way you want, just click “Save Changes” to make sure your settings are saved.
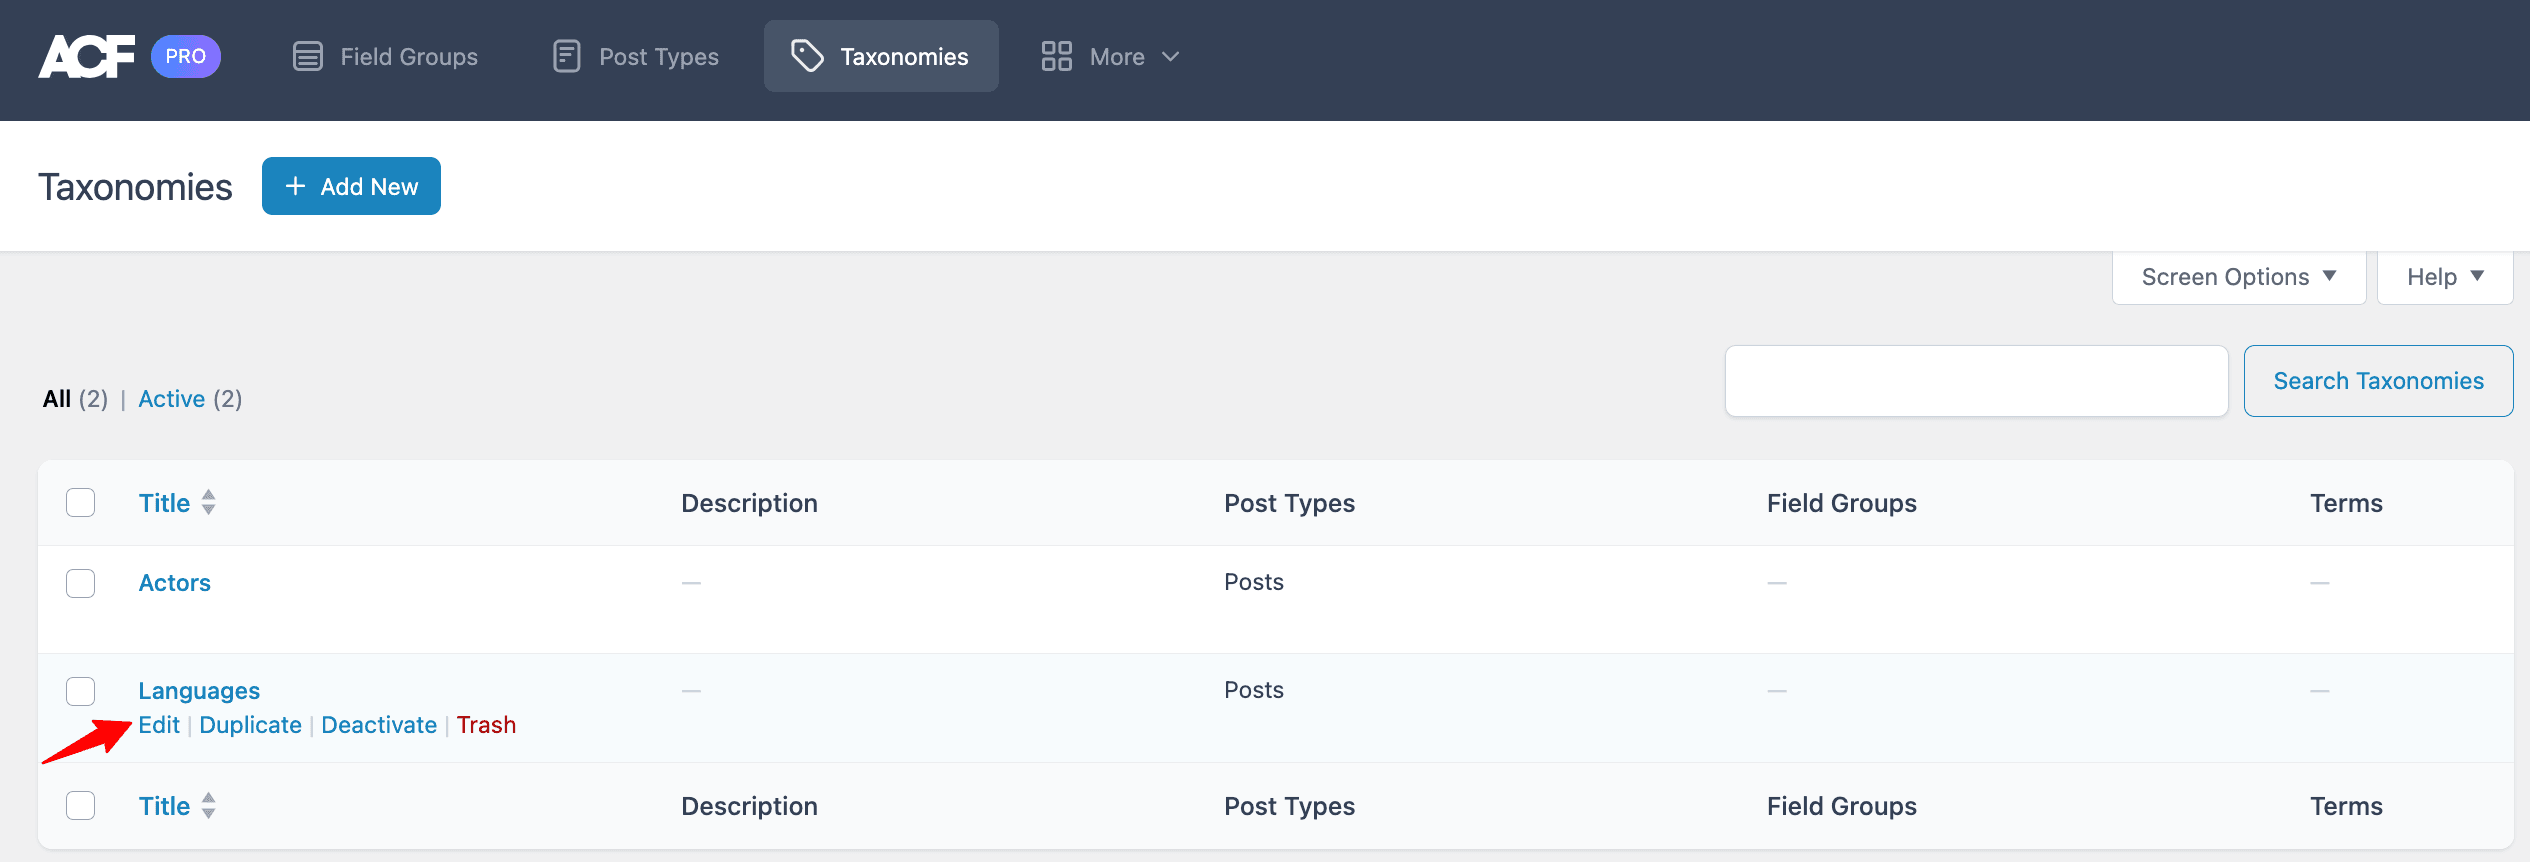
Edit Taxonomies in ACF
To modify existing taxonomies, click on the “Edit” button, and you will find all the settings available for customization.
Add Custom Post Types
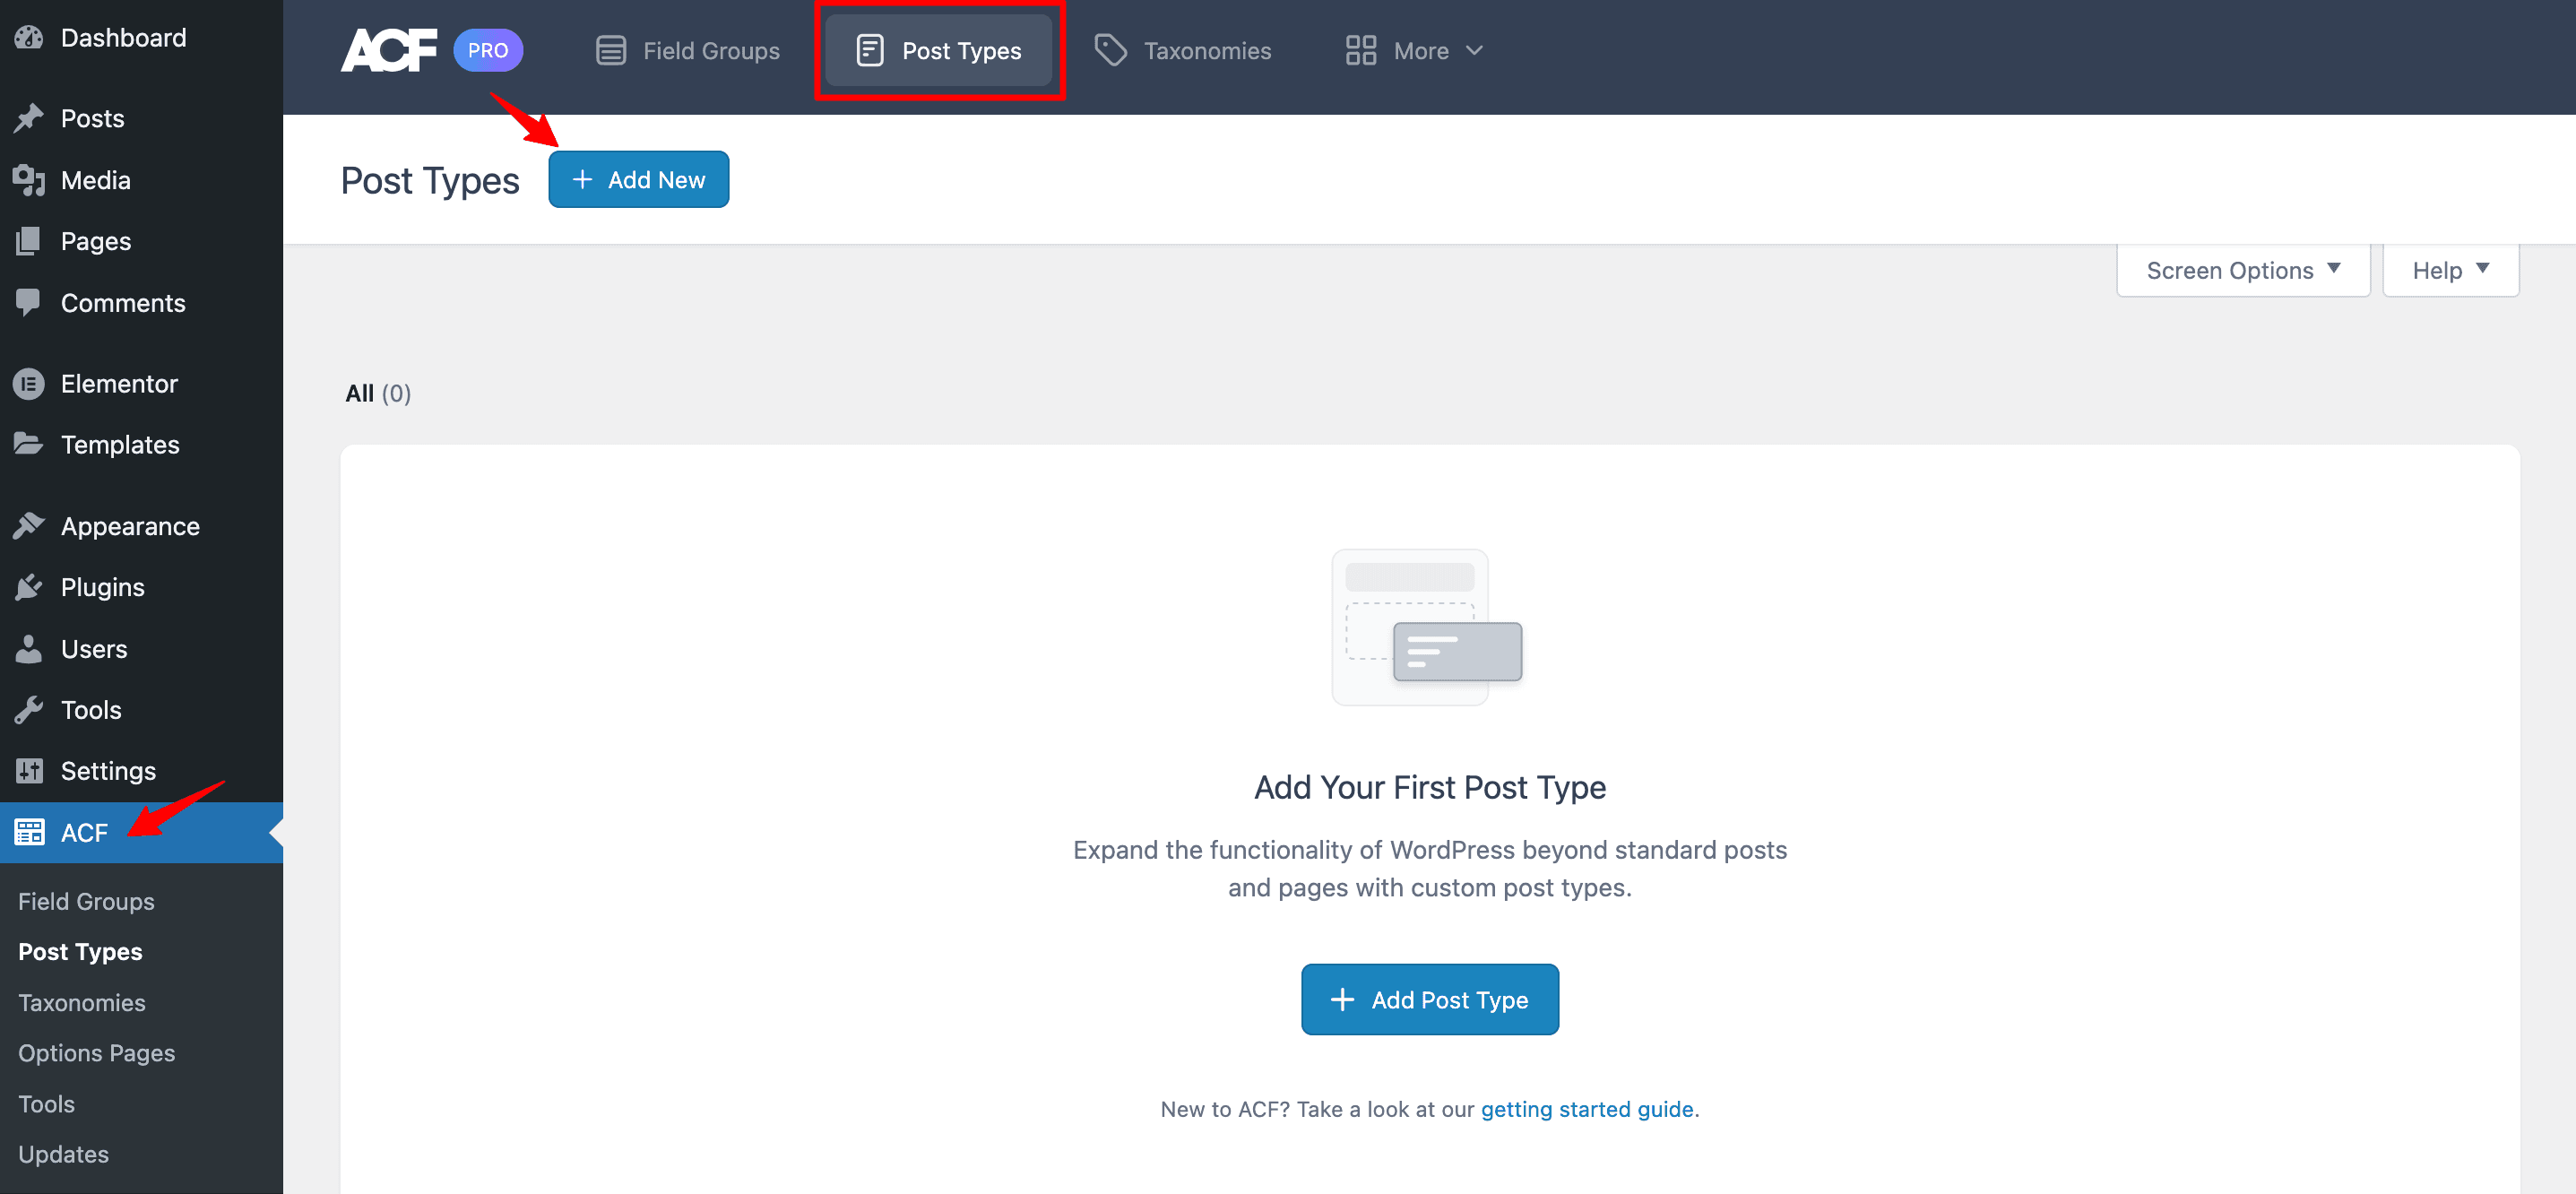
To register a new custom post type, go to ACF ➝ Post Types, click on Add New, and access a screen with settings for the post type.
Settings
- Plural Label: It is the plural label for the object you are registering could be, for example, “Movies,” “Places,” or “Books.”
- Singular Label: It is the singular label of the object you are registering, for example, Movie, Place, and book.
- Post Type Key: The auto-generated key is derived from the singular label, but you also have the option to modify it if necessary.
- Taxonomies: Choose the taxonomies that already exist to organize items of the post type.
- Public: By default, this setting determines whether the post type is public or private. When enabled, the post type is visible in the admin dashboard and accessible to the public on the frontend of the site.
- Hierarchical: By default, this setting is disabled and determines the type of post type in terms of supporting parent and child relationships between objects, similar to the WordPress ‘Pages’ post type.
- Advanced Configurations: To simplify the registration process, ACF does not display the extensive list of settings by default. However, when the ‘Advanced Configuration‘ toggle is enabled, you gain control over the various settings that can be configured for registering a post type.
Once you have configured all the necessary settings, simply click on the “Save Changes” button to save your settings.

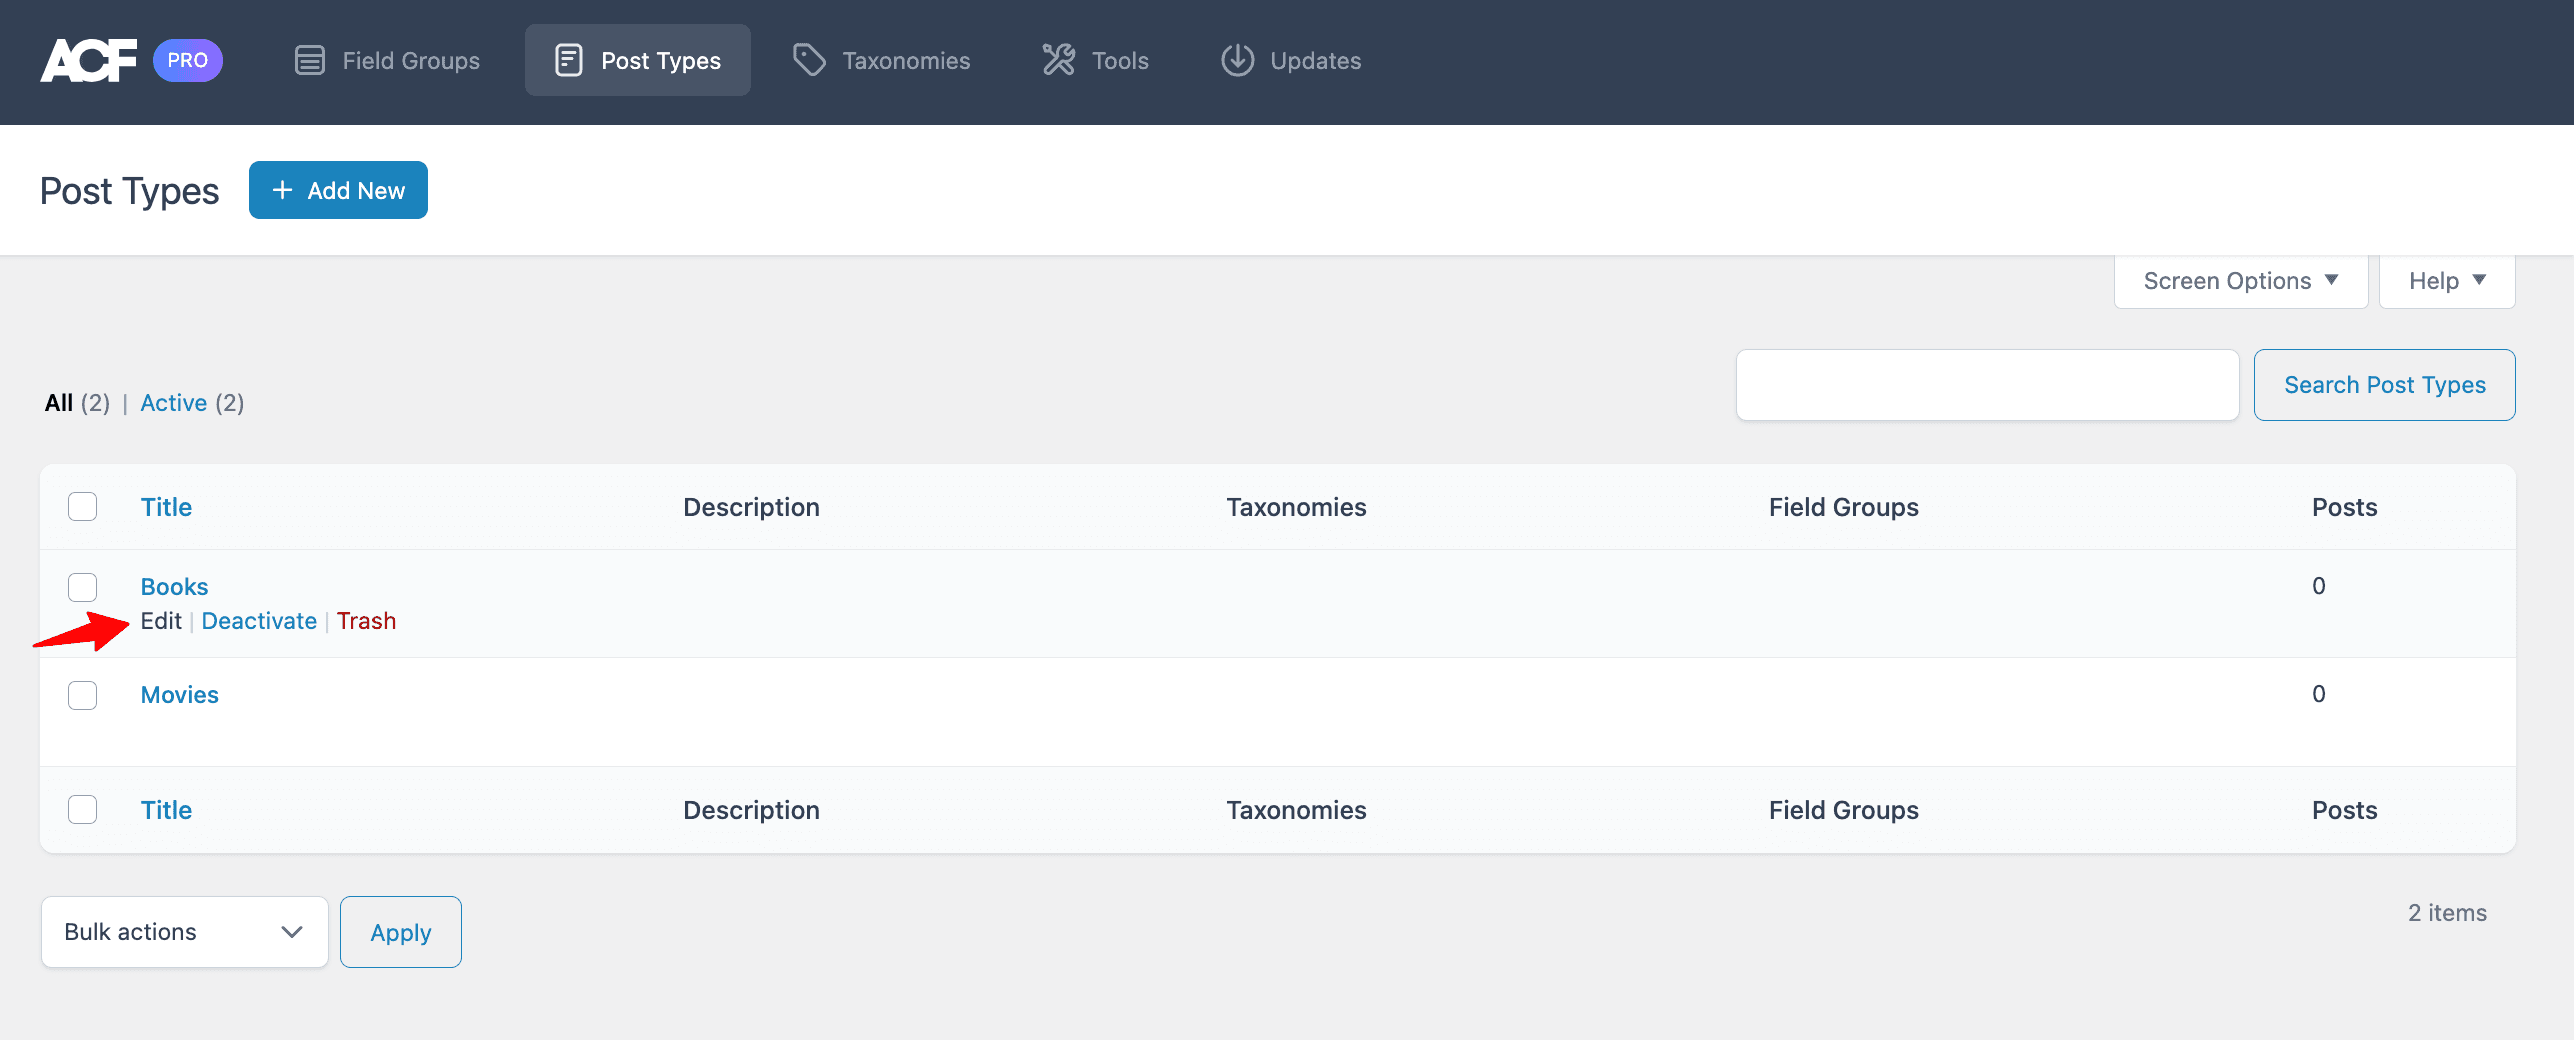
Edit Custom Post Types
To modify existing custom post types, click on the “Edit” button to find all the settings available for customization.
Create Taxonomy Terms
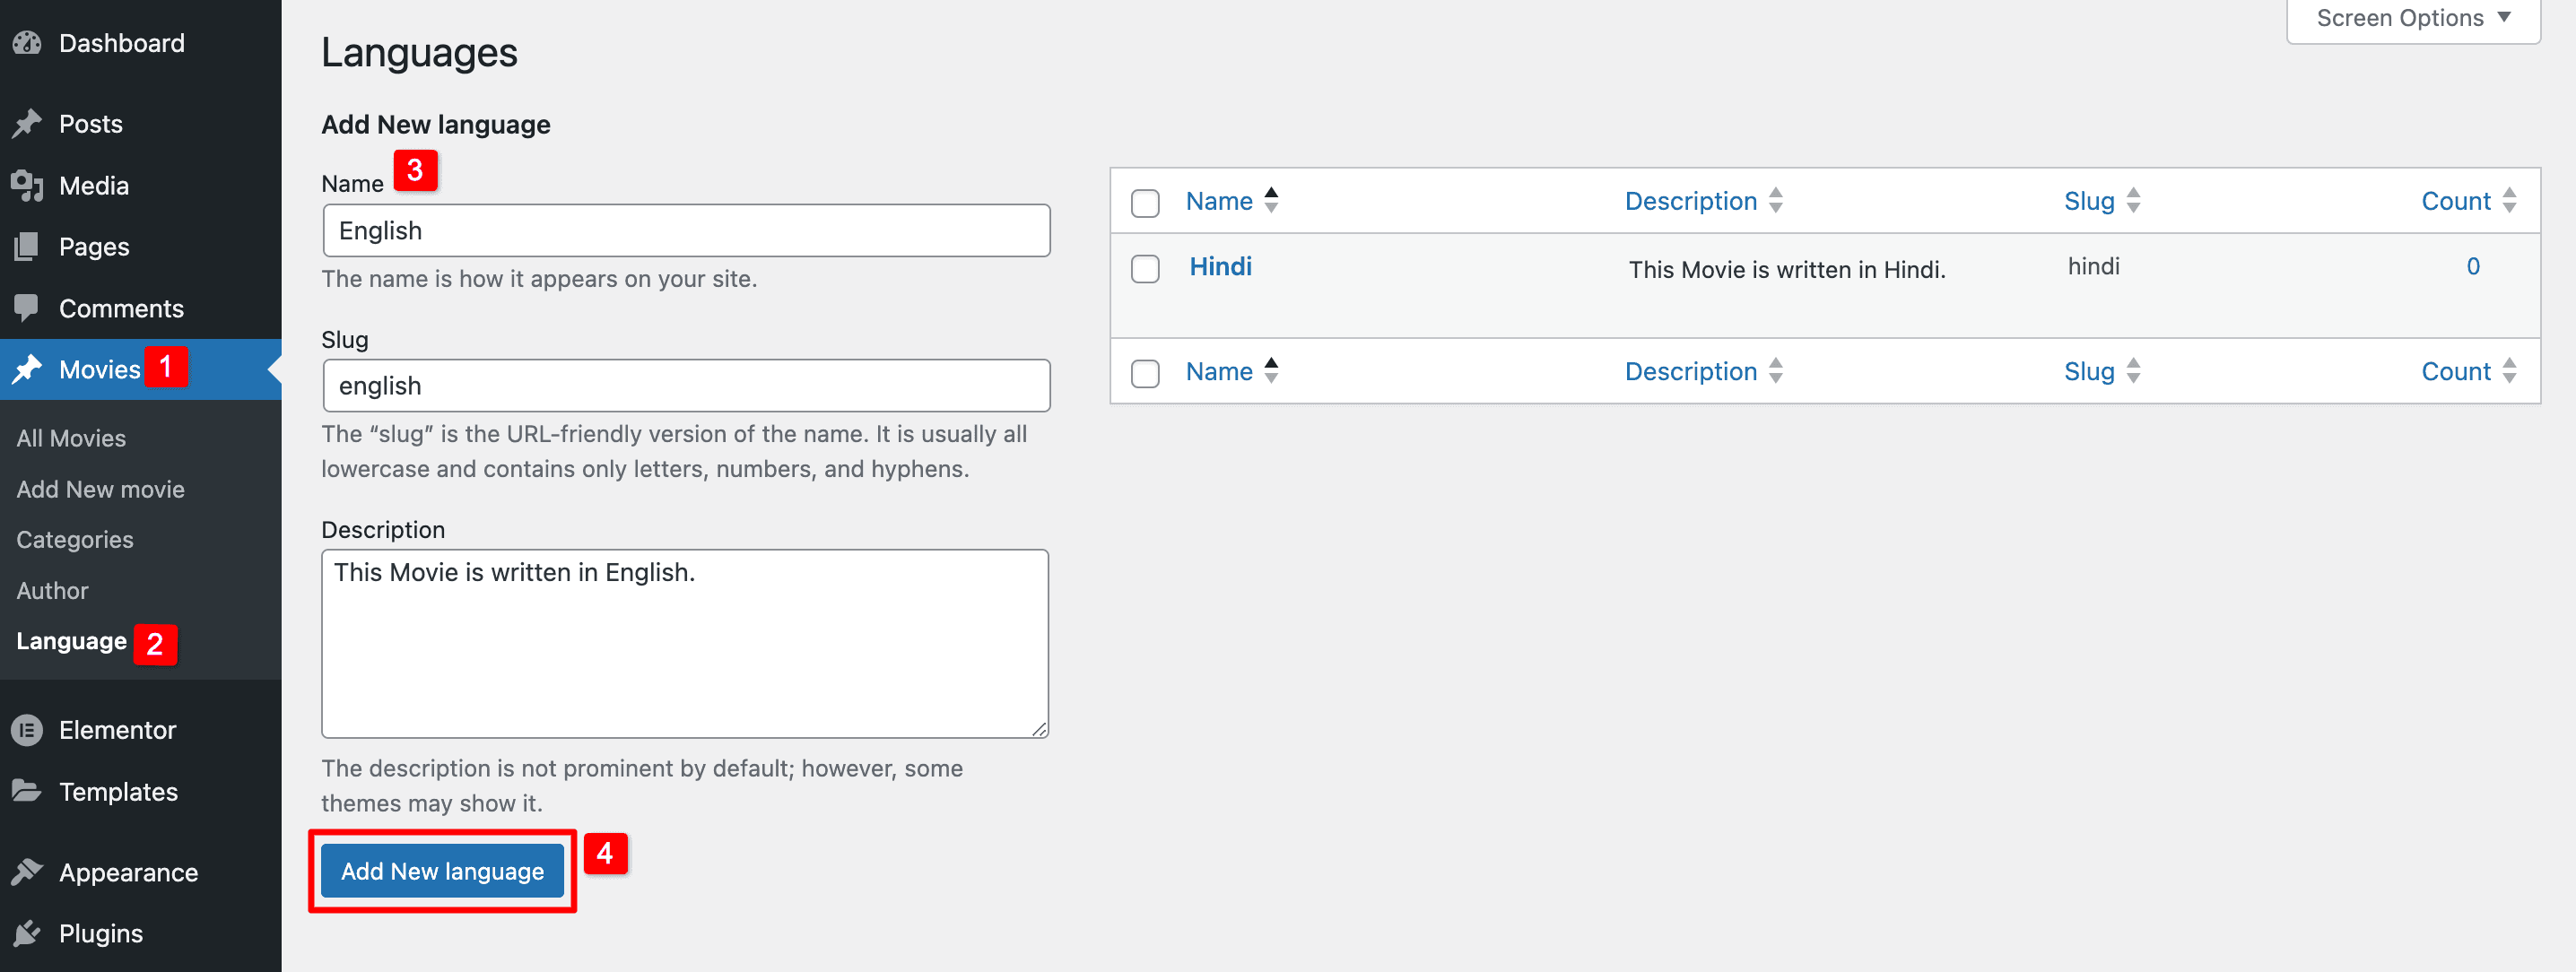
To make taxonomy terms, go to the menu on your WordPress Dashboard, find the custom post type you made (like “Movies” in my case), and click on it. Choose the taxonomy for which you want to create terms. Here, I’m choosing “Language.”
Now, type the term name, enter a slug, add a description, and click the “Add New Language” button.
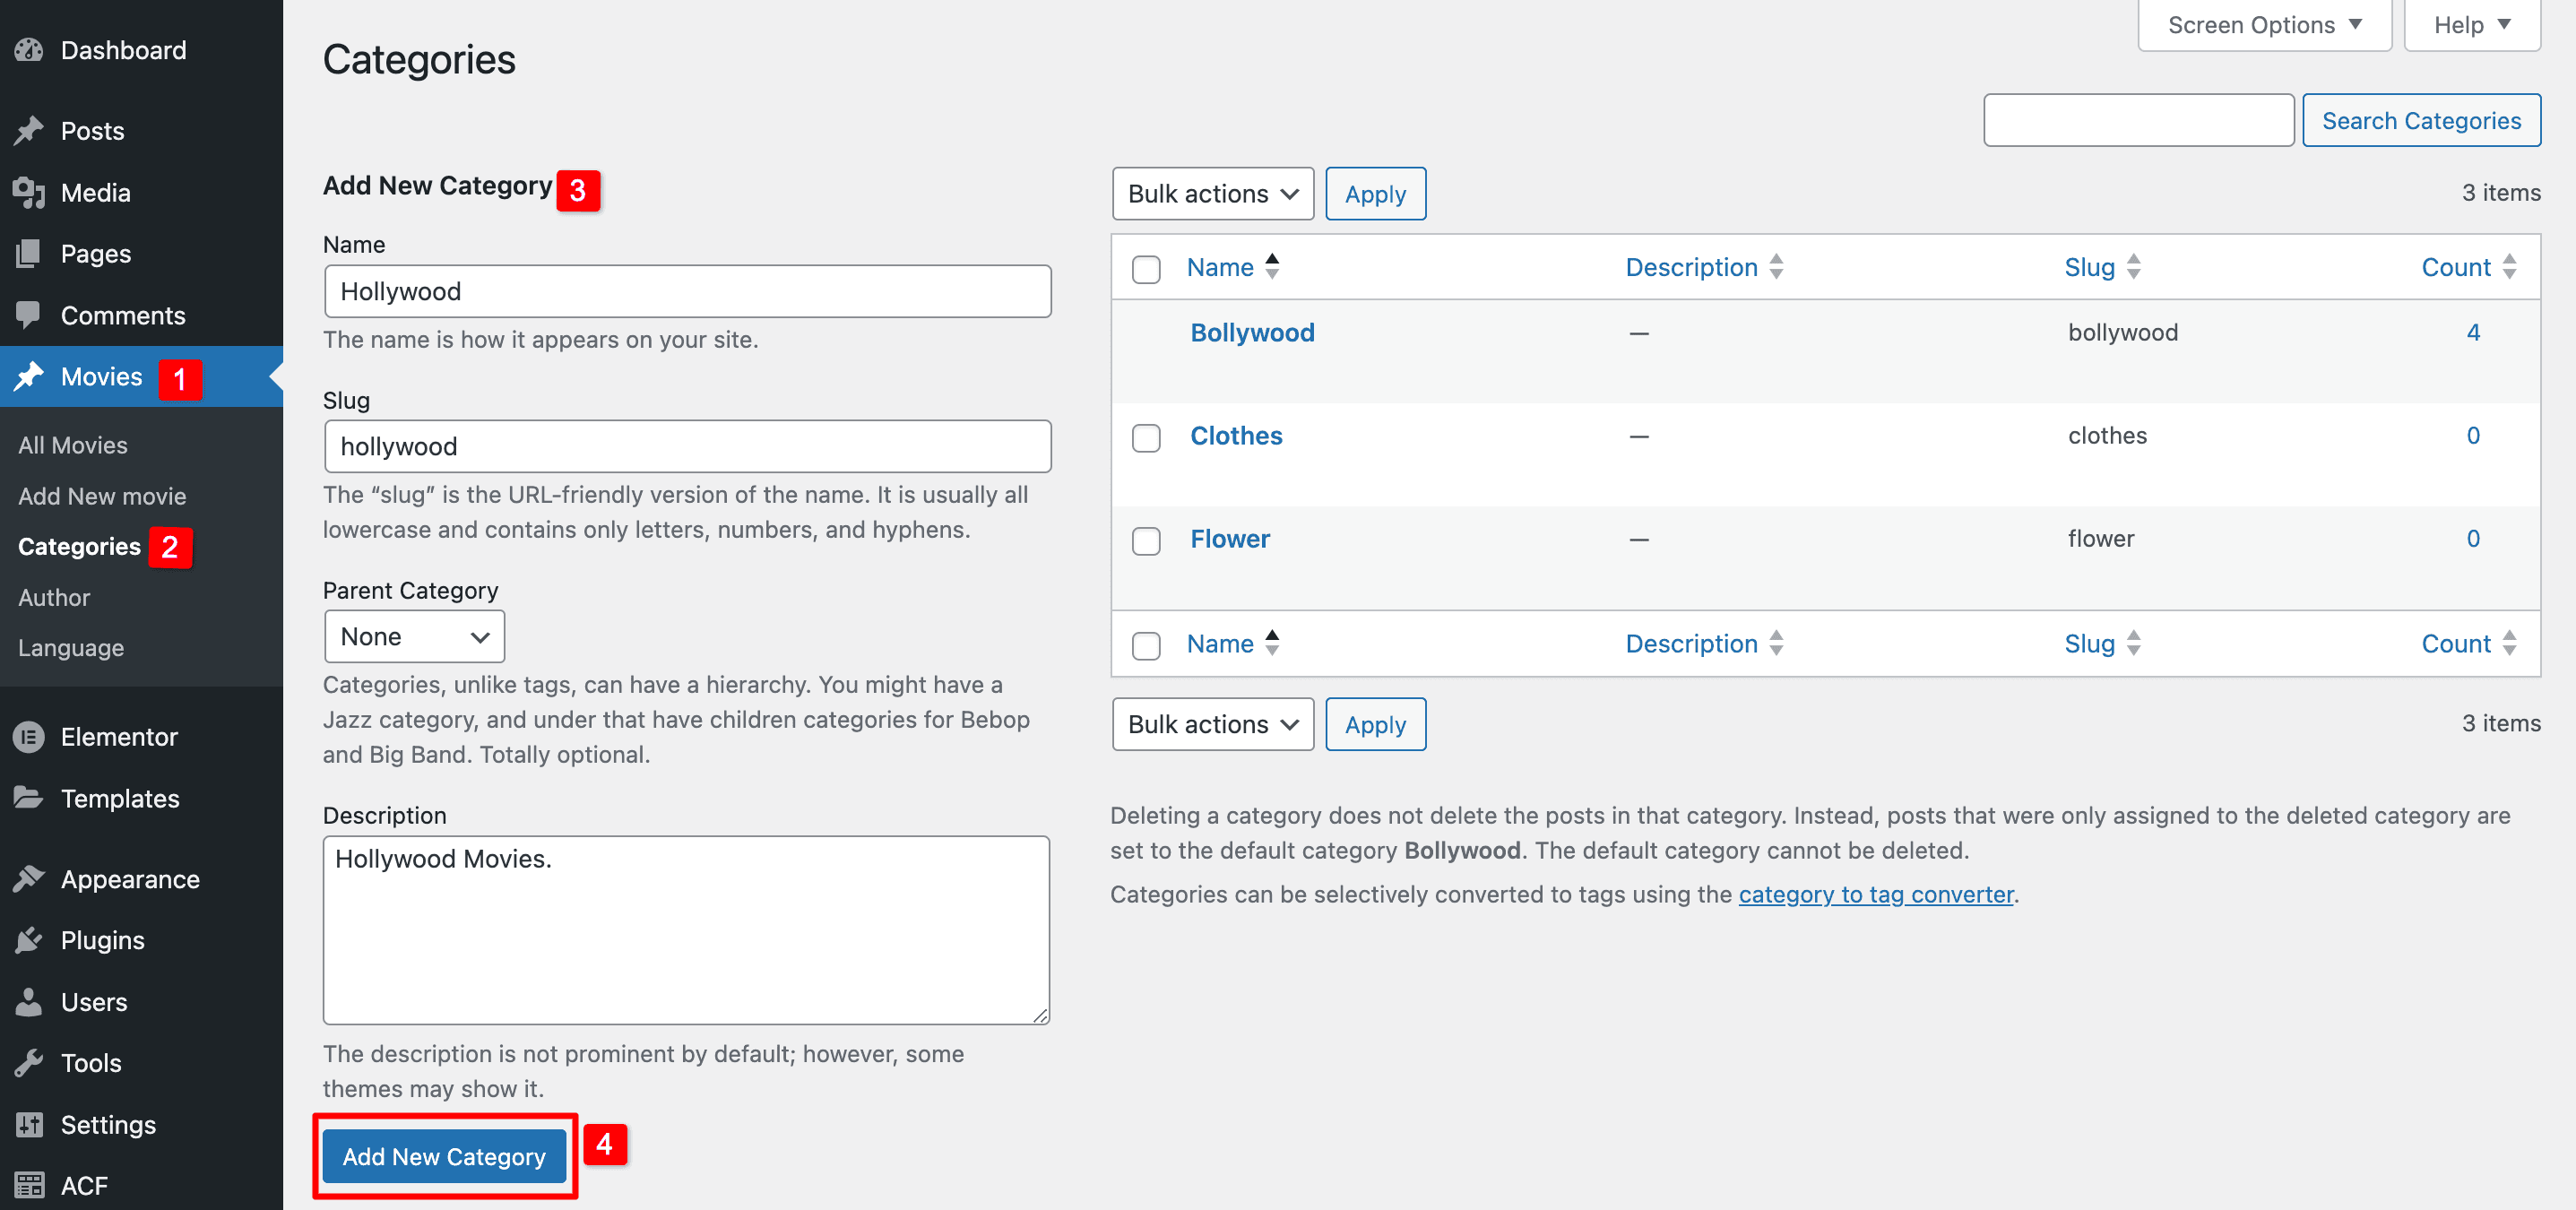
Create Categories for CPT
To set up categories for your custom post types, go to your WordPress Dashboard and find the custom post type you made (e.g., ‘Movies’). Click on it, then choose the category option. These categories are the ones you added when creating the custom post type earlier.
Now, give a name to a category, enter a slug, pick the parent category it belongs to, and write a short description. After that, click on the “Add New Category” button.
Start Using Advanced Custom Fields
In conclusion, creating custom post types, taxonomies, custom fields, and taxonomy terms using the Advanced Custom Fields (ACF) plugin offers a powerful solution for tailoring your WordPress website to specific content needs. With ACF, you can effortlessly define custom fields, associate them with post types, and enhance your content organization and data collection.
FAQs on Advanced Custom Fields
What is Advanced Custom Fields (ACF)?
ACF is a powerful plugin that allows you to create and manage custom fields, custom post types, and taxonomies to enhance the structure and functionality of your WordPress site.
What types of fields can I create using ACF?
ACF supports a wide variety of field types, including text, number, image, repeater, flexible content, WYSIWYG editor, relationship fields, and more.
Can I manage existing custom post types, custom fields, and taxonomies in ACF?
Yes, ACF provides an “Edit” option for post types, custom fields, and taxonomies, allowing you to change configurations without re-registering them manually.
Is ACF free or paid?
ACF has a free version with basic features. The Pro version offers more advanced options like repeaters, flexible content, and more.
Can I use ACF with Elementor or other page builders?
Yes, ACF works well with Elementor and many other page builders. You can display ACF fields directly in dynamic widgets.