Have you ever received customer inquiries asking for product or service quotes? Managing these requests through emails or phone calls can be messy and time-consuming. What if there is an easier way to streamline this process and provide a seamless experience for you and your customers? Adding a Request for Quote (RFQ) form to your website can help you determine which products customers are interested in and what they need.
In this guide, we’ll walk you through the steps to create a seamless and user-friendly quote request experience using Elementor Form. We’ll cover everything from setting a request button to linking it with a popup form. We’ll also discuss how to ensure that when a customer fills out the quote form, it captures which product they request a quote for. This way, you’ll have all the details to handle inquiries efficiently. Let’s start making your quote request process more efficient and engaging!
Table of Contents
Benefits of Adding Quote Request Form to Website
Here are the benefits of adding a quote request form to your website:
- Convenience for Customers: A quote request form makes it easier for customers to get in touch with you about their needs. Instead of handling multiple emails or phone calls, they can fill out a form with all the details in one place.
- Enhanced User Experience: A well-designed form on your website provides a smooth and professional experience for customers. It shows that you’re attentive to their needs and makes it convenient for them to reach out.
- 24/7 Availability: Unlike a phone call or email, a quote request form is available to customers 24/7. It means that you can capture leads even when you’re not working.
- Valuable Customer Information: The information you collect through quote request forms can be a valuable source of customer data. You can use this data to learn more about your target audience and improve your marketing efforts.
- Opportunity for Feedback: Including a section for customers to provide feedback during the quote request process allows you to gather valuable insights and suggestions, helping you improve your services and address any potential issues early on.
If you want to get feedback from users about their shopping experience, you can use our Order Feedback for WooCommerce plugin. For more details on how to set it up, check out the guide here.
Steps to Add Quote Request Form Using Elementor
This section will discuss the steps to add the quote request form using Elementor. We will cover all the steps that will help you add the quote form.
Add Request Quote Button Using PHP Code
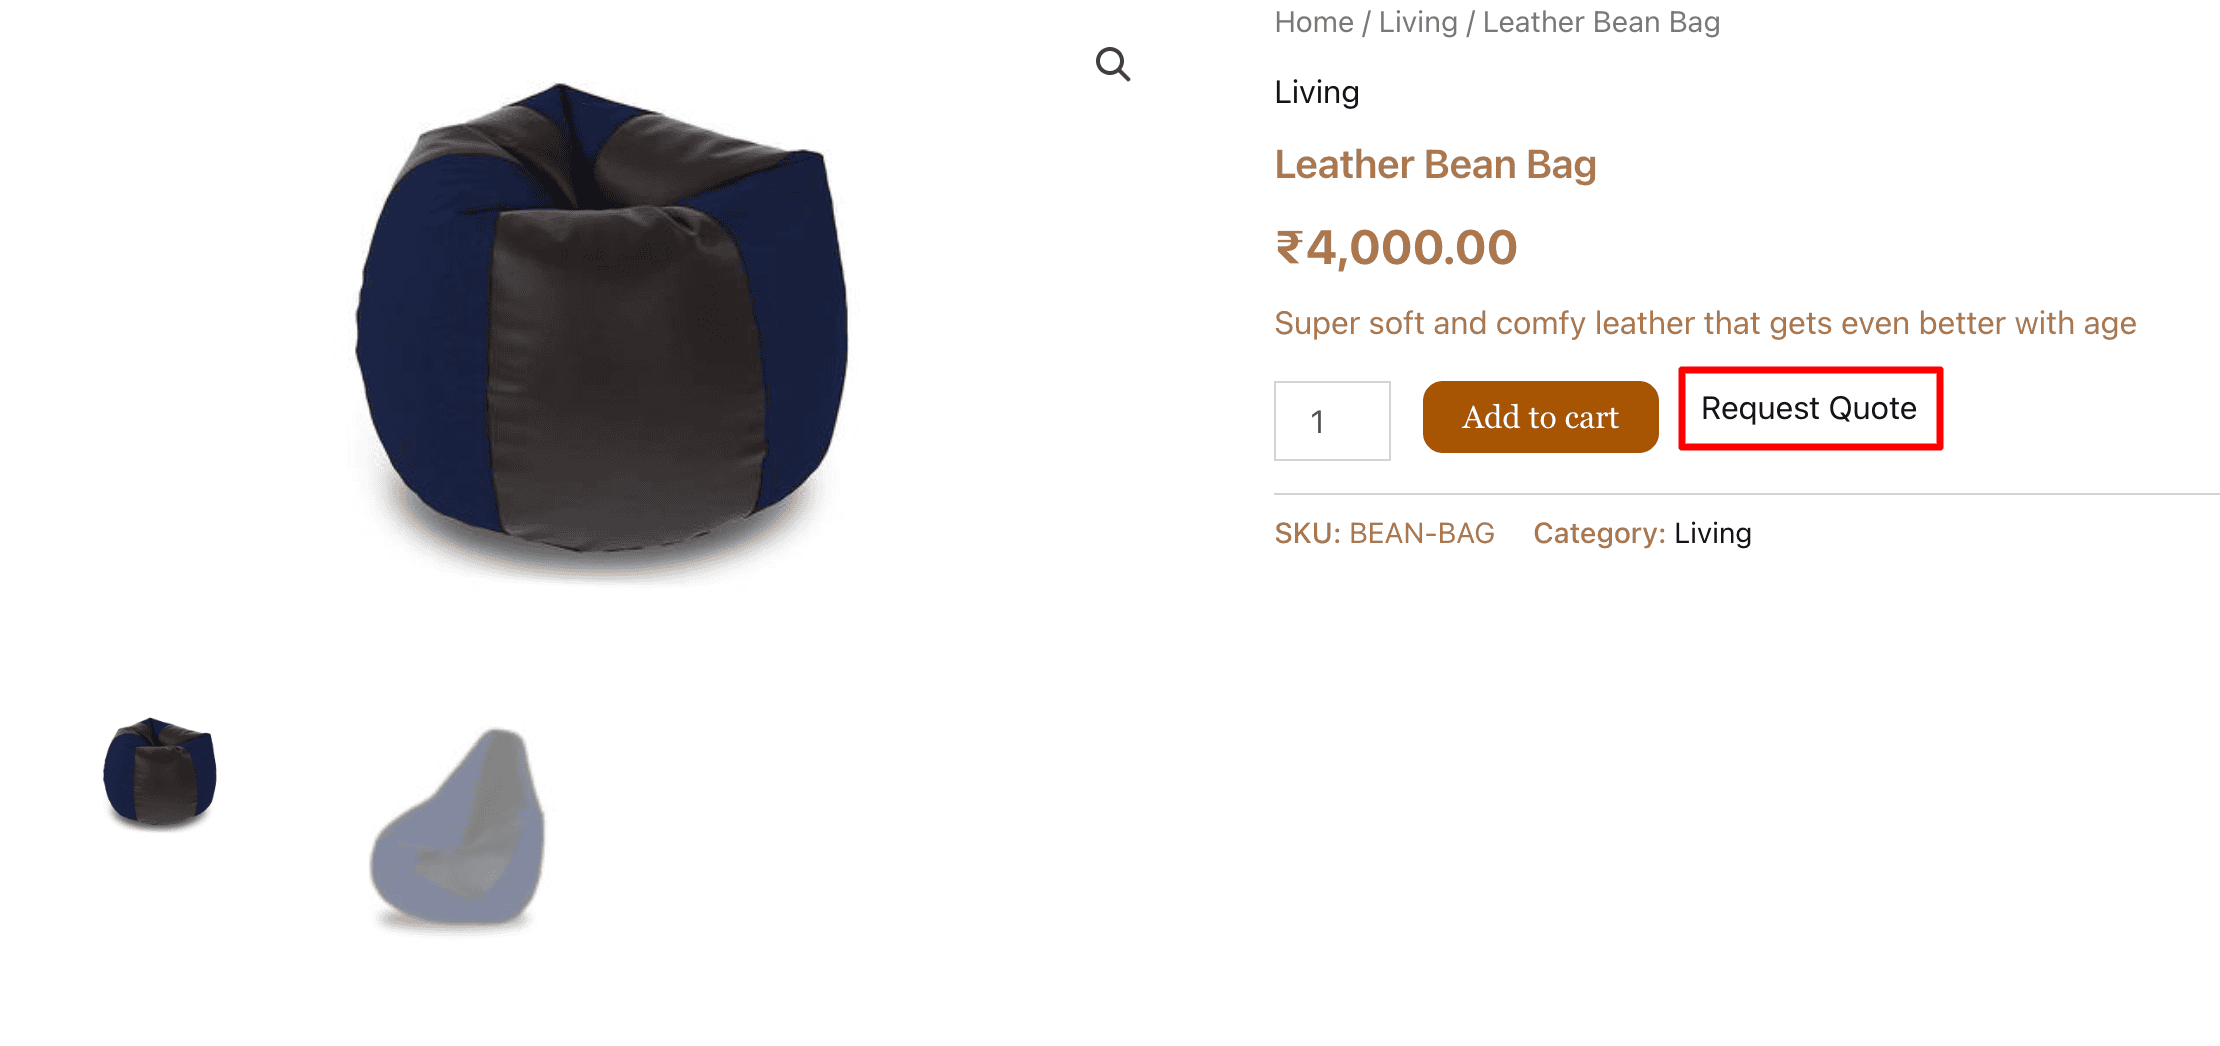
To start, you need to add a request quote button to your website. We’ll be adding it on the single product page next to the add-to-cart button in the WooCommerce store. To do this, open the functions.php file of your child theme, which you can find at /wp-content/themes/your-child-theme/. Then, paste the code below into that file.
// add a button after woocommerce single product add to cart button
add_action('woocommerce_after_add_to_cart_button', 'add_button_after_add_to_cart_button');
function add_button_after_add_to_cart_button() {

    echo '<a class="request-quote add-to-quote" href="#">Request Quote</a>';

}
After you add the code, a new button labeled “Request Quote” will appear on the single product page.
Create an Elementor Popup Template
After adding the button, the next step is to create a popup in Elementor. This popup will open when we click the “Request Quote” button we have just added. First, we’ll create the popup and then link the request quote button to it.
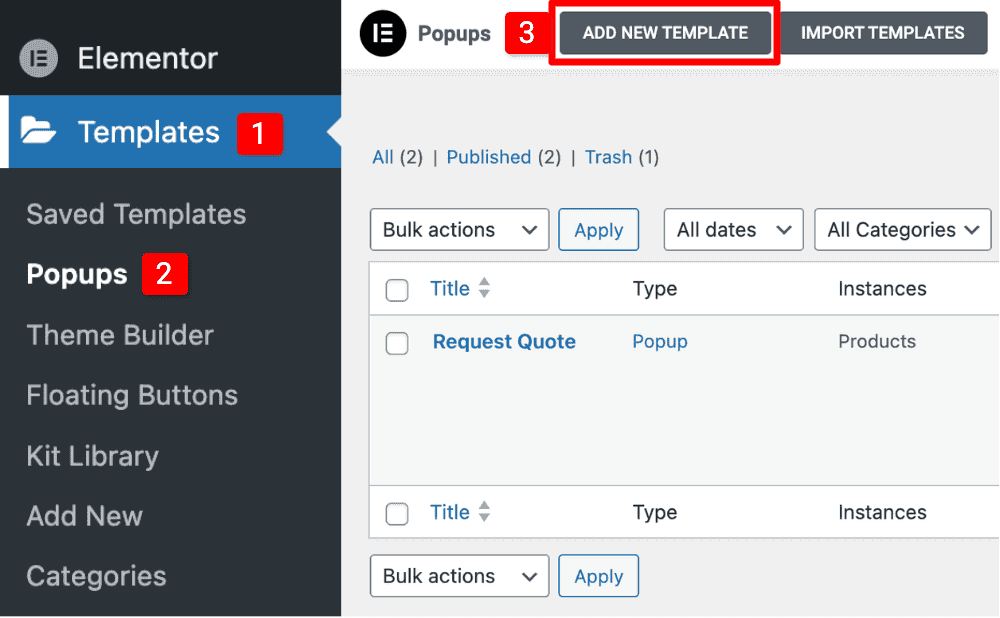
- To create the popup, go to WordPress Dashboard ➝ Elementor Templates ➝ Popups ➝ Add New Template.
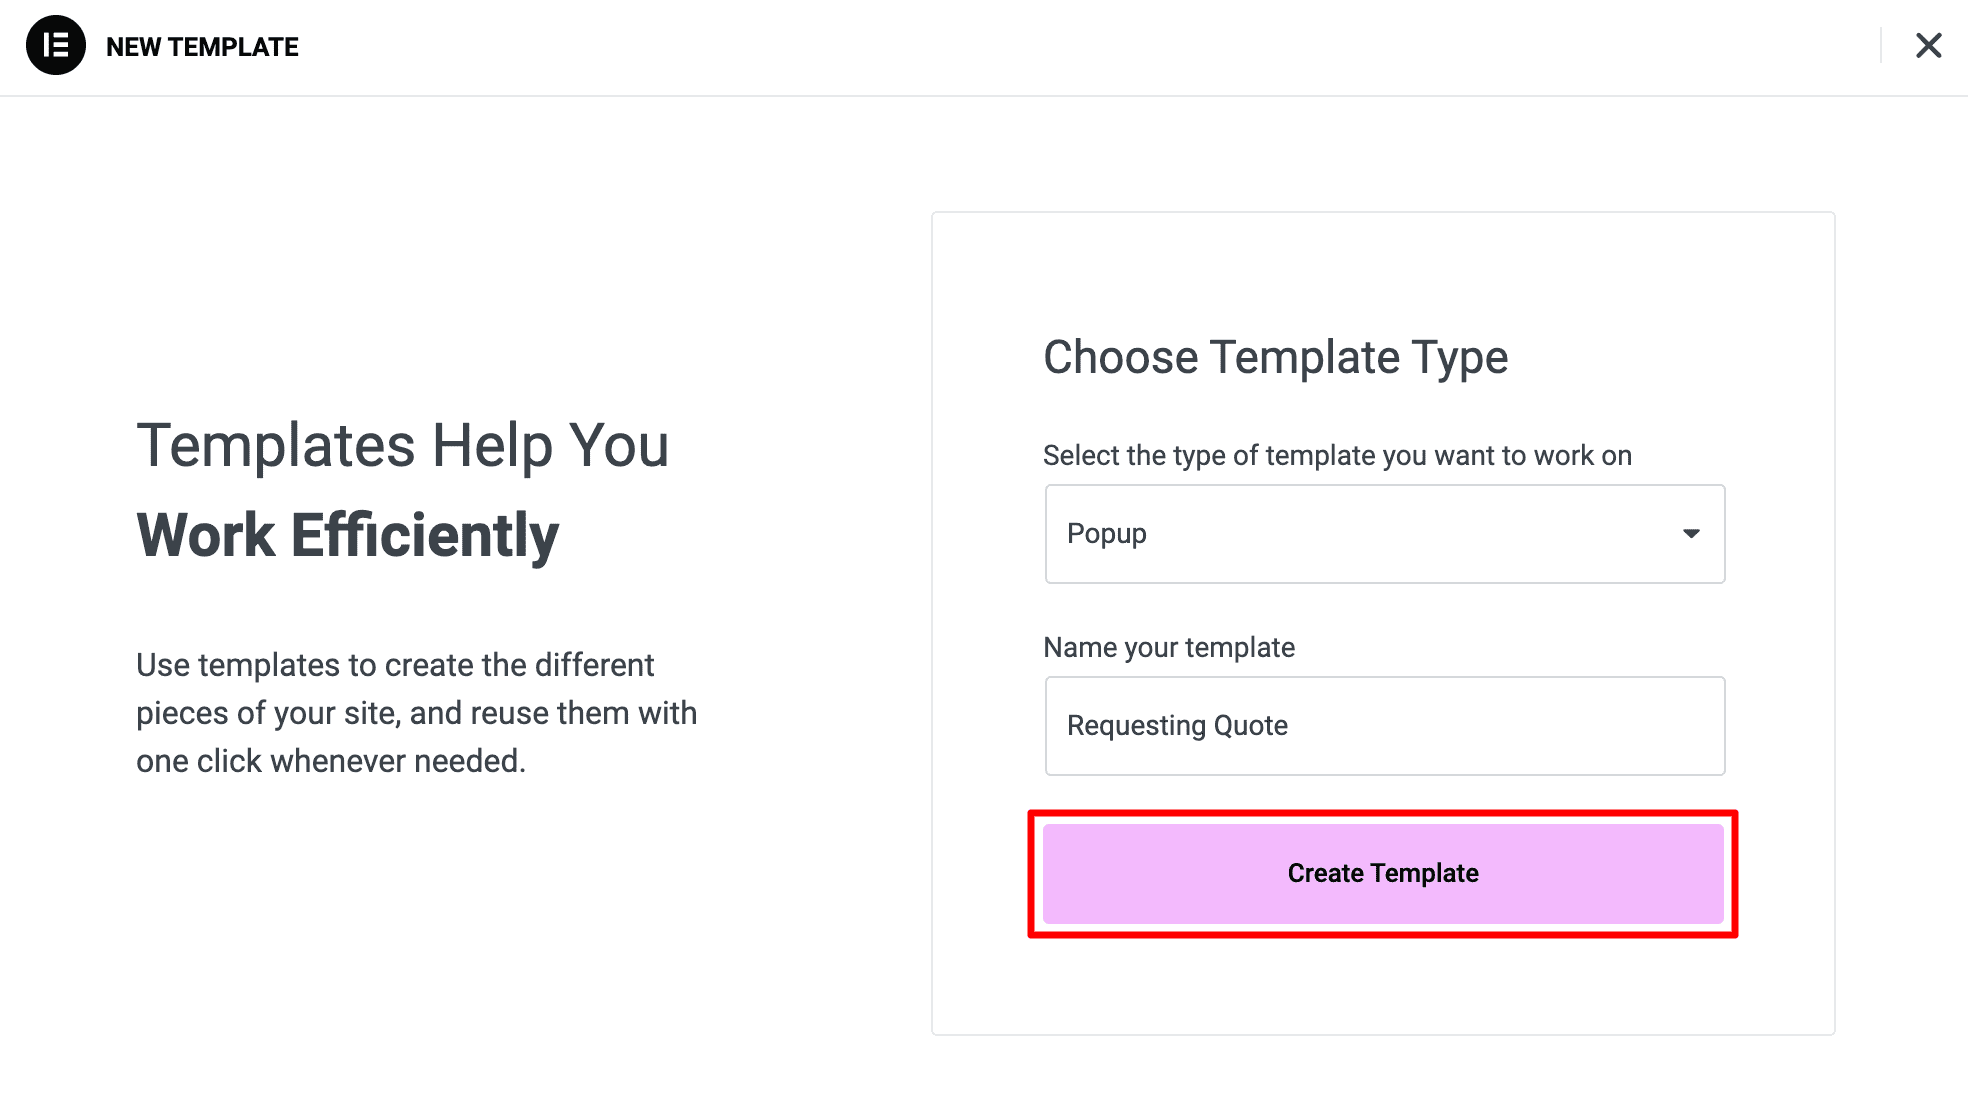
- Name your popup template and click “Create Template.”
Adding & Configuring Elementor Form in Popup
- After that, the popup will automatically open in Elementor. You need to add an Elementor Form to the popup by navigating to the widgets section.
- Design the form for requesting a quote, including fields for customer details like name, email, Mobile number, and message.
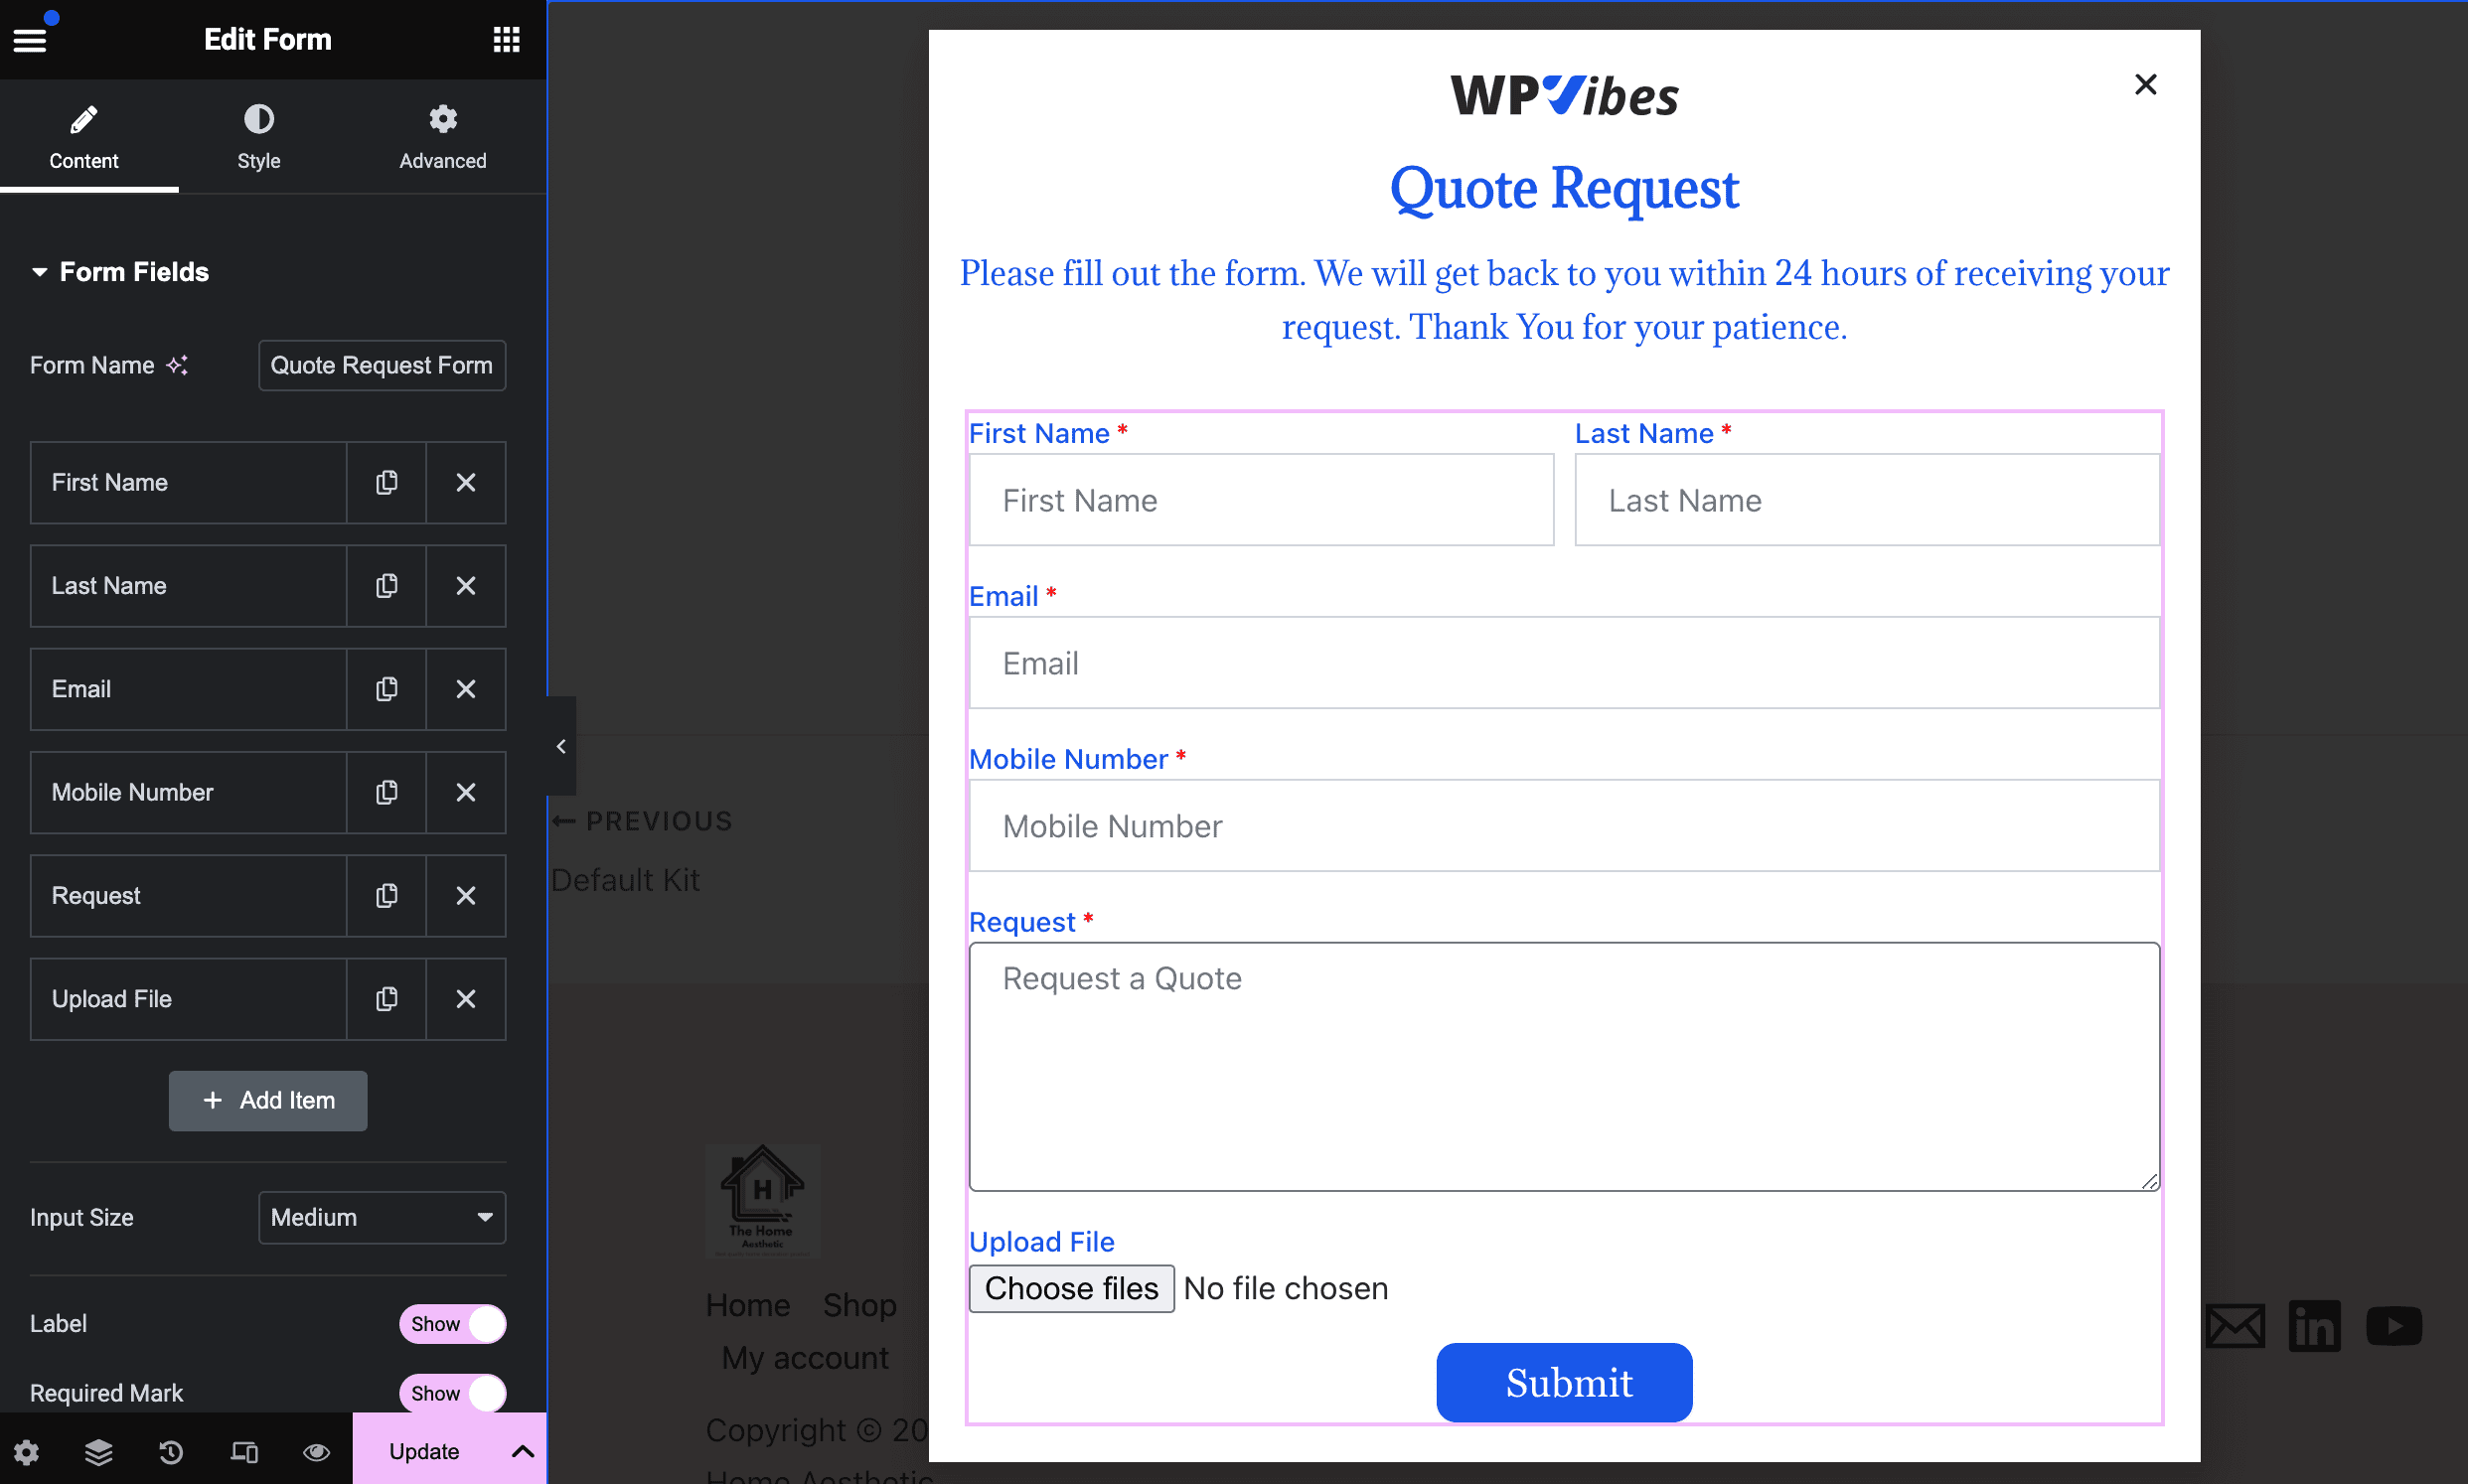
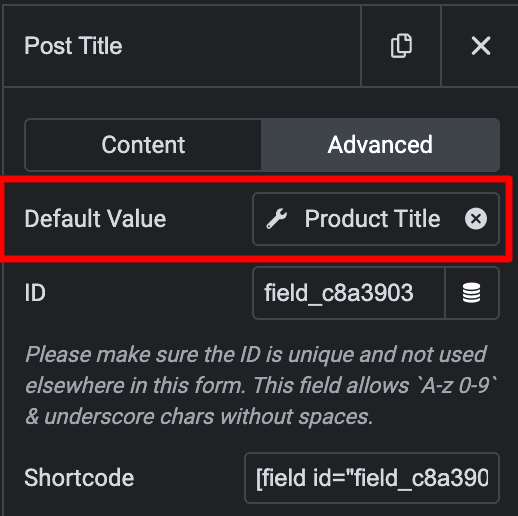
- Make sure to include a hidden field in the form that will capture information about the product for which the customer is requesting a quote.
- In the Advanced section of the hidden field, choose the dynamic value you want to capture, such as SKU, price, or product title. This field will be sent with the form but will not be visible to users. It helps you determine which product the customer is inquiring about.
- Next, in the “Action After Submit” settings, choose what should happen when a customer submits the form. Select “Email” for this action.
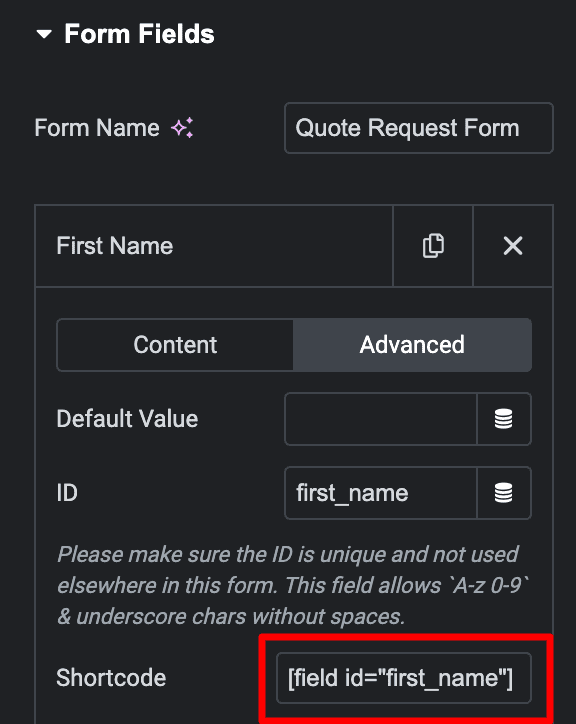
- Now, we will configure the Email settings. By default, the email will include all the field information from the form. But, if you only want to include specific details or fields, you can use shortcodes for those fields. You can find these shortcodes in the advanced section of each form field.
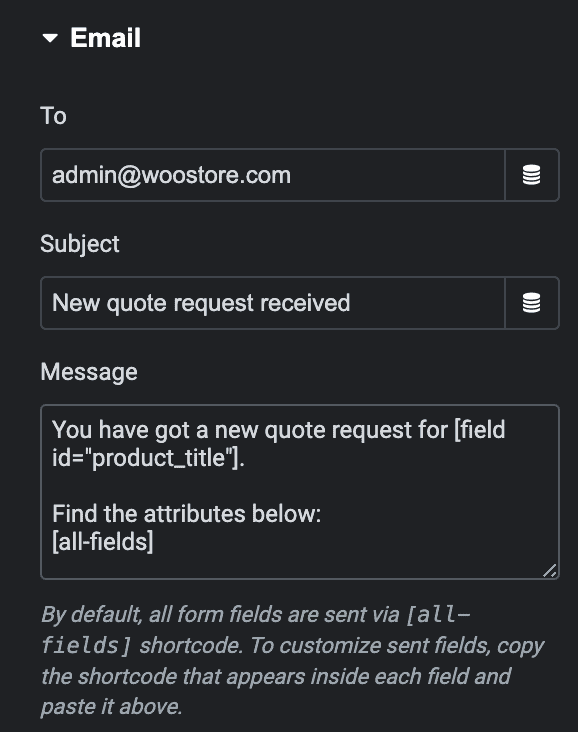
- Once you’ve added the shortcode, the message box will look like this.
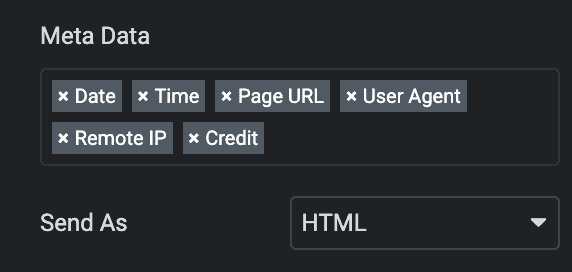
- Next, under metadata, make sure to select the Page URL. Including this in the email content makes it easy to quickly check the product for which the request was received.
Integrate Elementor Popup with Request Button
We’ve already covered adding the request button and creating a popup with a form in Elementor. Now, let’s integrate the popup with the request button so that clicking the button opens the popup.
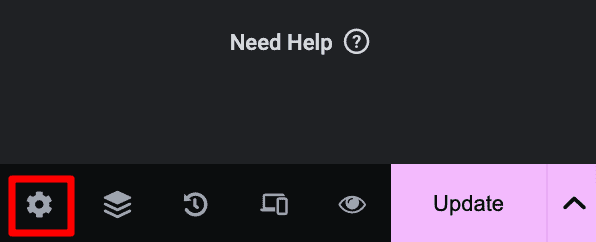
First, open the popup in Elementor. Look for the settings button in the editor bar and click on it. It will open the popup settings.
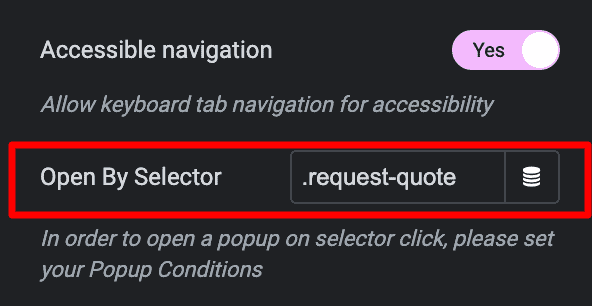
In the popup settings, go to the Advanced section and find the label “Open by Selector.” Here, you need to enter the class name that connects the button with the popup. Remember, the code we added to the request button already includes this class name, such as `.request-quote`.
After adding the class name in the “Open by Selector” field, make sure to click on Publish button.
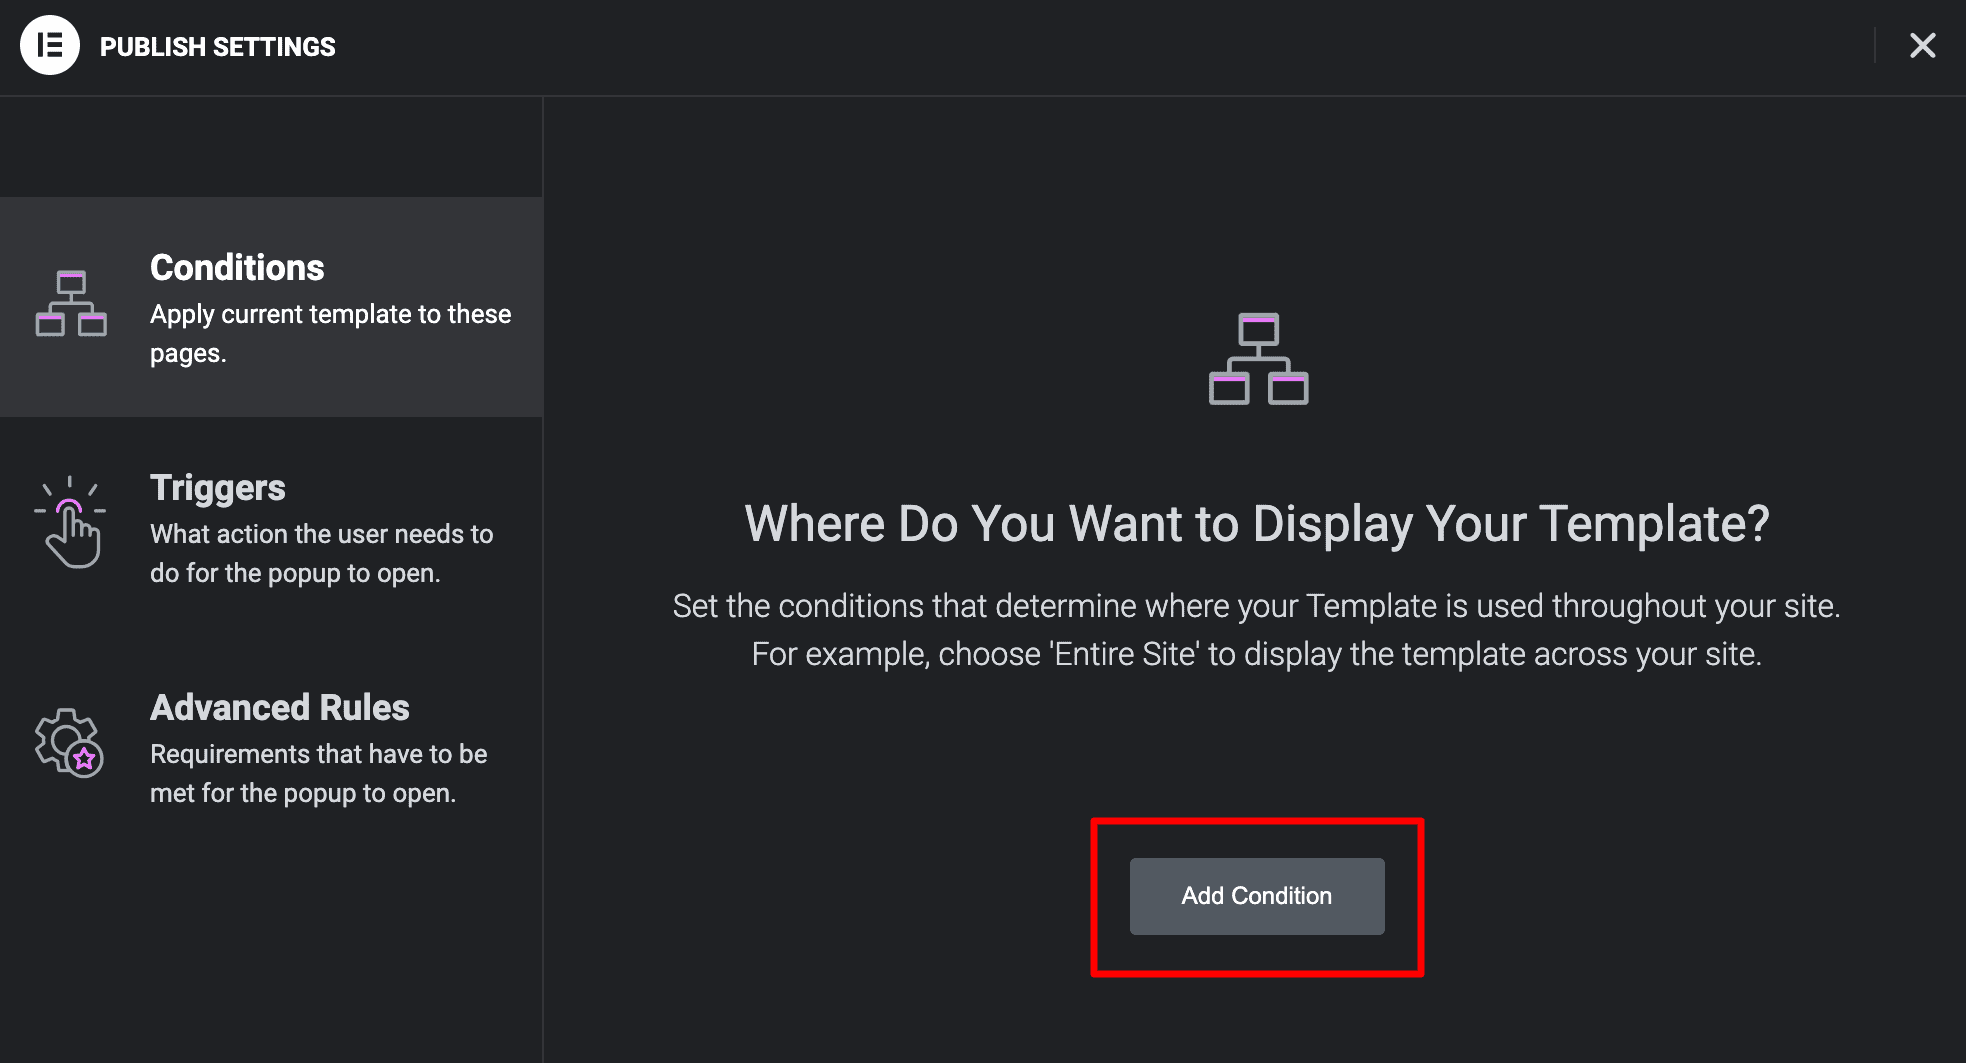
When you click the publish button, you’ll be asked to set up the popup display conditions. This means deciding where you want the popup to appear. Click on the “Add Condition” button to do this.
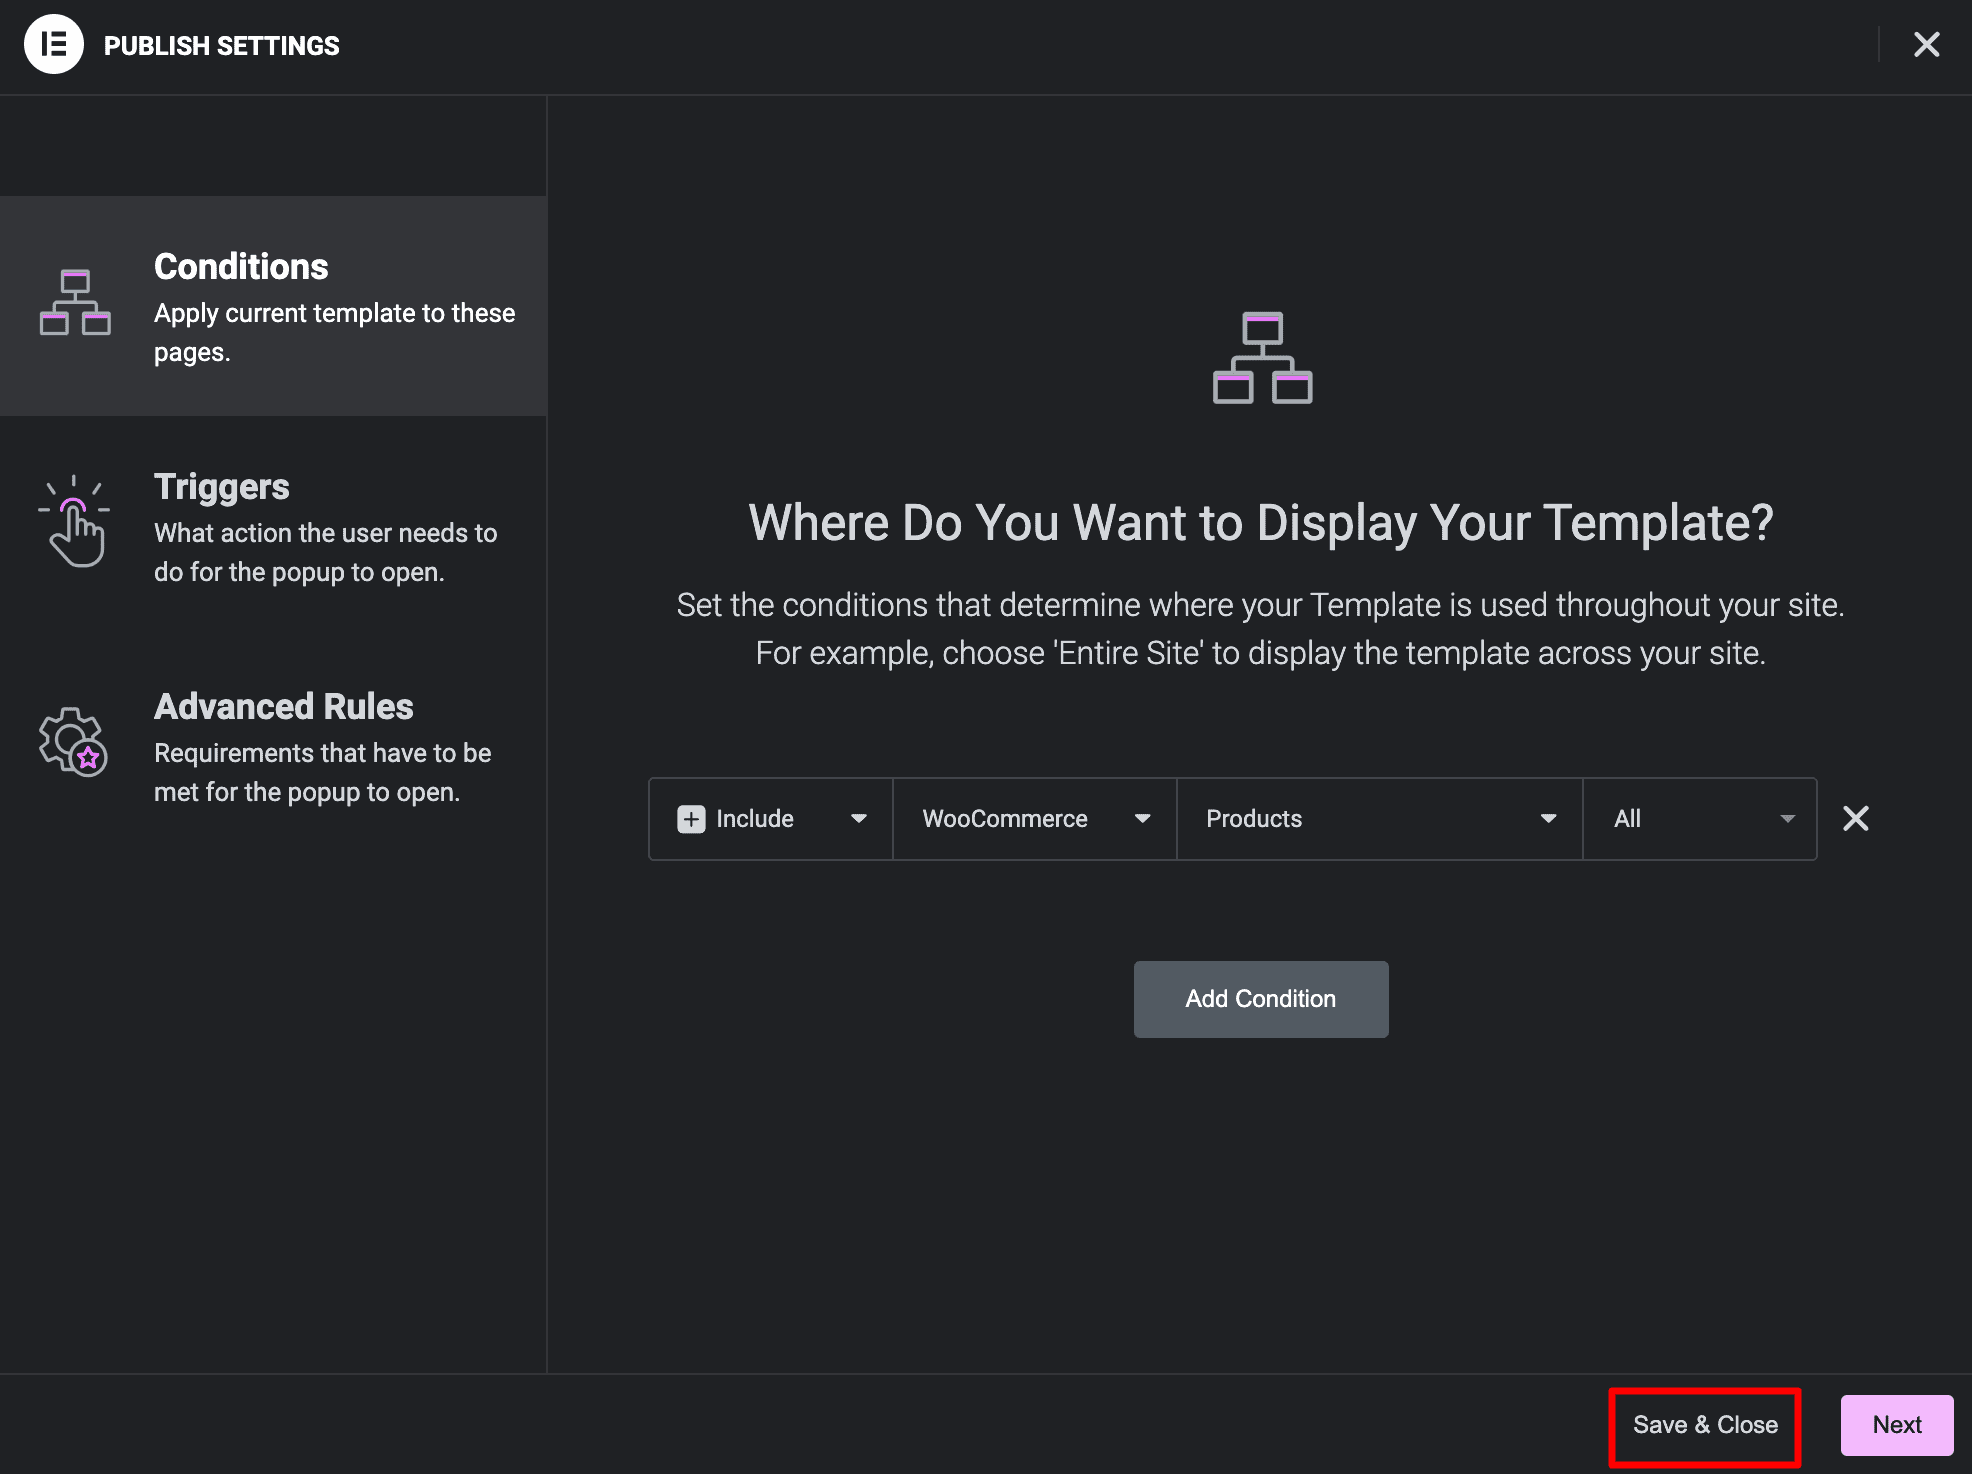
After clicking the “Add Condition” button, apply the settings shown in the screenshot below and click on the Save & Close button.
Testing the Functionality of the Request Quote Form
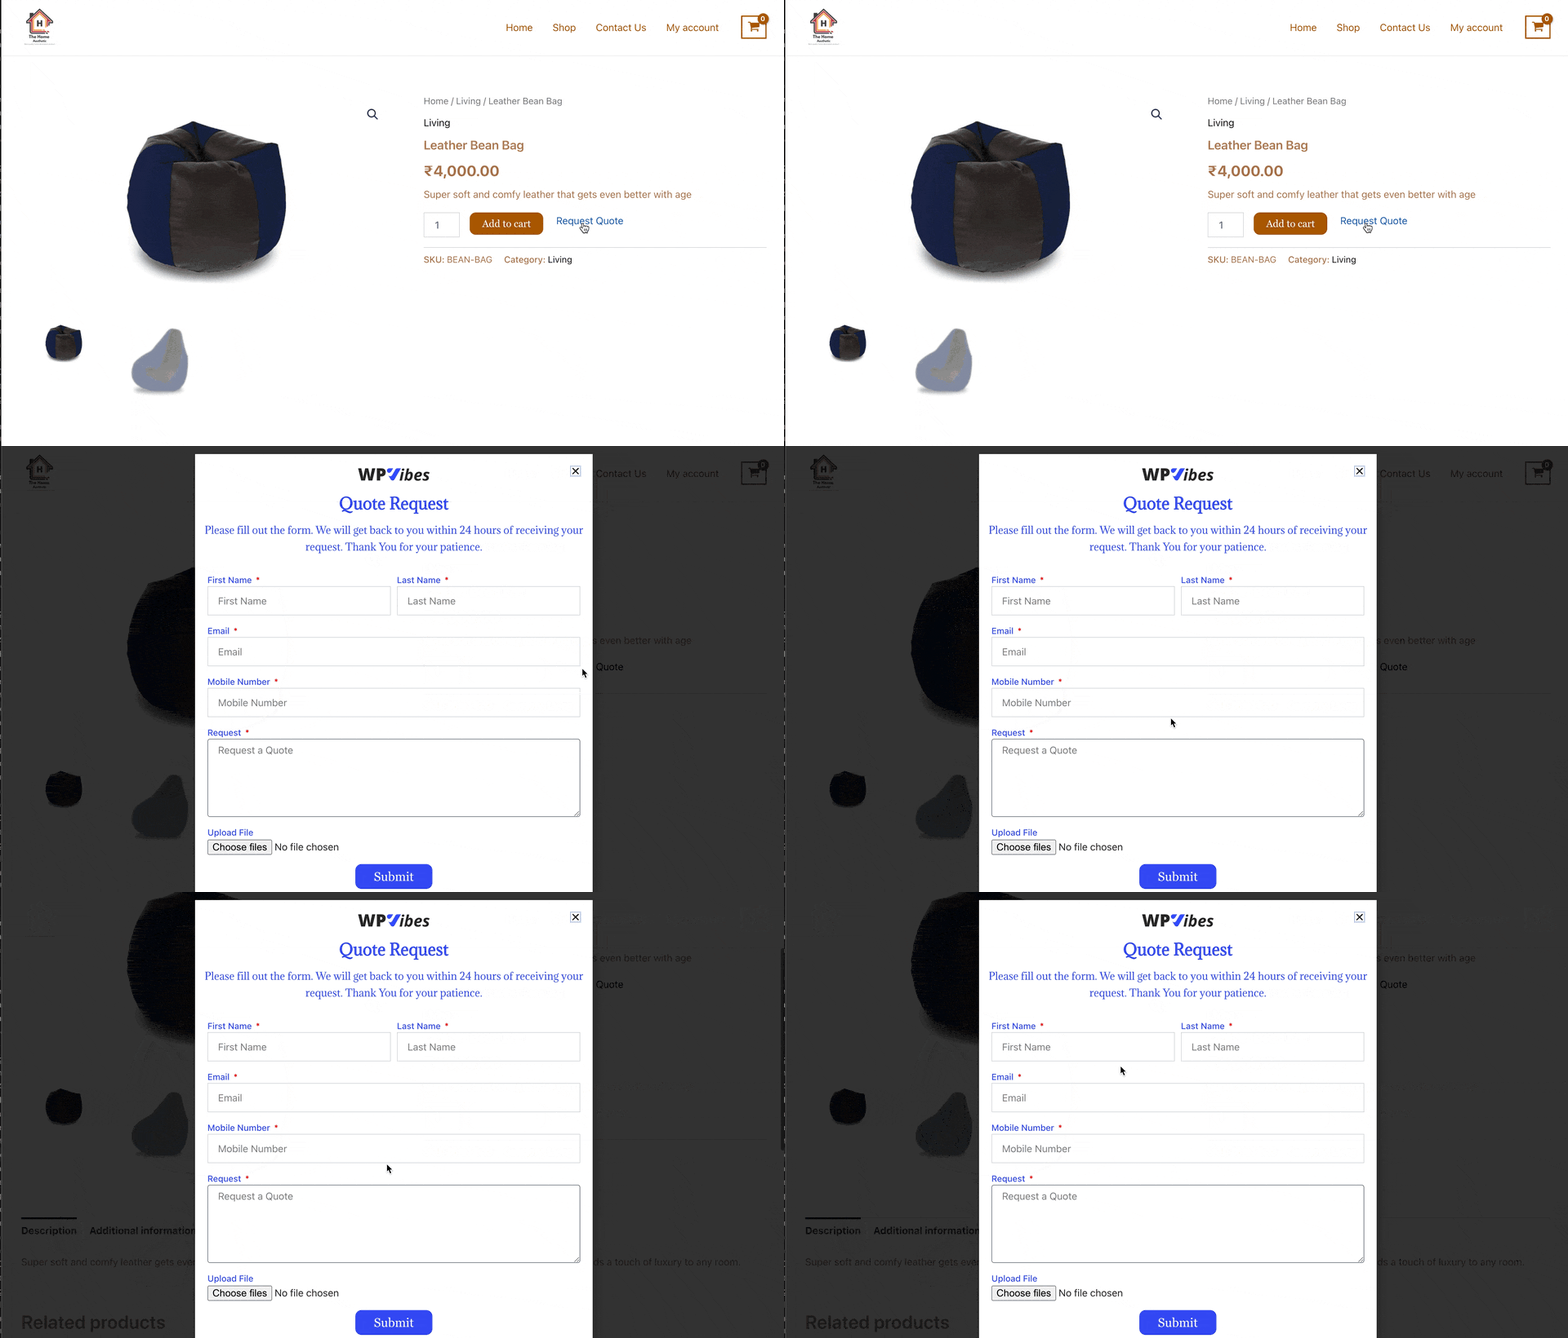
After adding the quote request form to your website using Elementor, you can capture customer information efficiently. When a user clicks the “Request Quote” button, a popup with the quote form inside will appear. This makes it simple for customers to complete and submit their requests directly from your site.
You can use our WP Mail Log plugin to ensure you receive and track these quote requests. It helps you to log all emails sent from your site, including quote requests. This plugin allows you to check if your emails are sent correctly and manage your communications effectively.
Create Your Quote Form Easily
Incorporating a Request for Quote (RFQ) form into your WooCommerce website can significantly streamline how you handle customer inquiries and improve their overall experience. By following the steps outlined in this guide, you’ve learned how to add a seamless quote request button to your product pages, create a dynamic popup form using Elementor, and integrate it effectively with your site.
With the quote request form in place, you’ll capture valuable customer information efficiently and provide a more organized and professional way for customers to inquire about products or services. Collecting feedback and tracking email communications further enhances your ability to respond promptly and effectively to customer needs.


