Many businesses want to show their operating hours clearly on their website, but it can be tricky to make them look good. Displaying your hours helps customers know when you’re open, leading to better satisfaction and fewer missed opportunities.
The good news is that adding your business hours information to your site is quick and easy with Elementor Addon Elements. In this guide, we’ll show you how to do it step-by-step so your customers can quickly see your operating hours without any hassle. Let’s get started!
Table of Contents
What is Business Hours in Elementor
Business hours refer to the display of your company’s operating hours on your website. It’s a convenient way for your customers to quickly find out when you’re open without searching multiple pages.
Using Elementor, you can effortlessly showcase your opening and closing hours in one clear way. This simple addition not only makes it easier for visitors to access the information they need but also improves the overall user experience on your site.
Benefits of Displaying Business Hours on Elementor Website
Adding a business hours to your website can bring several key advantages. It’s a simple yet powerful addition that can improve your website’s functionality and customer experience. Here are the main benefits:
- Time-Saving for Customers: Customers don’t need to search multiple pages to find your operating hours. Having this information readily available saves them time and streamlines their experience, which can result in higher satisfaction.
- Build Trust: A well-structured business hours info shows customers you value transparency and professionalism. This small detail can make a big difference in establishing trust and credibility with your audience.
- Improve Customer Convenience: By displaying your business hours on your website, you make it easier for customers to know when they can visit or contact your business. It saves time and effort, allowing them to plan their visit or interaction according to your availability.
- Eliminates Confusion: When your business hours are readily available, customers won’t have to guess whether you’re open. This clarity prevents misunderstandings, even if your business is temporarily closed or operates on irregular schedules.
Step-by-Step Guide to Showcasing Business Hours with Elementor
Creating a clear and attractive business hours is essential for providing a seamless user experience. With Elementor, this process becomes simple and efficient. Follow the steps below to showcase your operating hours and keep your visitors informed.
Before you start, ensure the following plugins are installed on your WordPress website:
Step 1: Start creating a page on your website & edit it with Elementor.
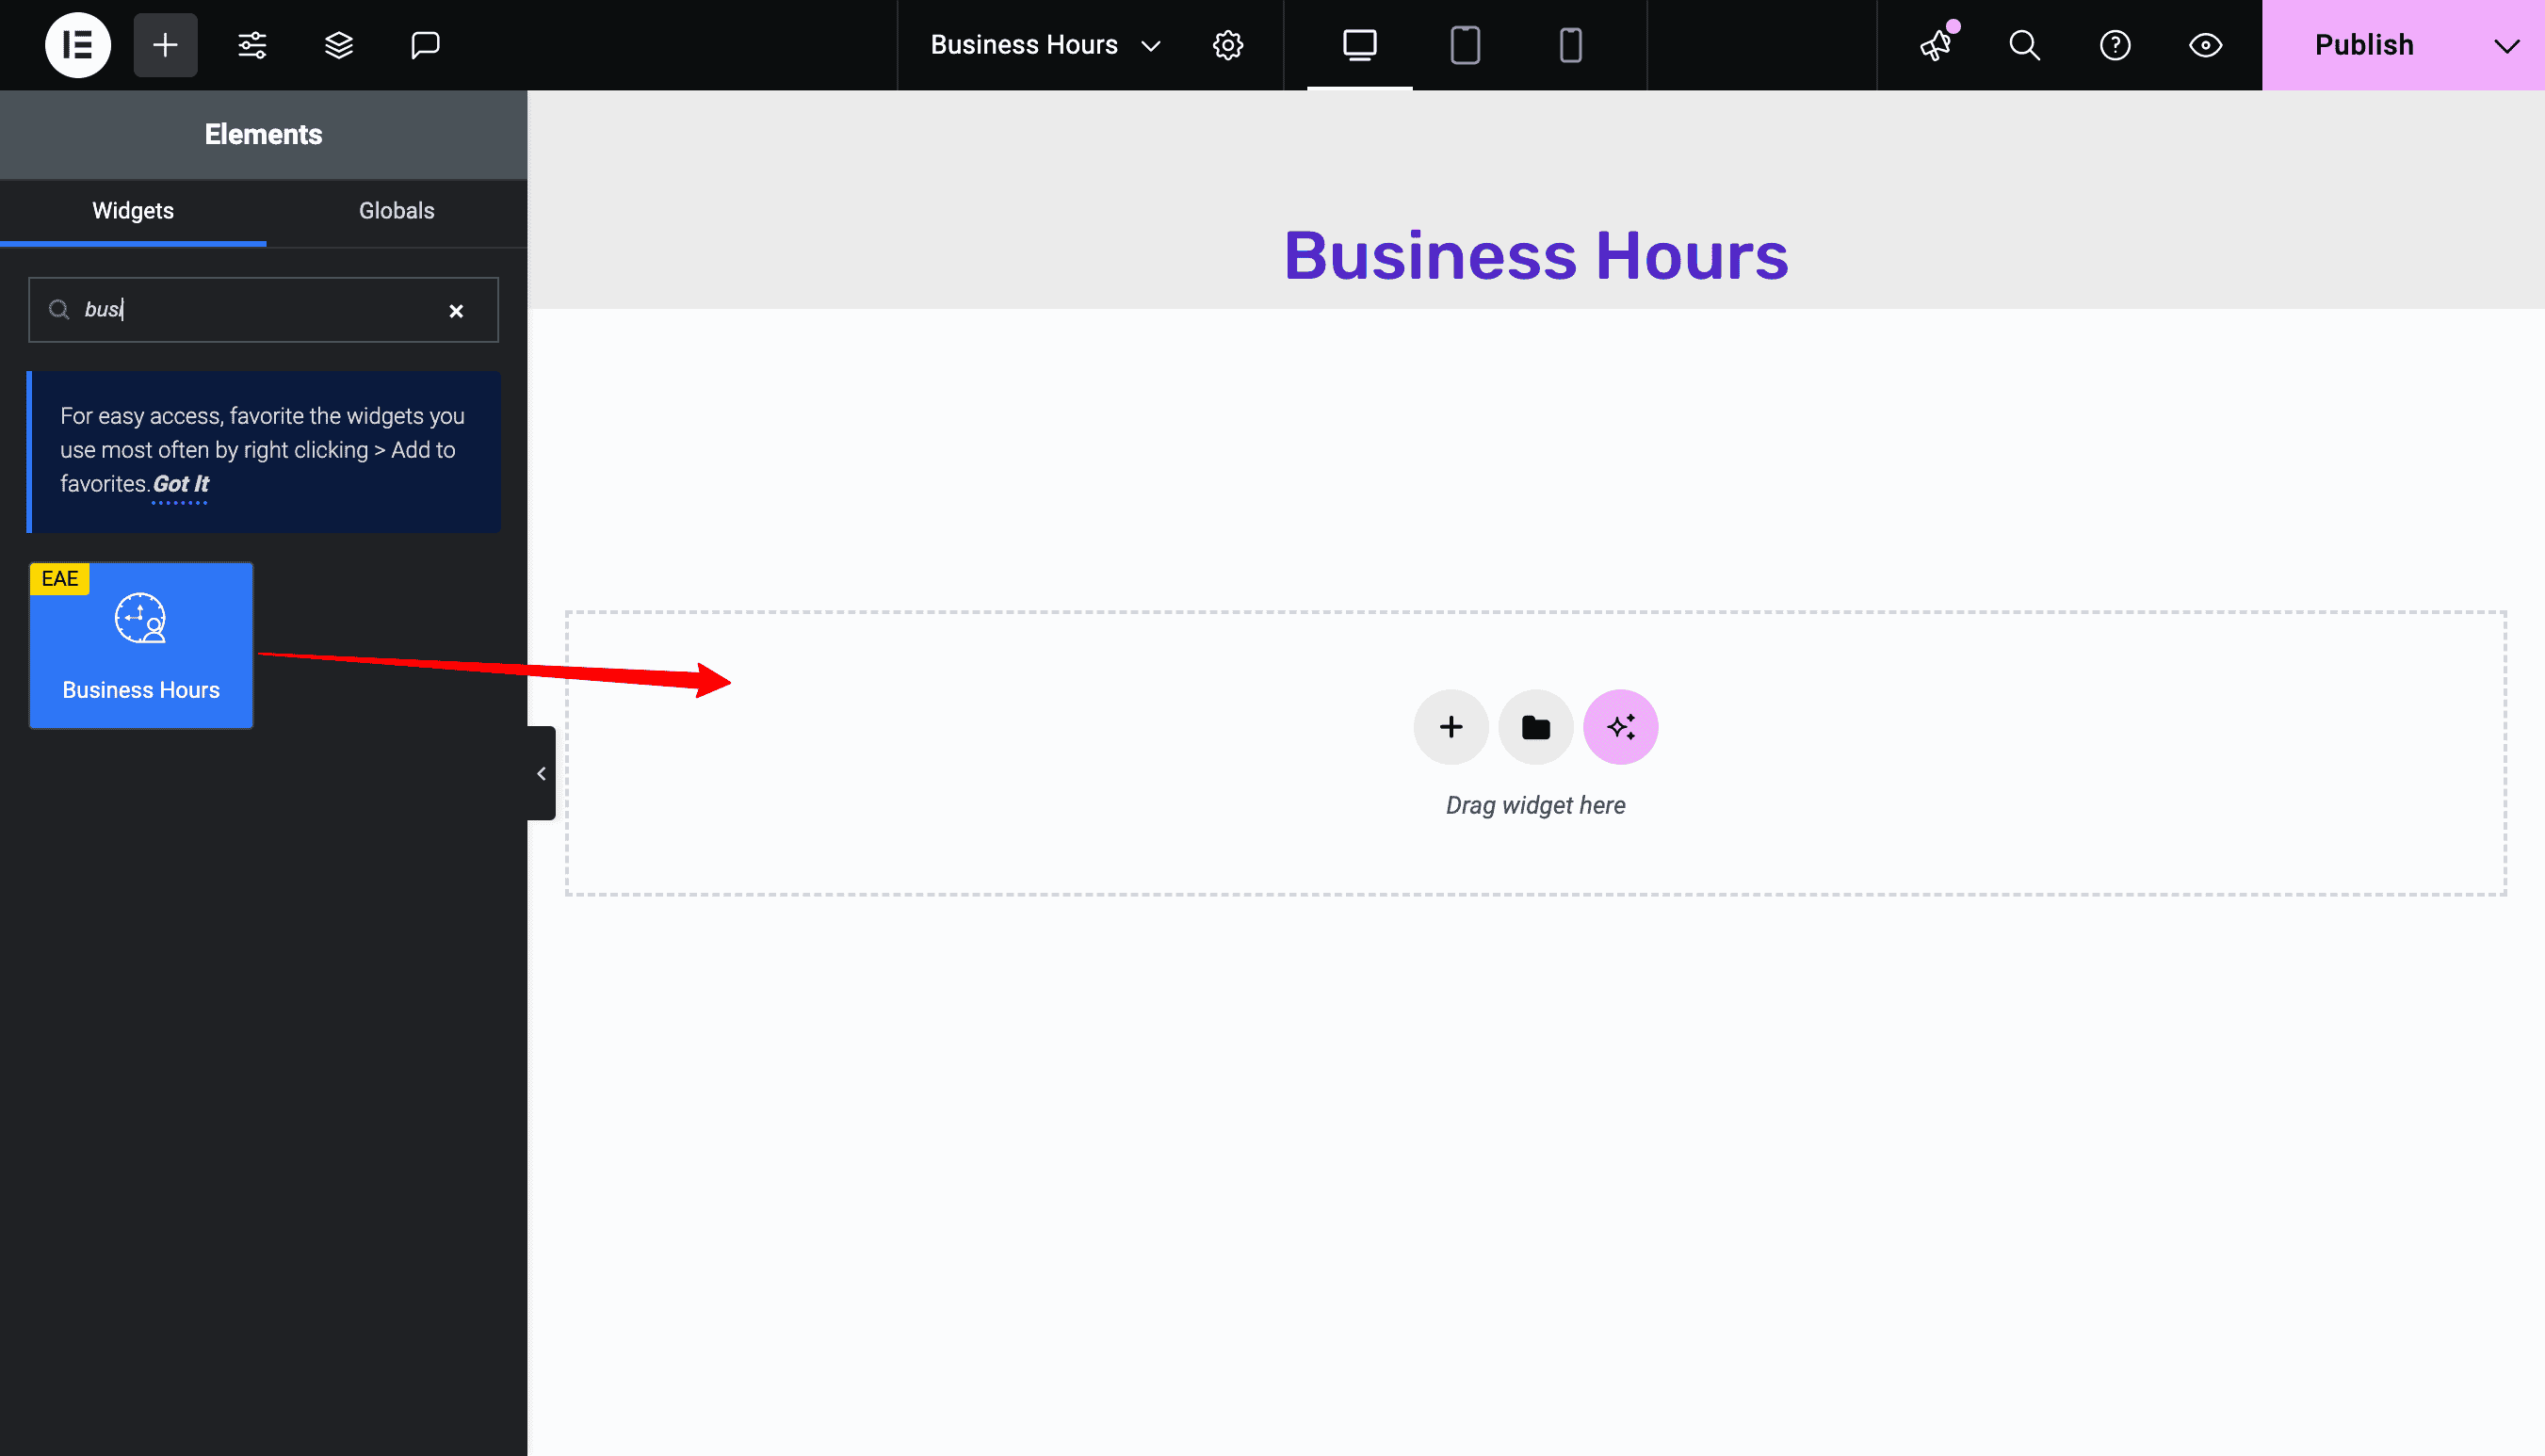
Step 2: After editing the page, search for the Business Hours widget in search bar. Make sure to have an “EAE” badge with the widget that you use.
Choose the Perfect Layout for Displaying Your Business Hours
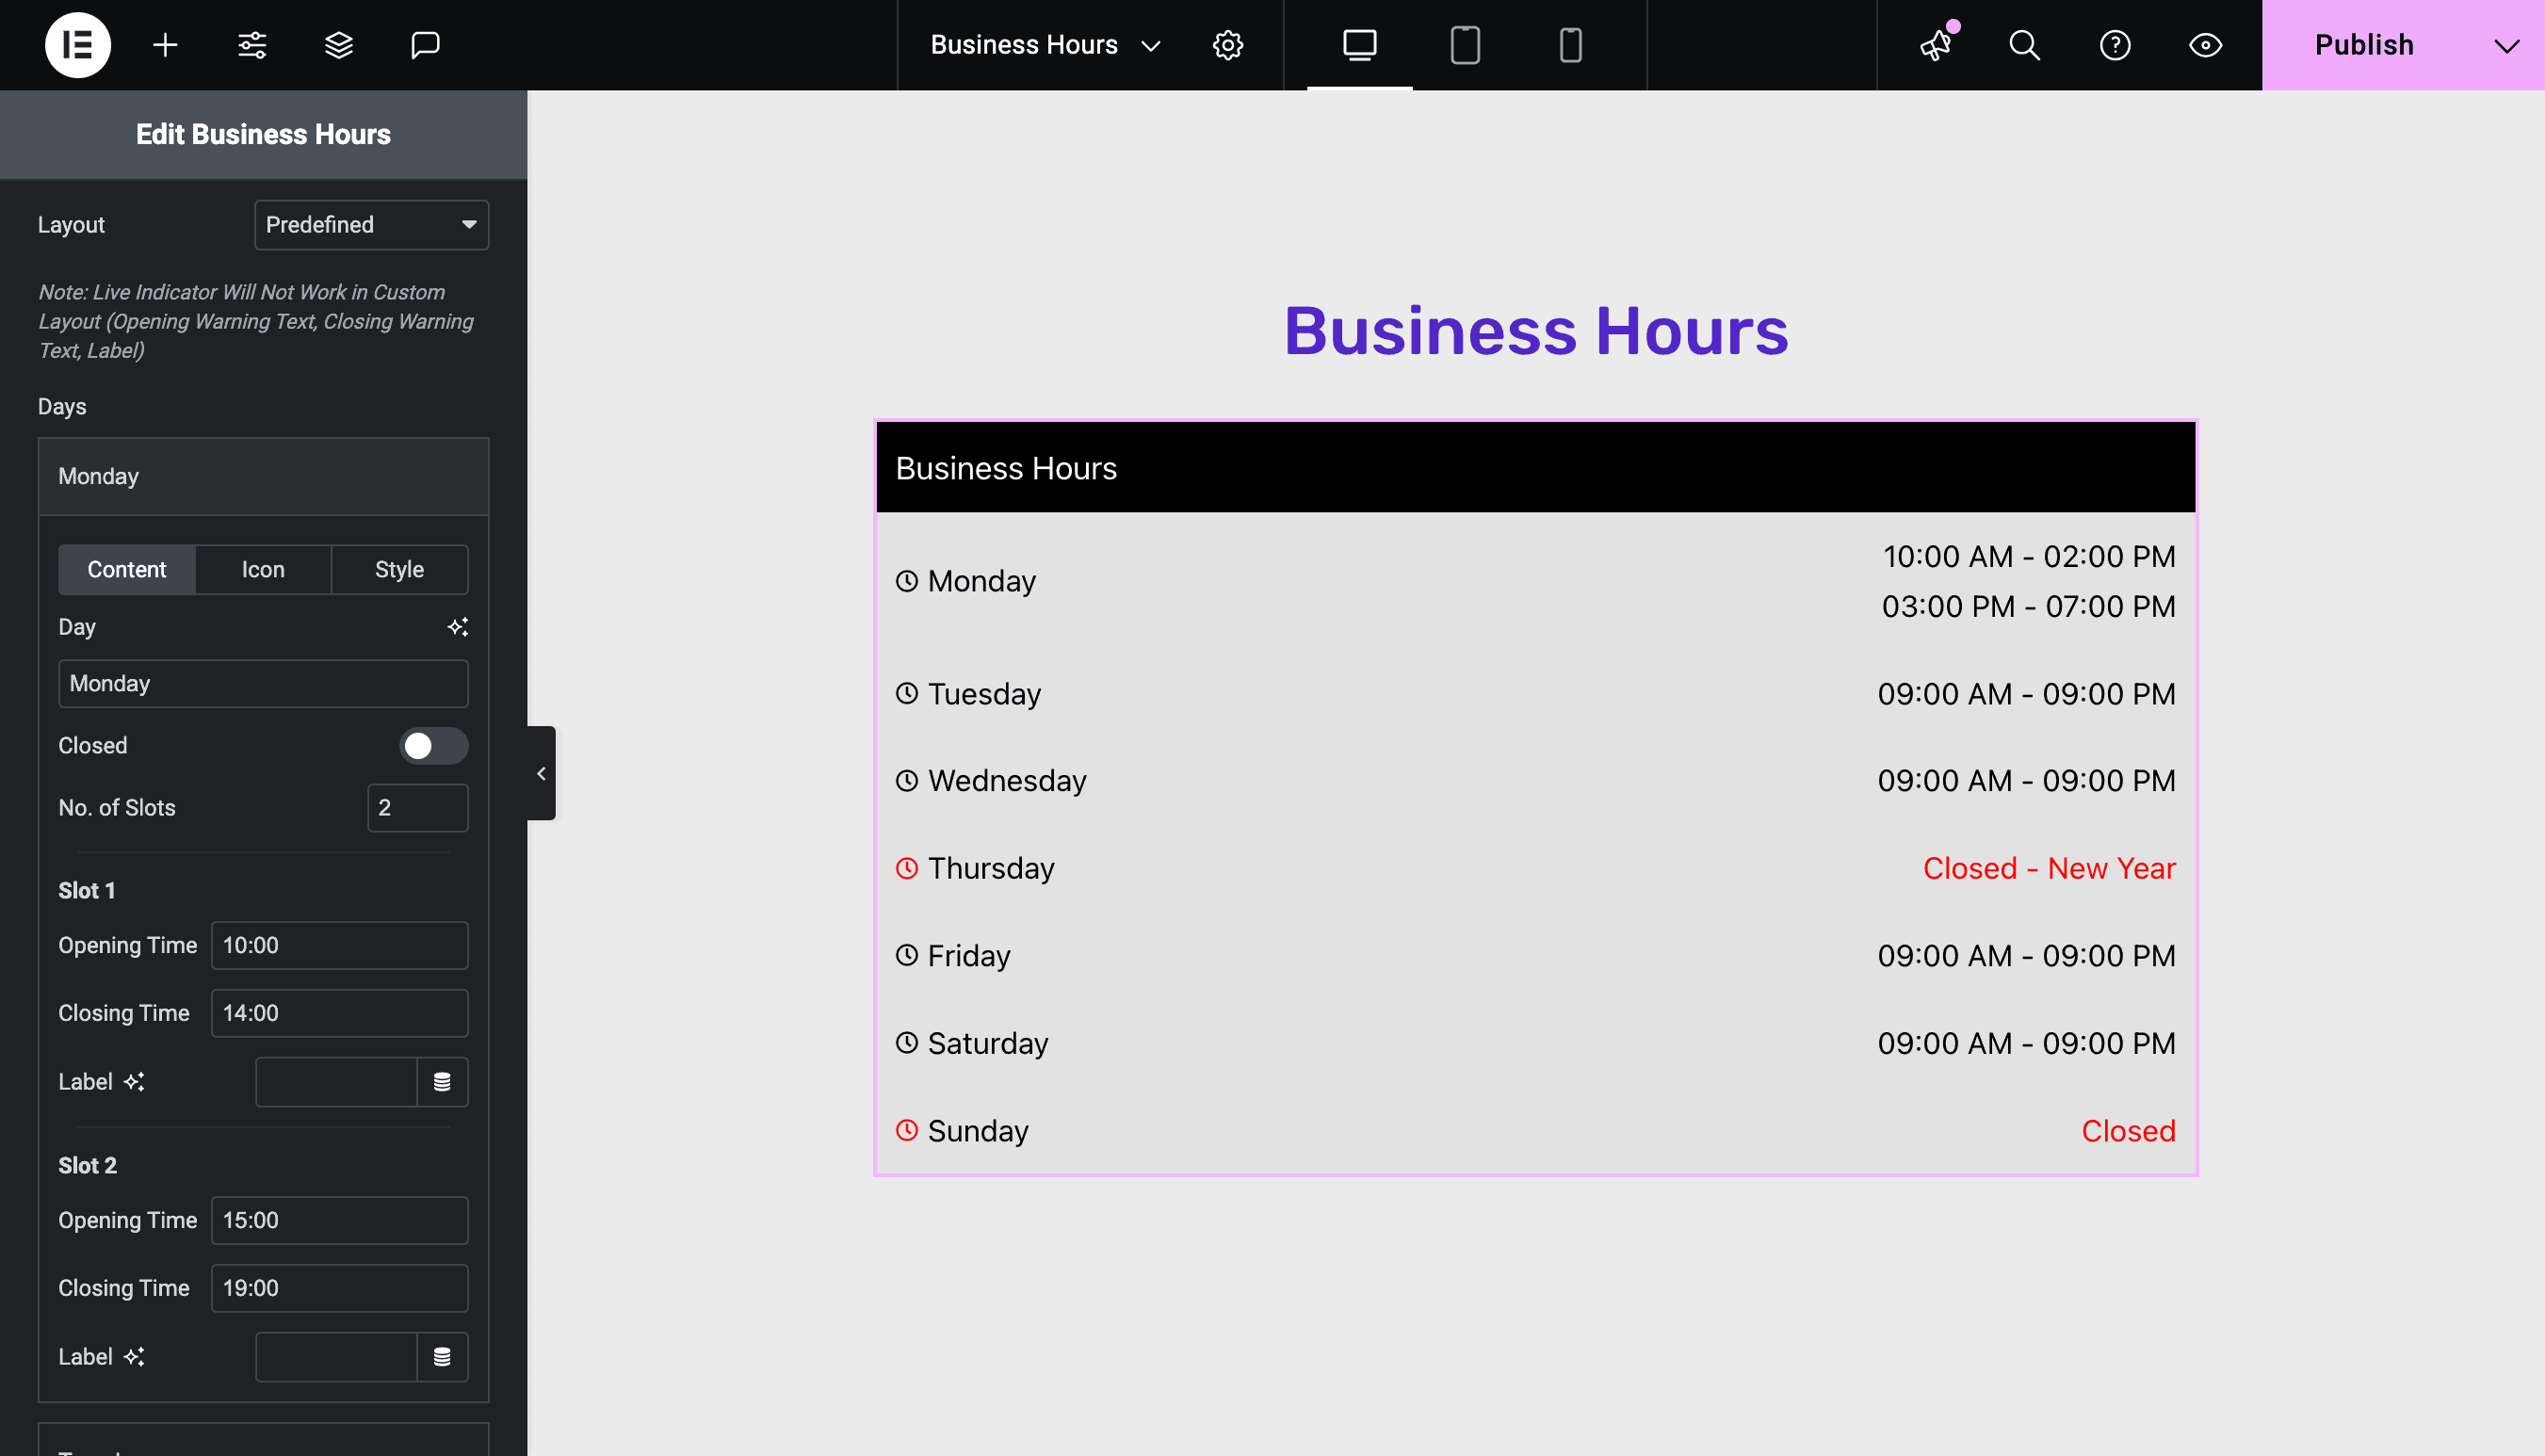
In the layout section, you’ll find options to customize the appearance of your business hours. You can choose between custom or predefined layouts, depending on what suits your needs best.
By selecting a predefined layout, the days of the week start from Monday to Sunday. Each day is displayed separately, making it ideal for businesses with varying operating hours throughout the week.
You can easily input text for each day, mark specific days as closed by enabling the “Closed” option, and set multiple time slots for any given day. It is beneficial for businesses that operate in various shifts. Add the opening and closing times for each shift, along with labels to include any additional details, ensuring your customers get all the information they need at a glance.
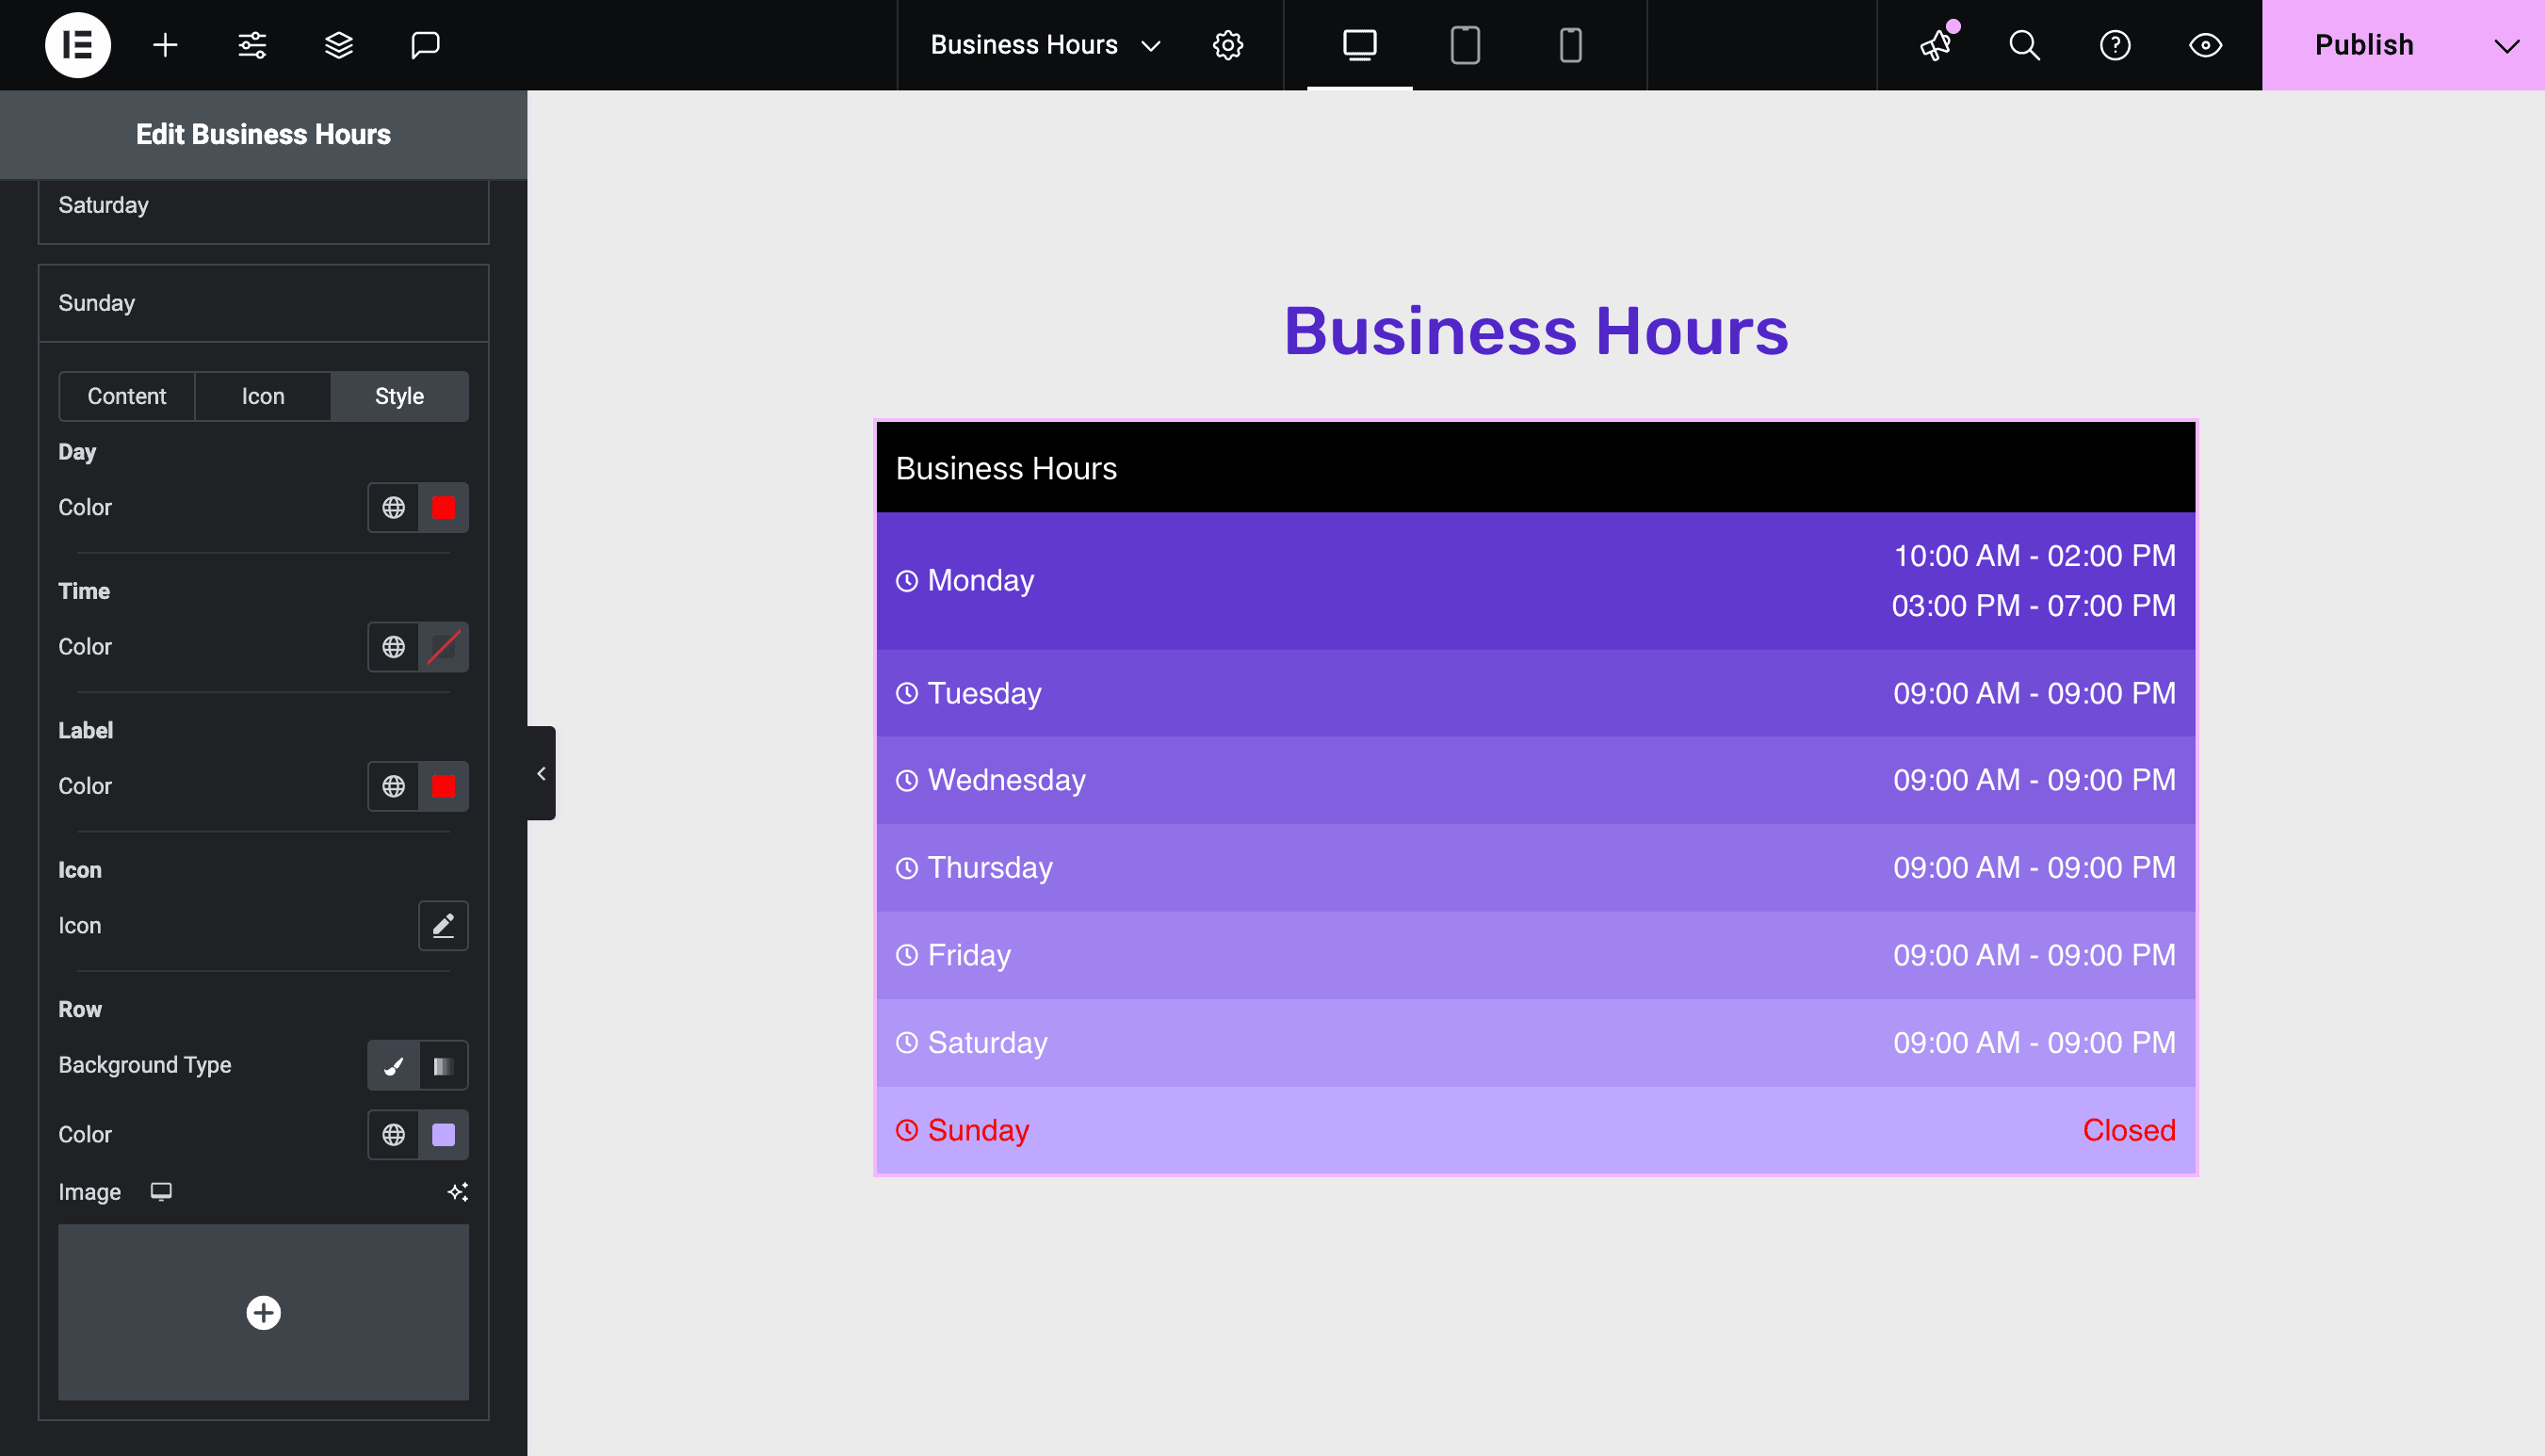
You can effortlessly customize business hours for each day of the week. Additionally, you can add unique icons for individual days and apply personalized styling. It allows you to design your business hours info precisely how you expect, making it functional and visually appealing.
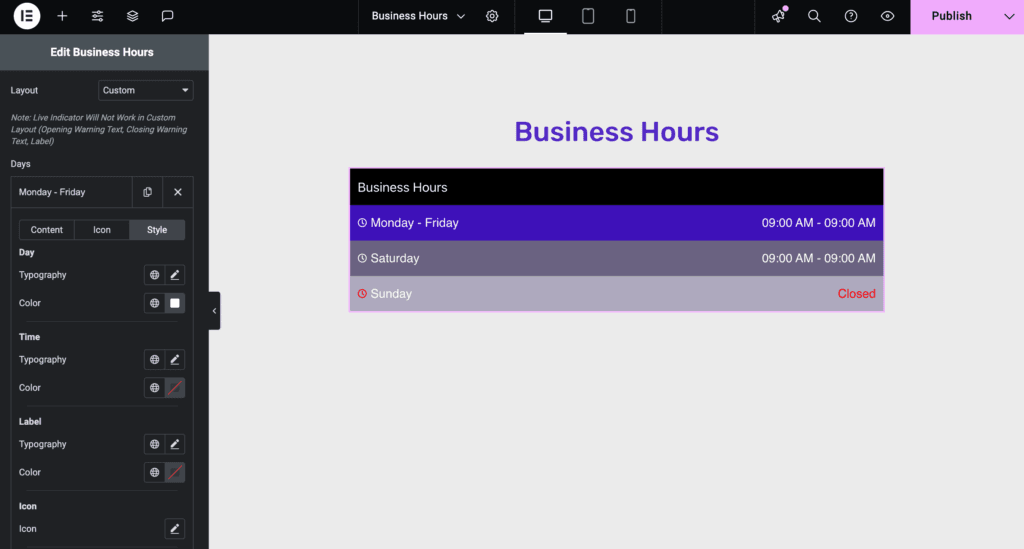
When you choose the custom layout option, you can group your operating hours for easier management. By default, it groups Monday to Friday together, but you have the flexibility to modify these days to match your schedule. This feature is especially useful if your office follows the same timing for multiple days, allowing you to display your hours more efficiently and professionally.
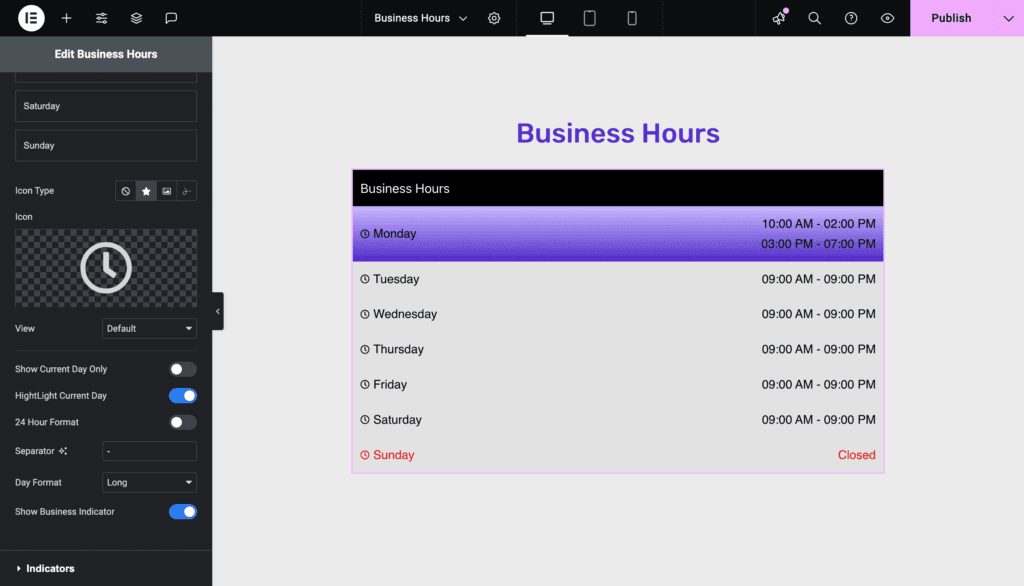
You have several customization options to make it more user-friendly. You can choose to display the hours for just the current day, making it easier for customers to know when you’re open. If you prefer, you can highlight the current day to draw attention to it.
It lets you select whether the days are shown in short format (e.g., Mon, Tue) or the full-day name (e.g., Monday, Tuesday) to suit your site’s design. It also offers an option to display a business indicator, which lets your customers know whether you’re open or closed or other details.
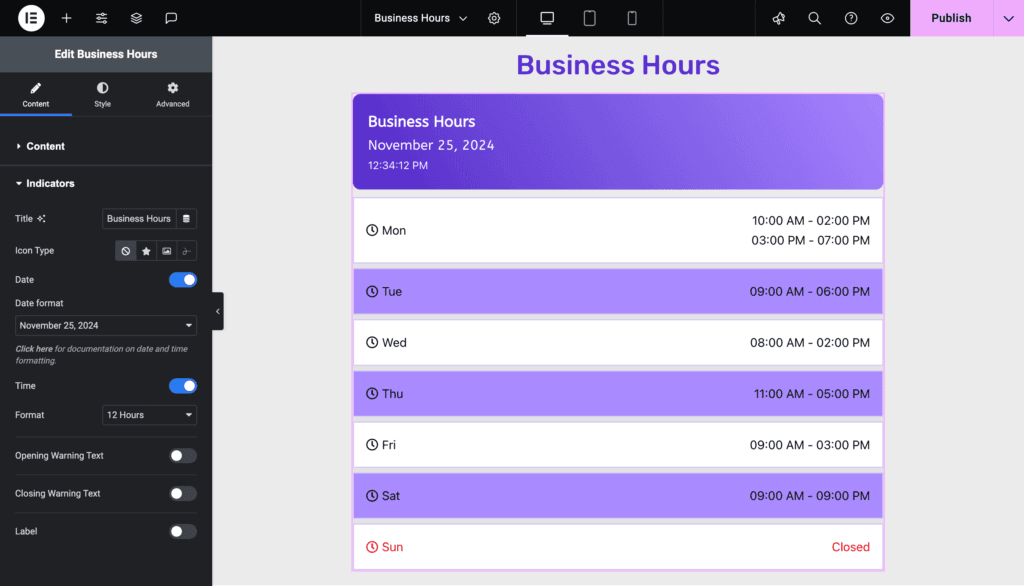
Customize Business Indicator to Show Status
With the Business Indicator, you can showcase essential details like a title and an icon, choosing from various styles to match your design. Additionally, you can display the current date and time, which is fully customizable to your preferred format, ensuring the indicator is informative and visually appealing.
Add Custom Warning Message for Better Customer Experience
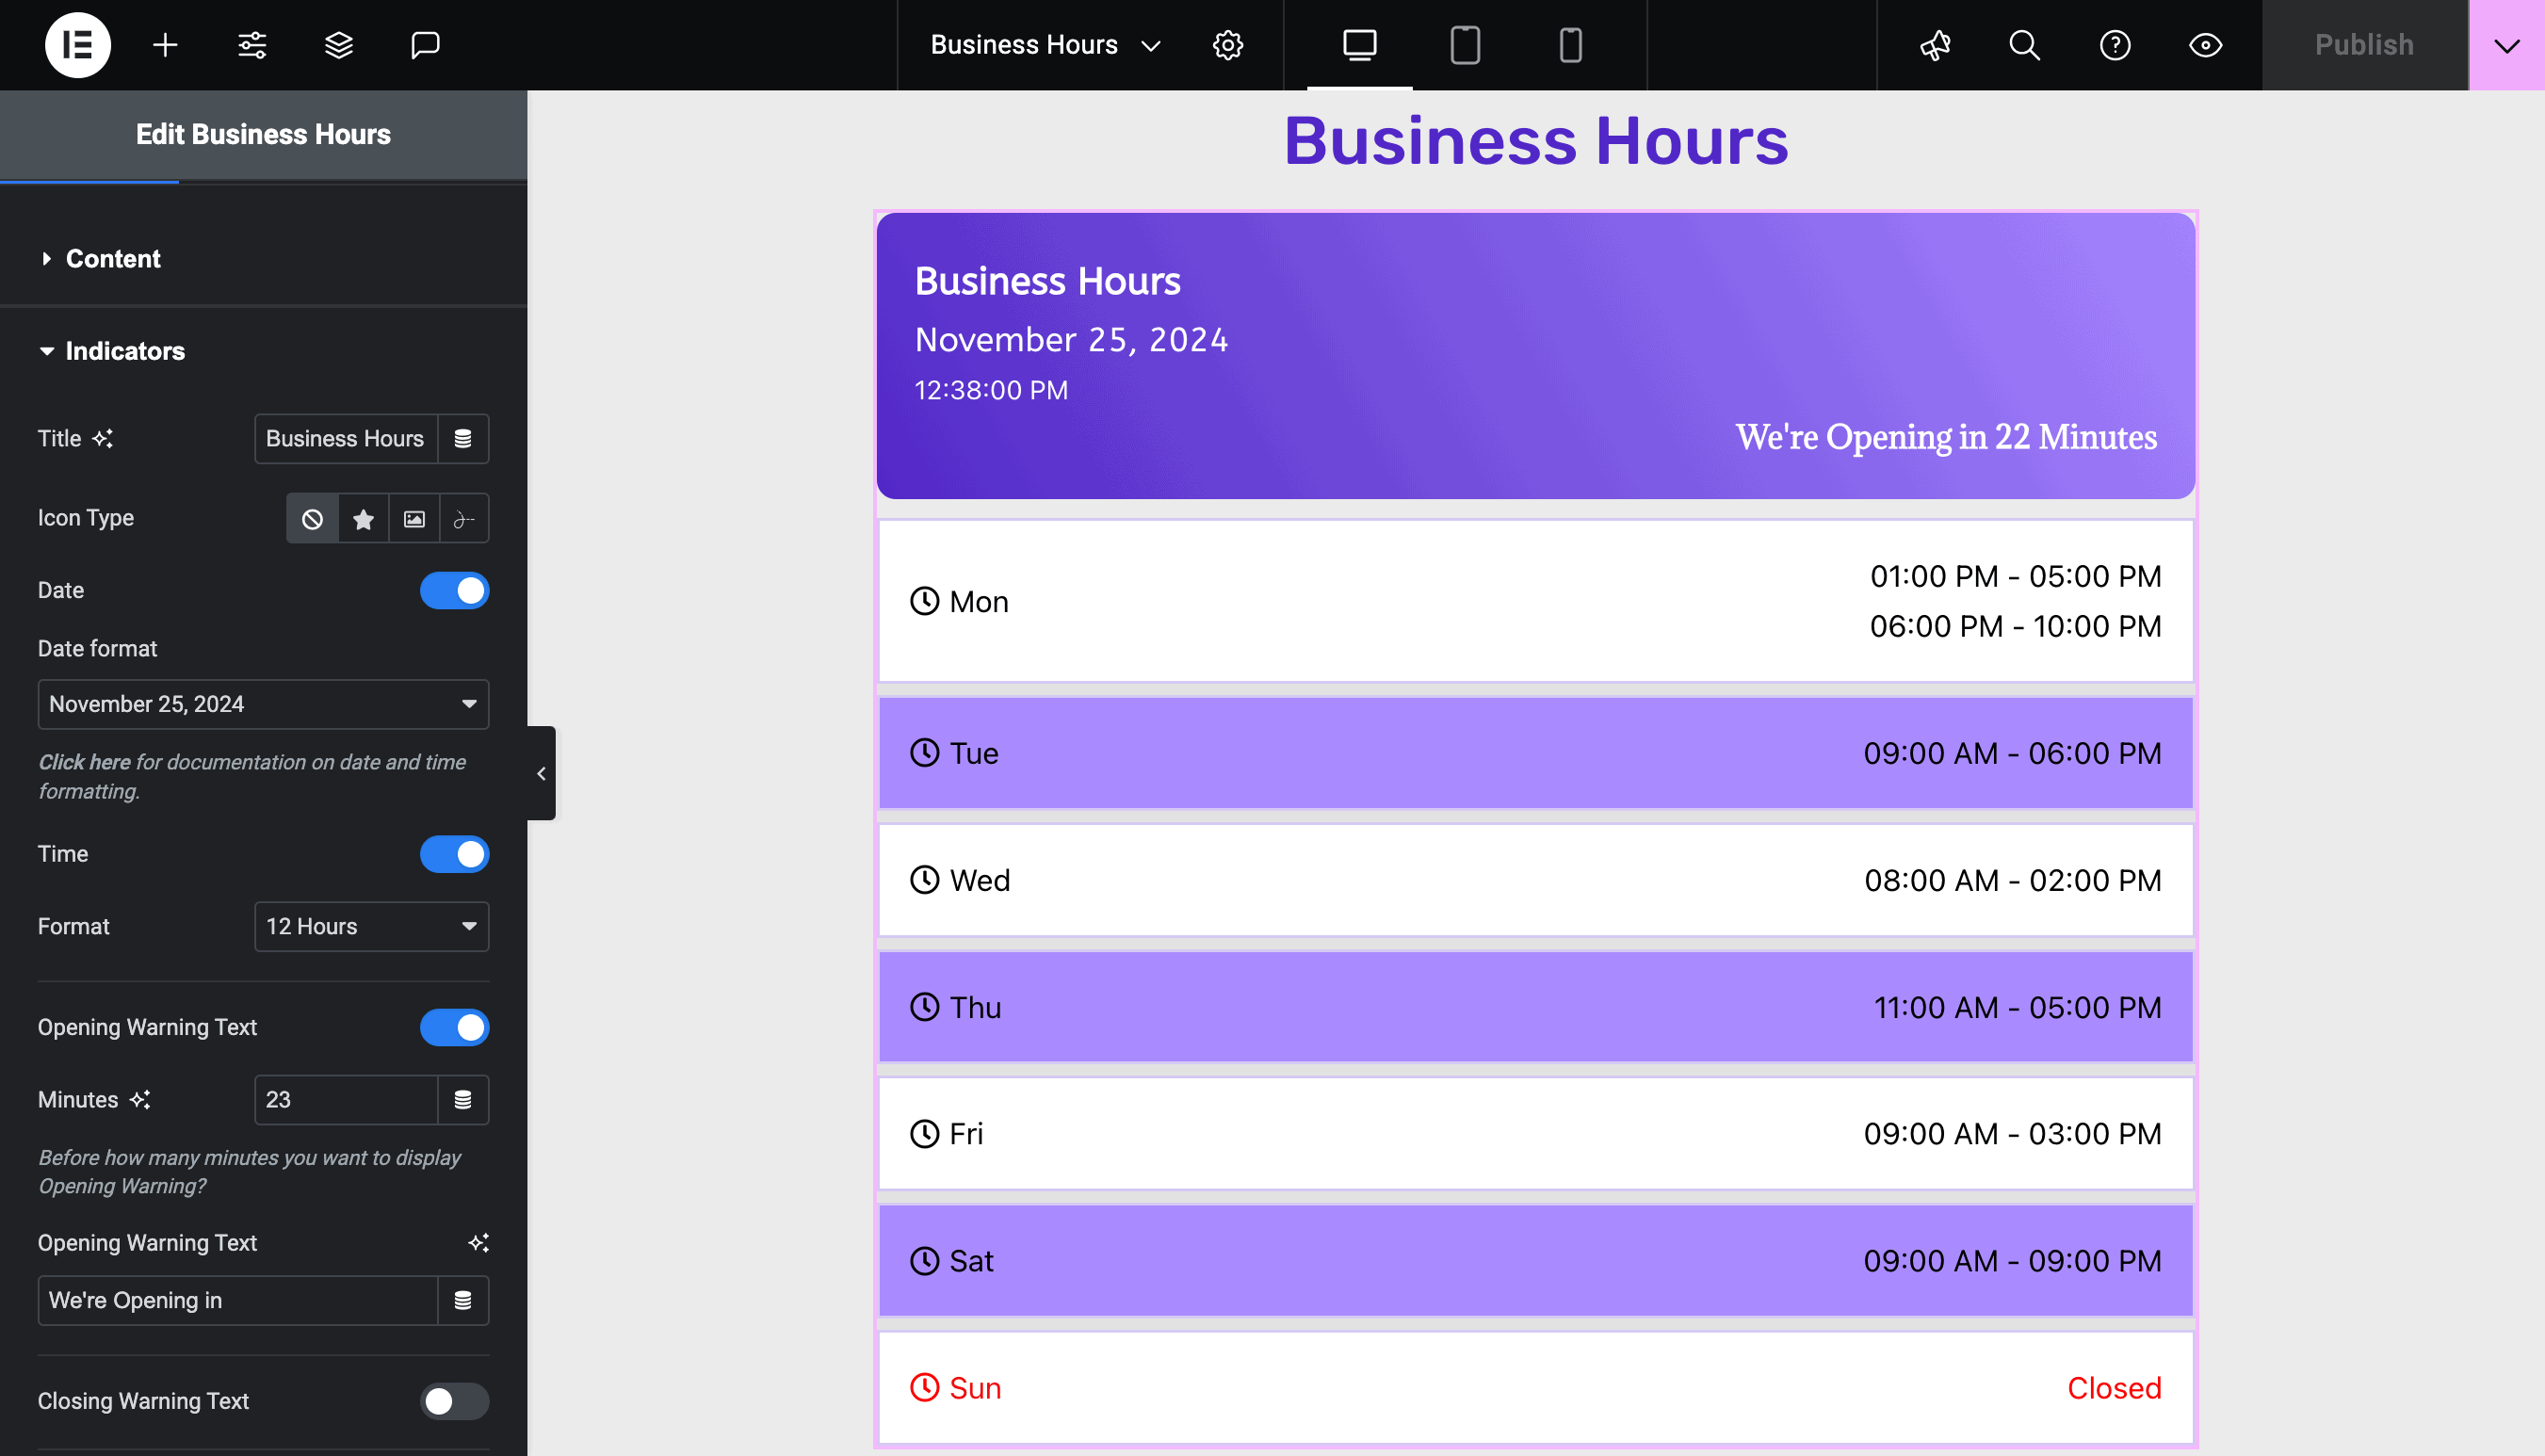
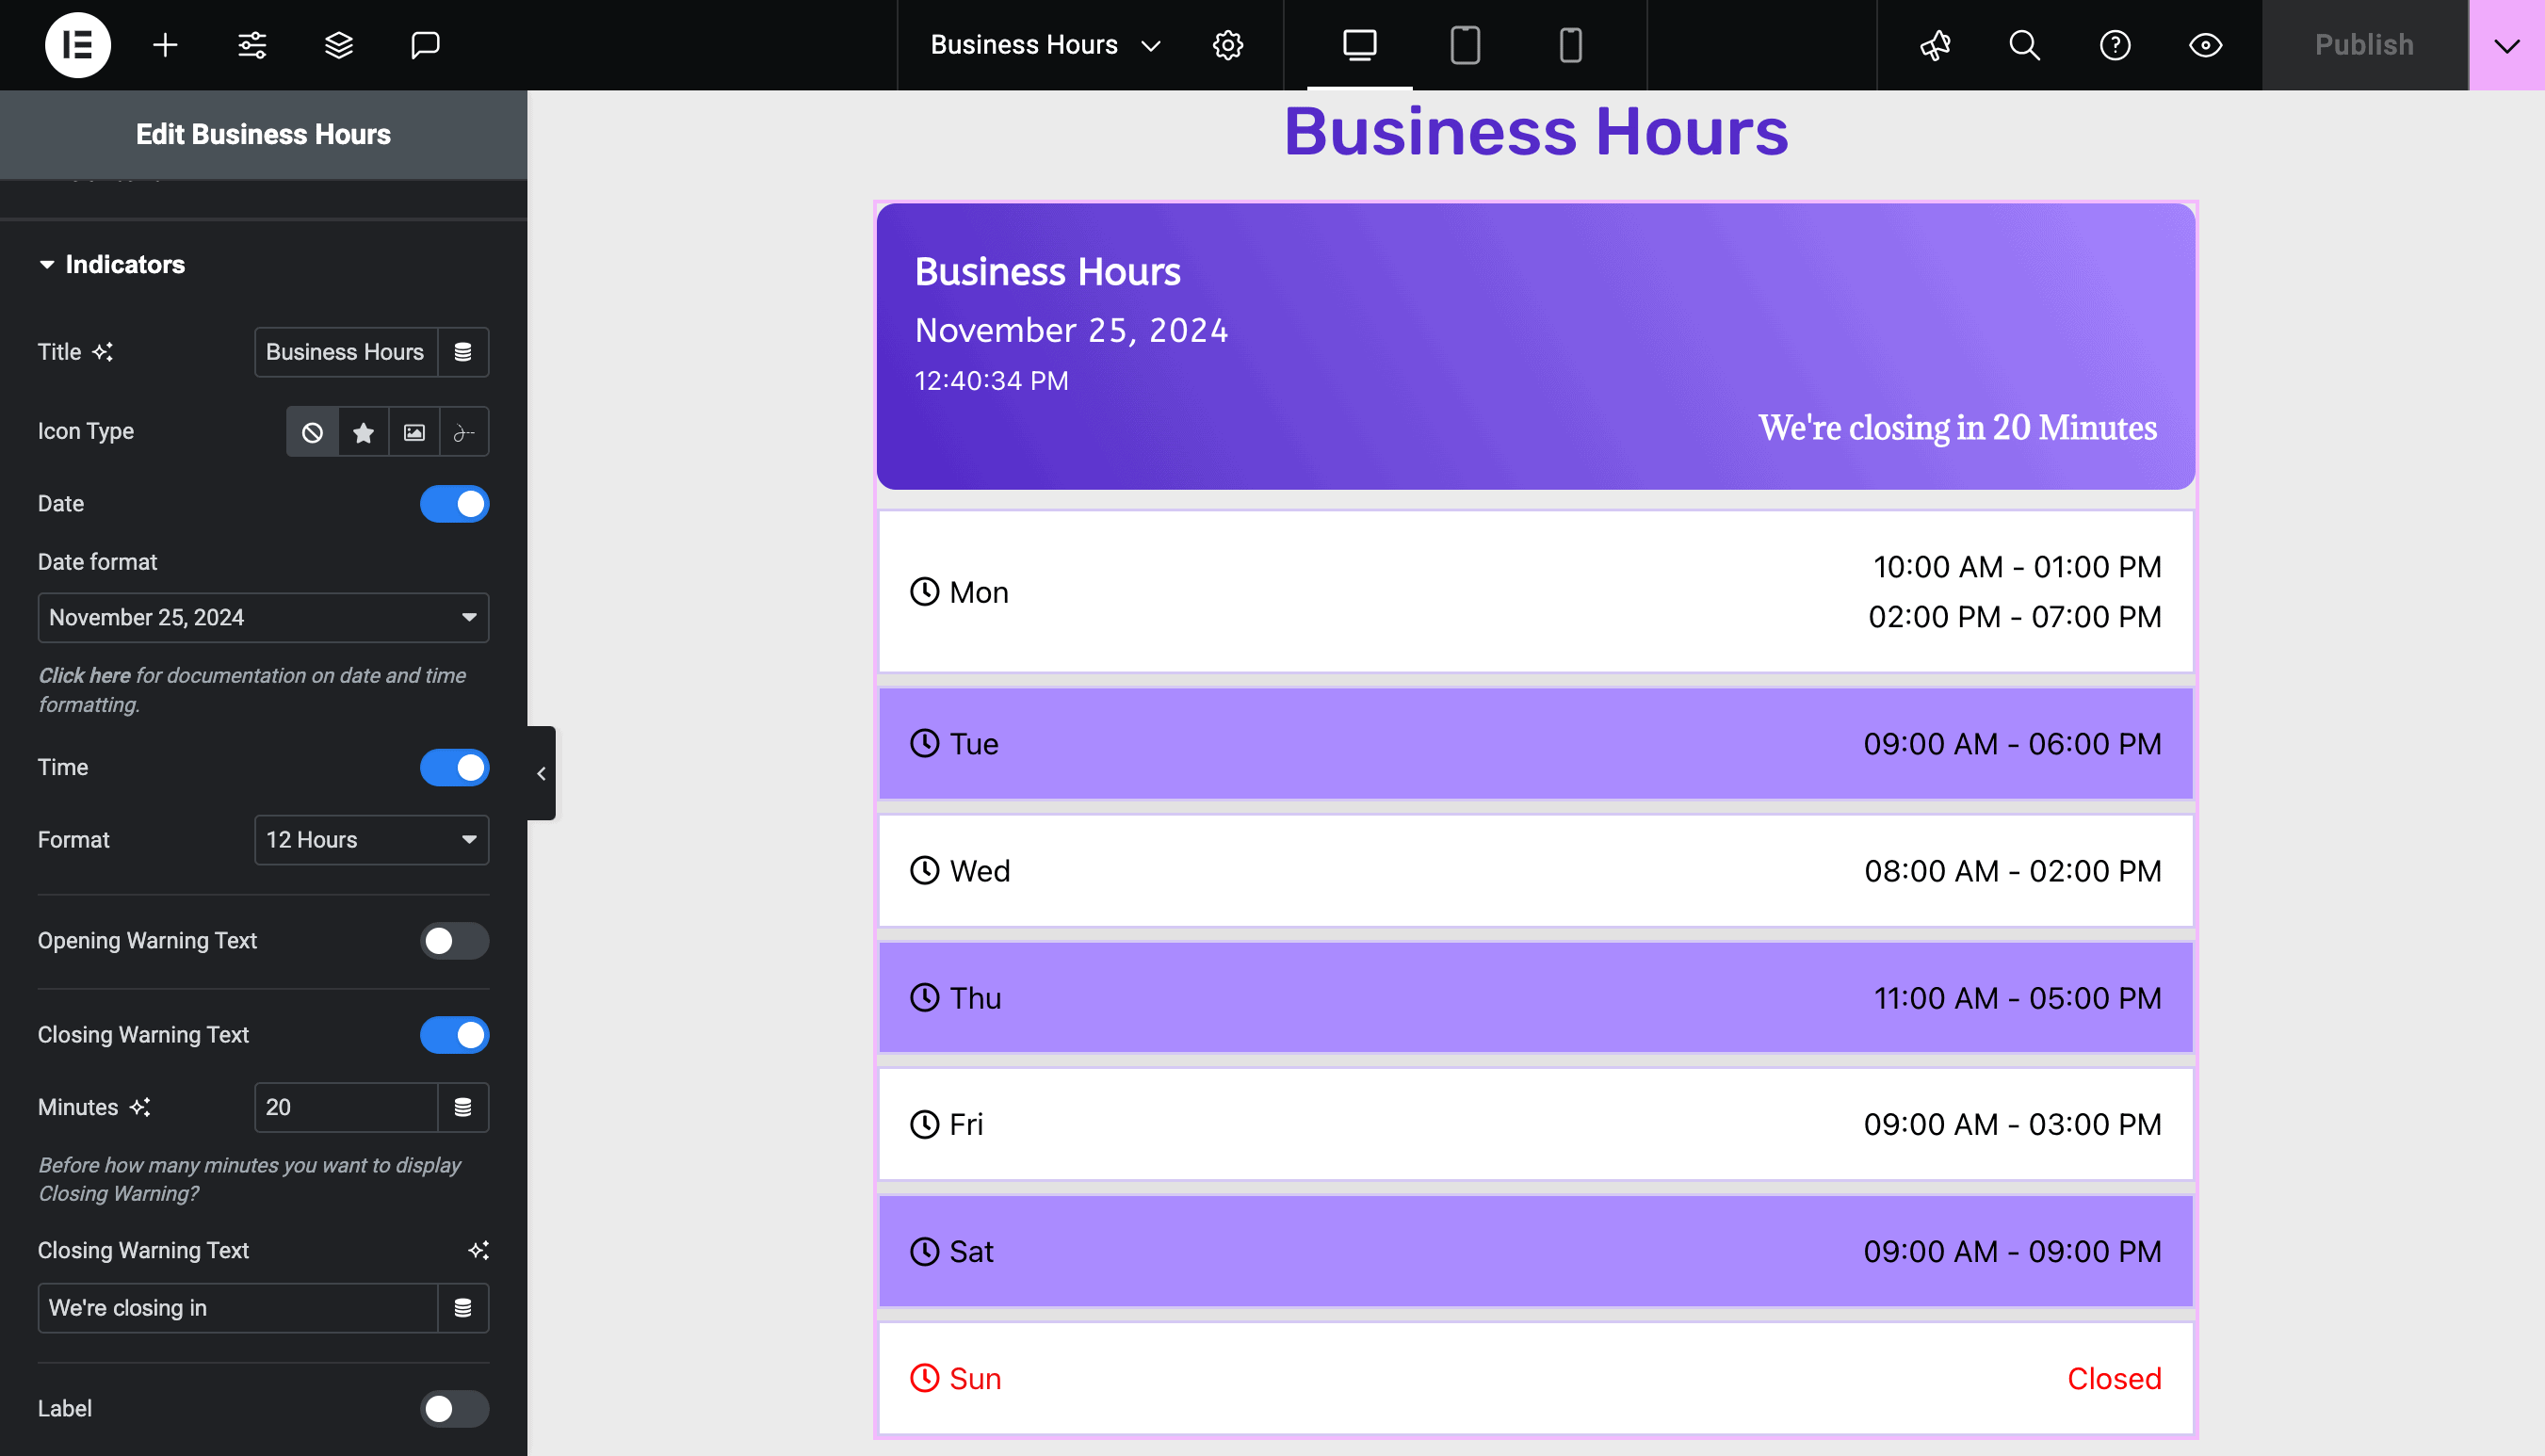
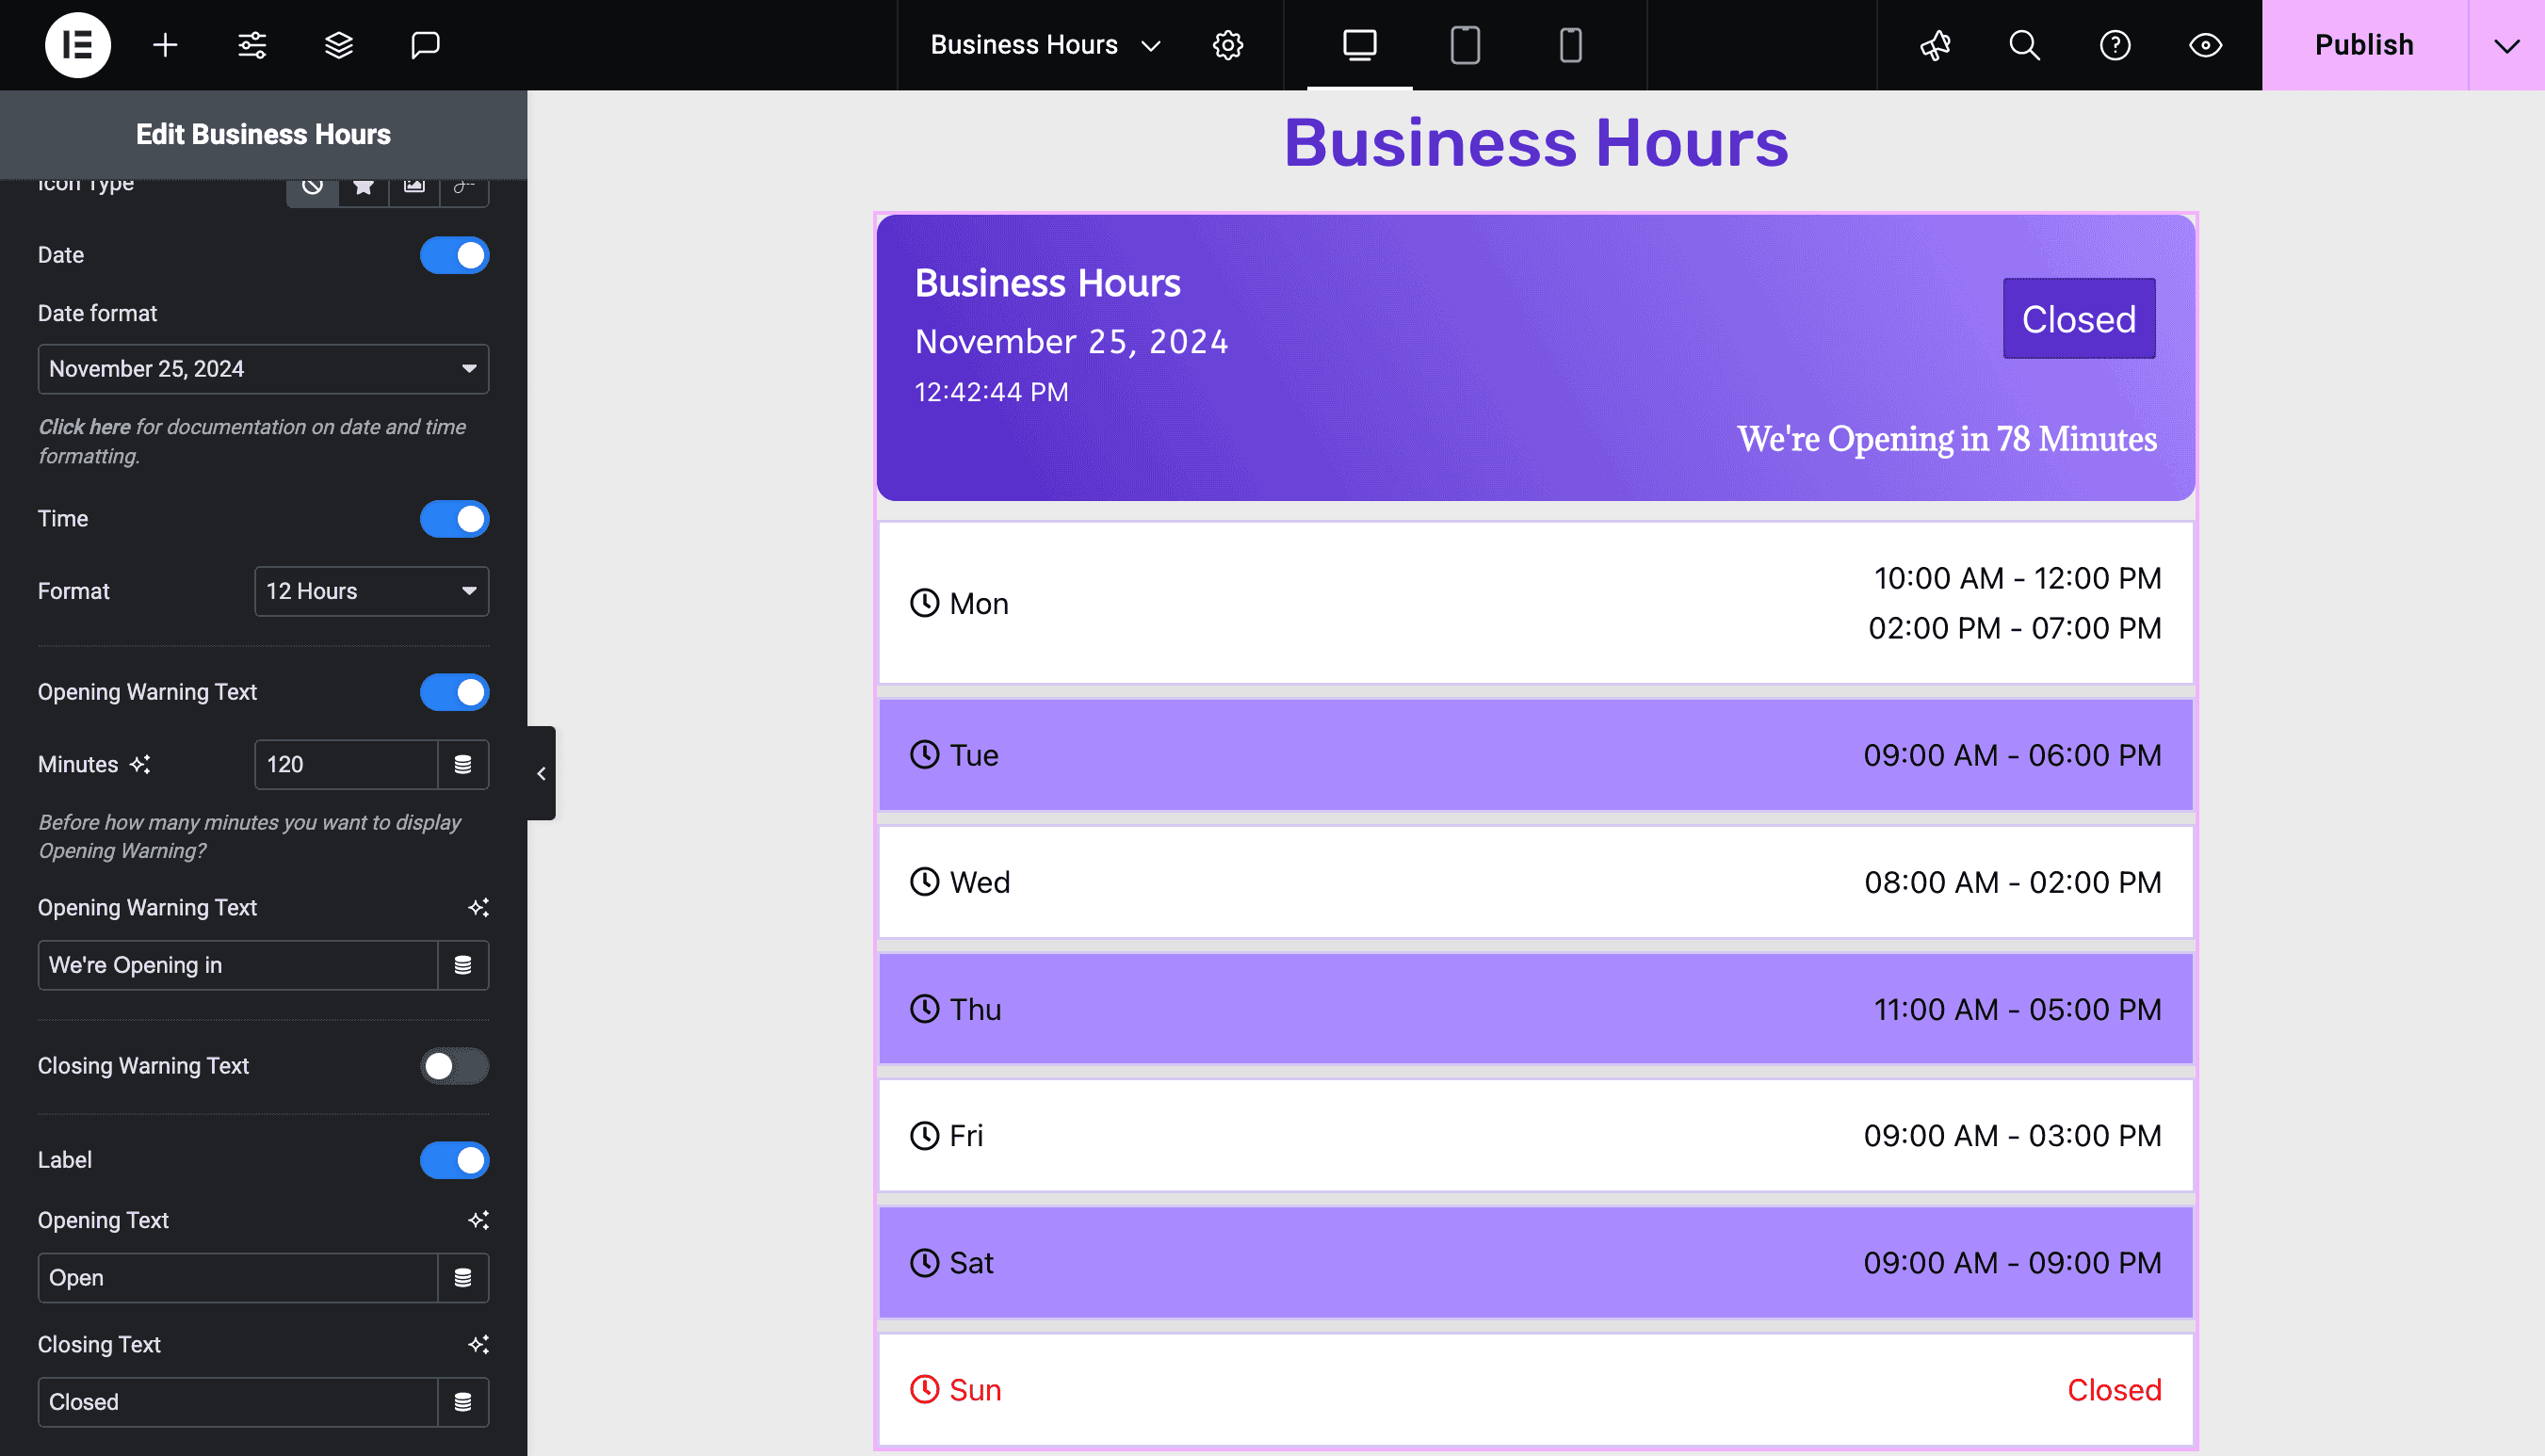
You can enhance your customer experience by displaying custom warning messages for your business hours. With this feature, you can notify visitors when you’re about to open or close. Enable the option to show an “Opening Soon” or “Closing Soon” message and customize it with your text.
You can also specify the minutes before opening or closing when these messages should appear. For example, give your customers a gentle reminder 20 minutes before closing time. It ensures clear communication and keeps your visitors informed at the right moments.
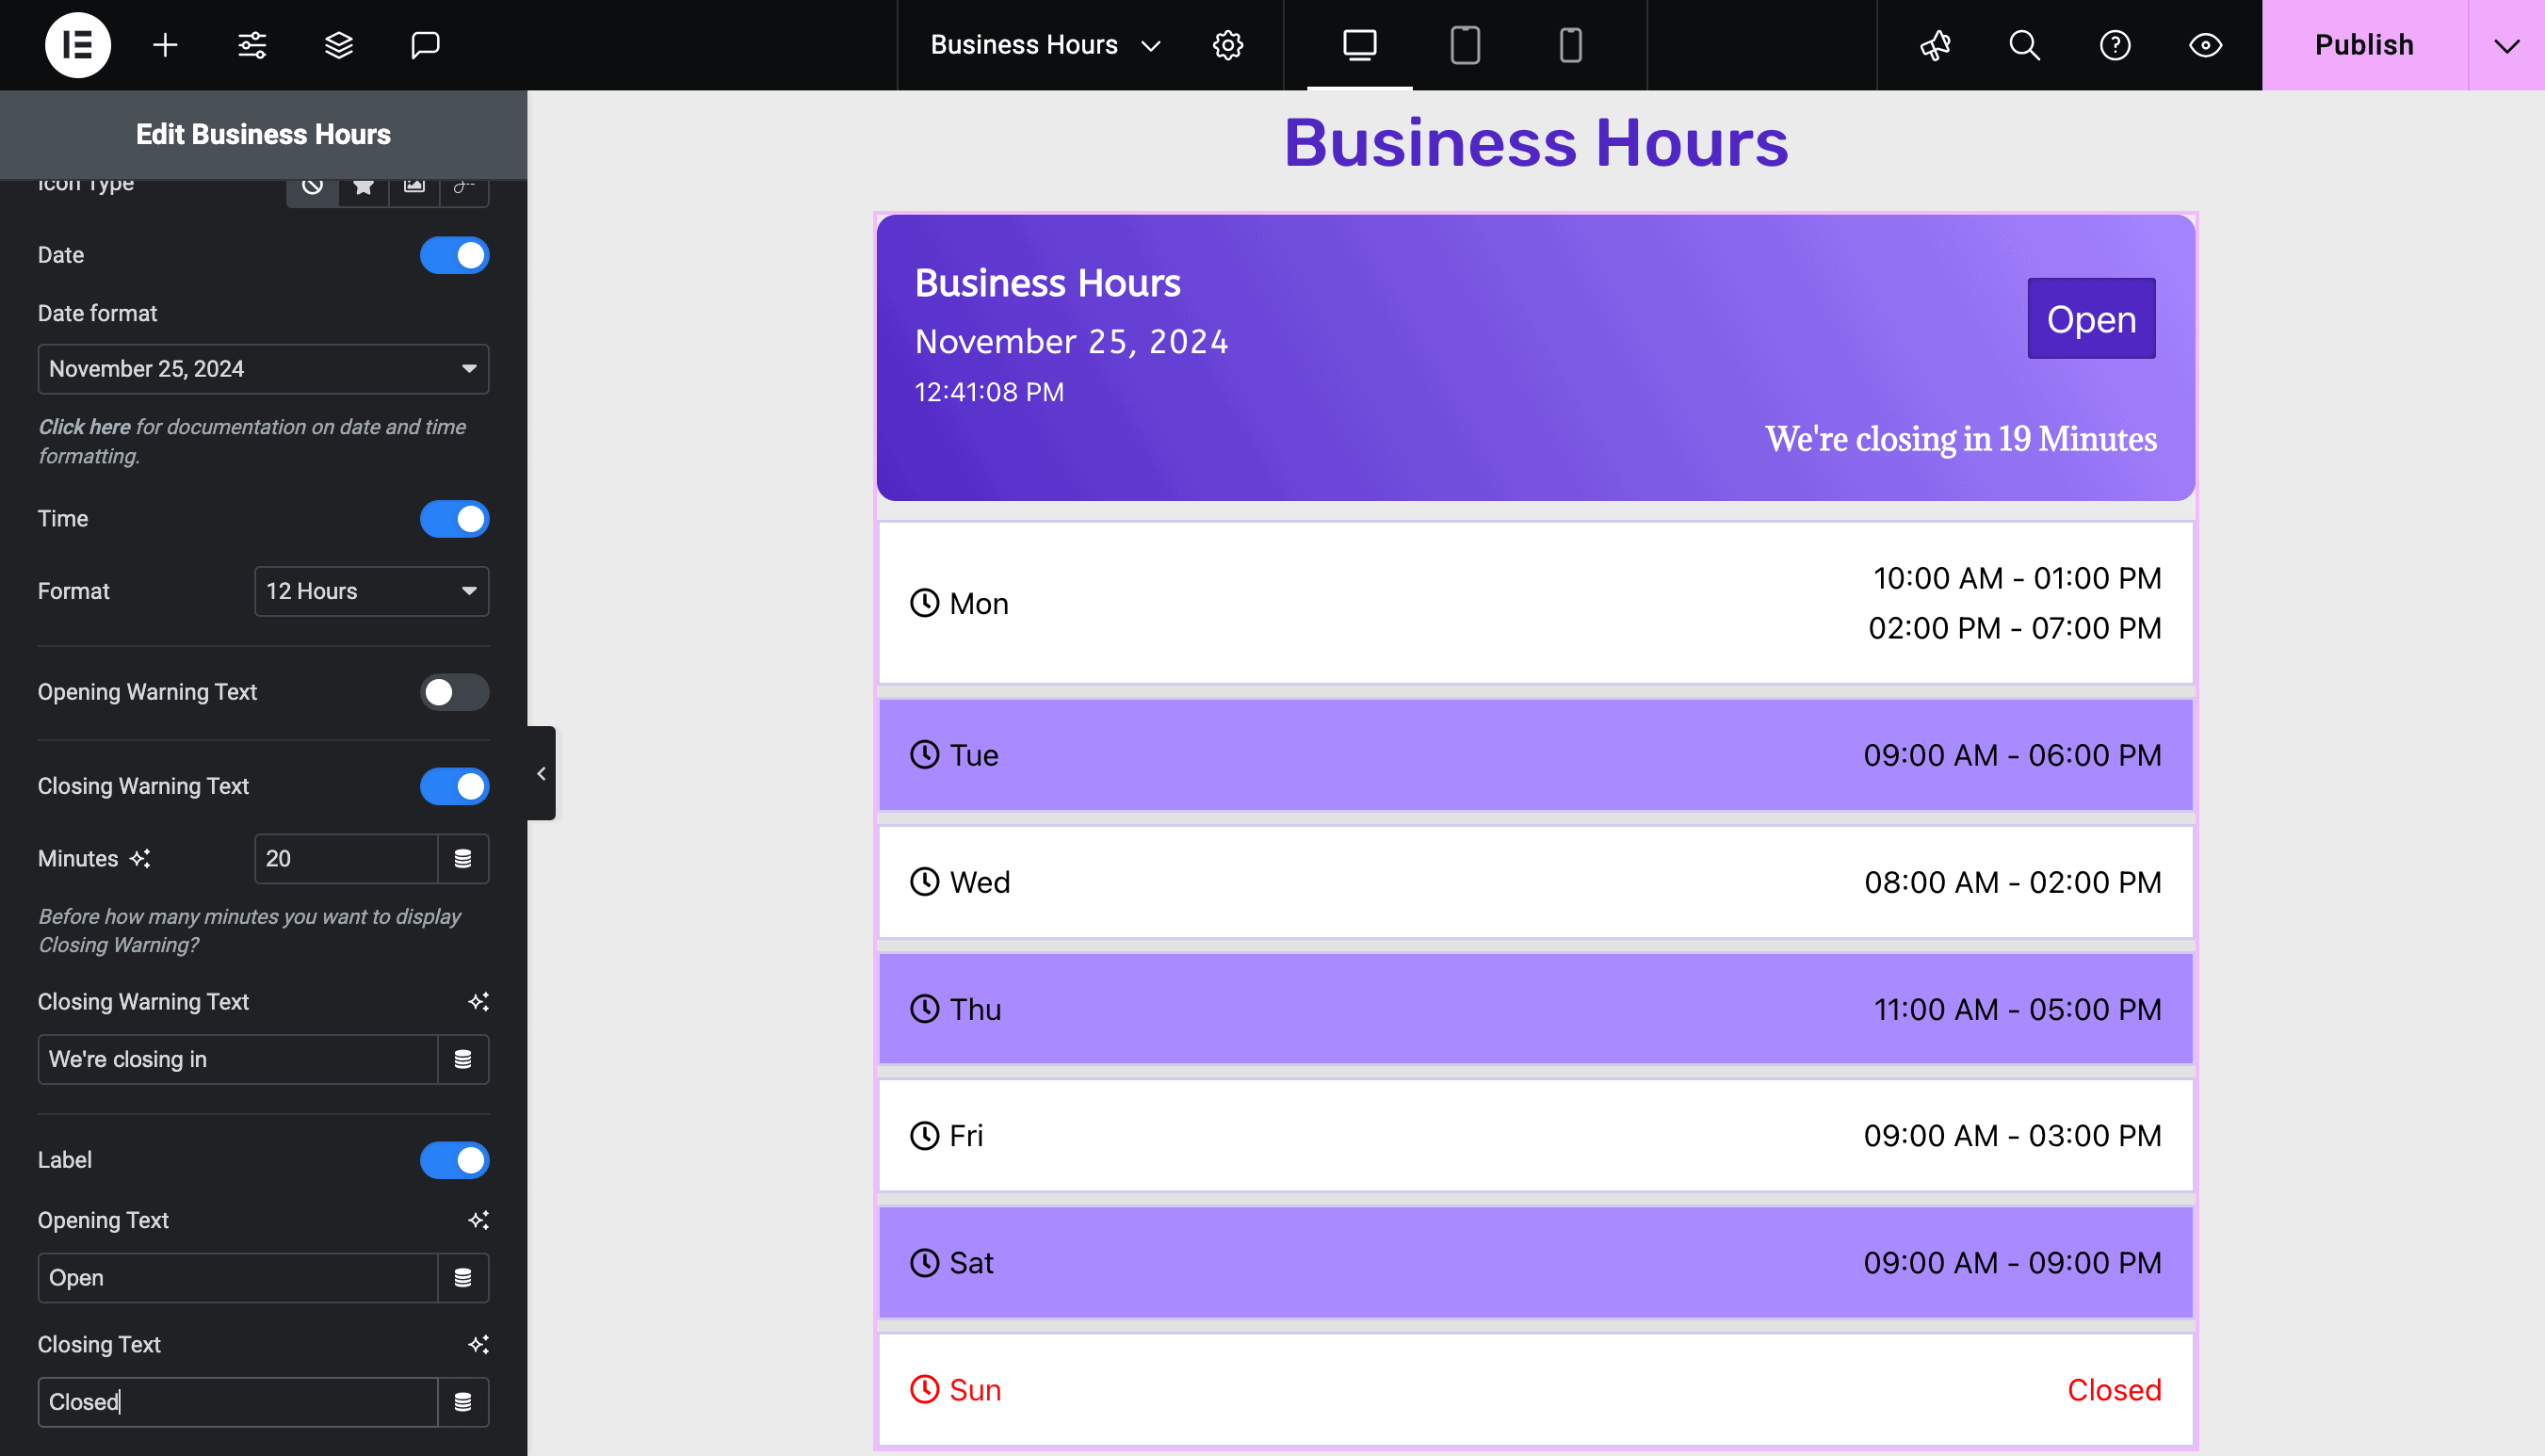
Customize the Business Status Label
You can customize the business status label to show whether your business is open or closed. It is a great way to keep your customers informed in real-time. Enter the text you want to display for each status, such as “Open” when you’re available or “Closed” when you’re not.
Style & Design Your Business Hours For a Professional Look
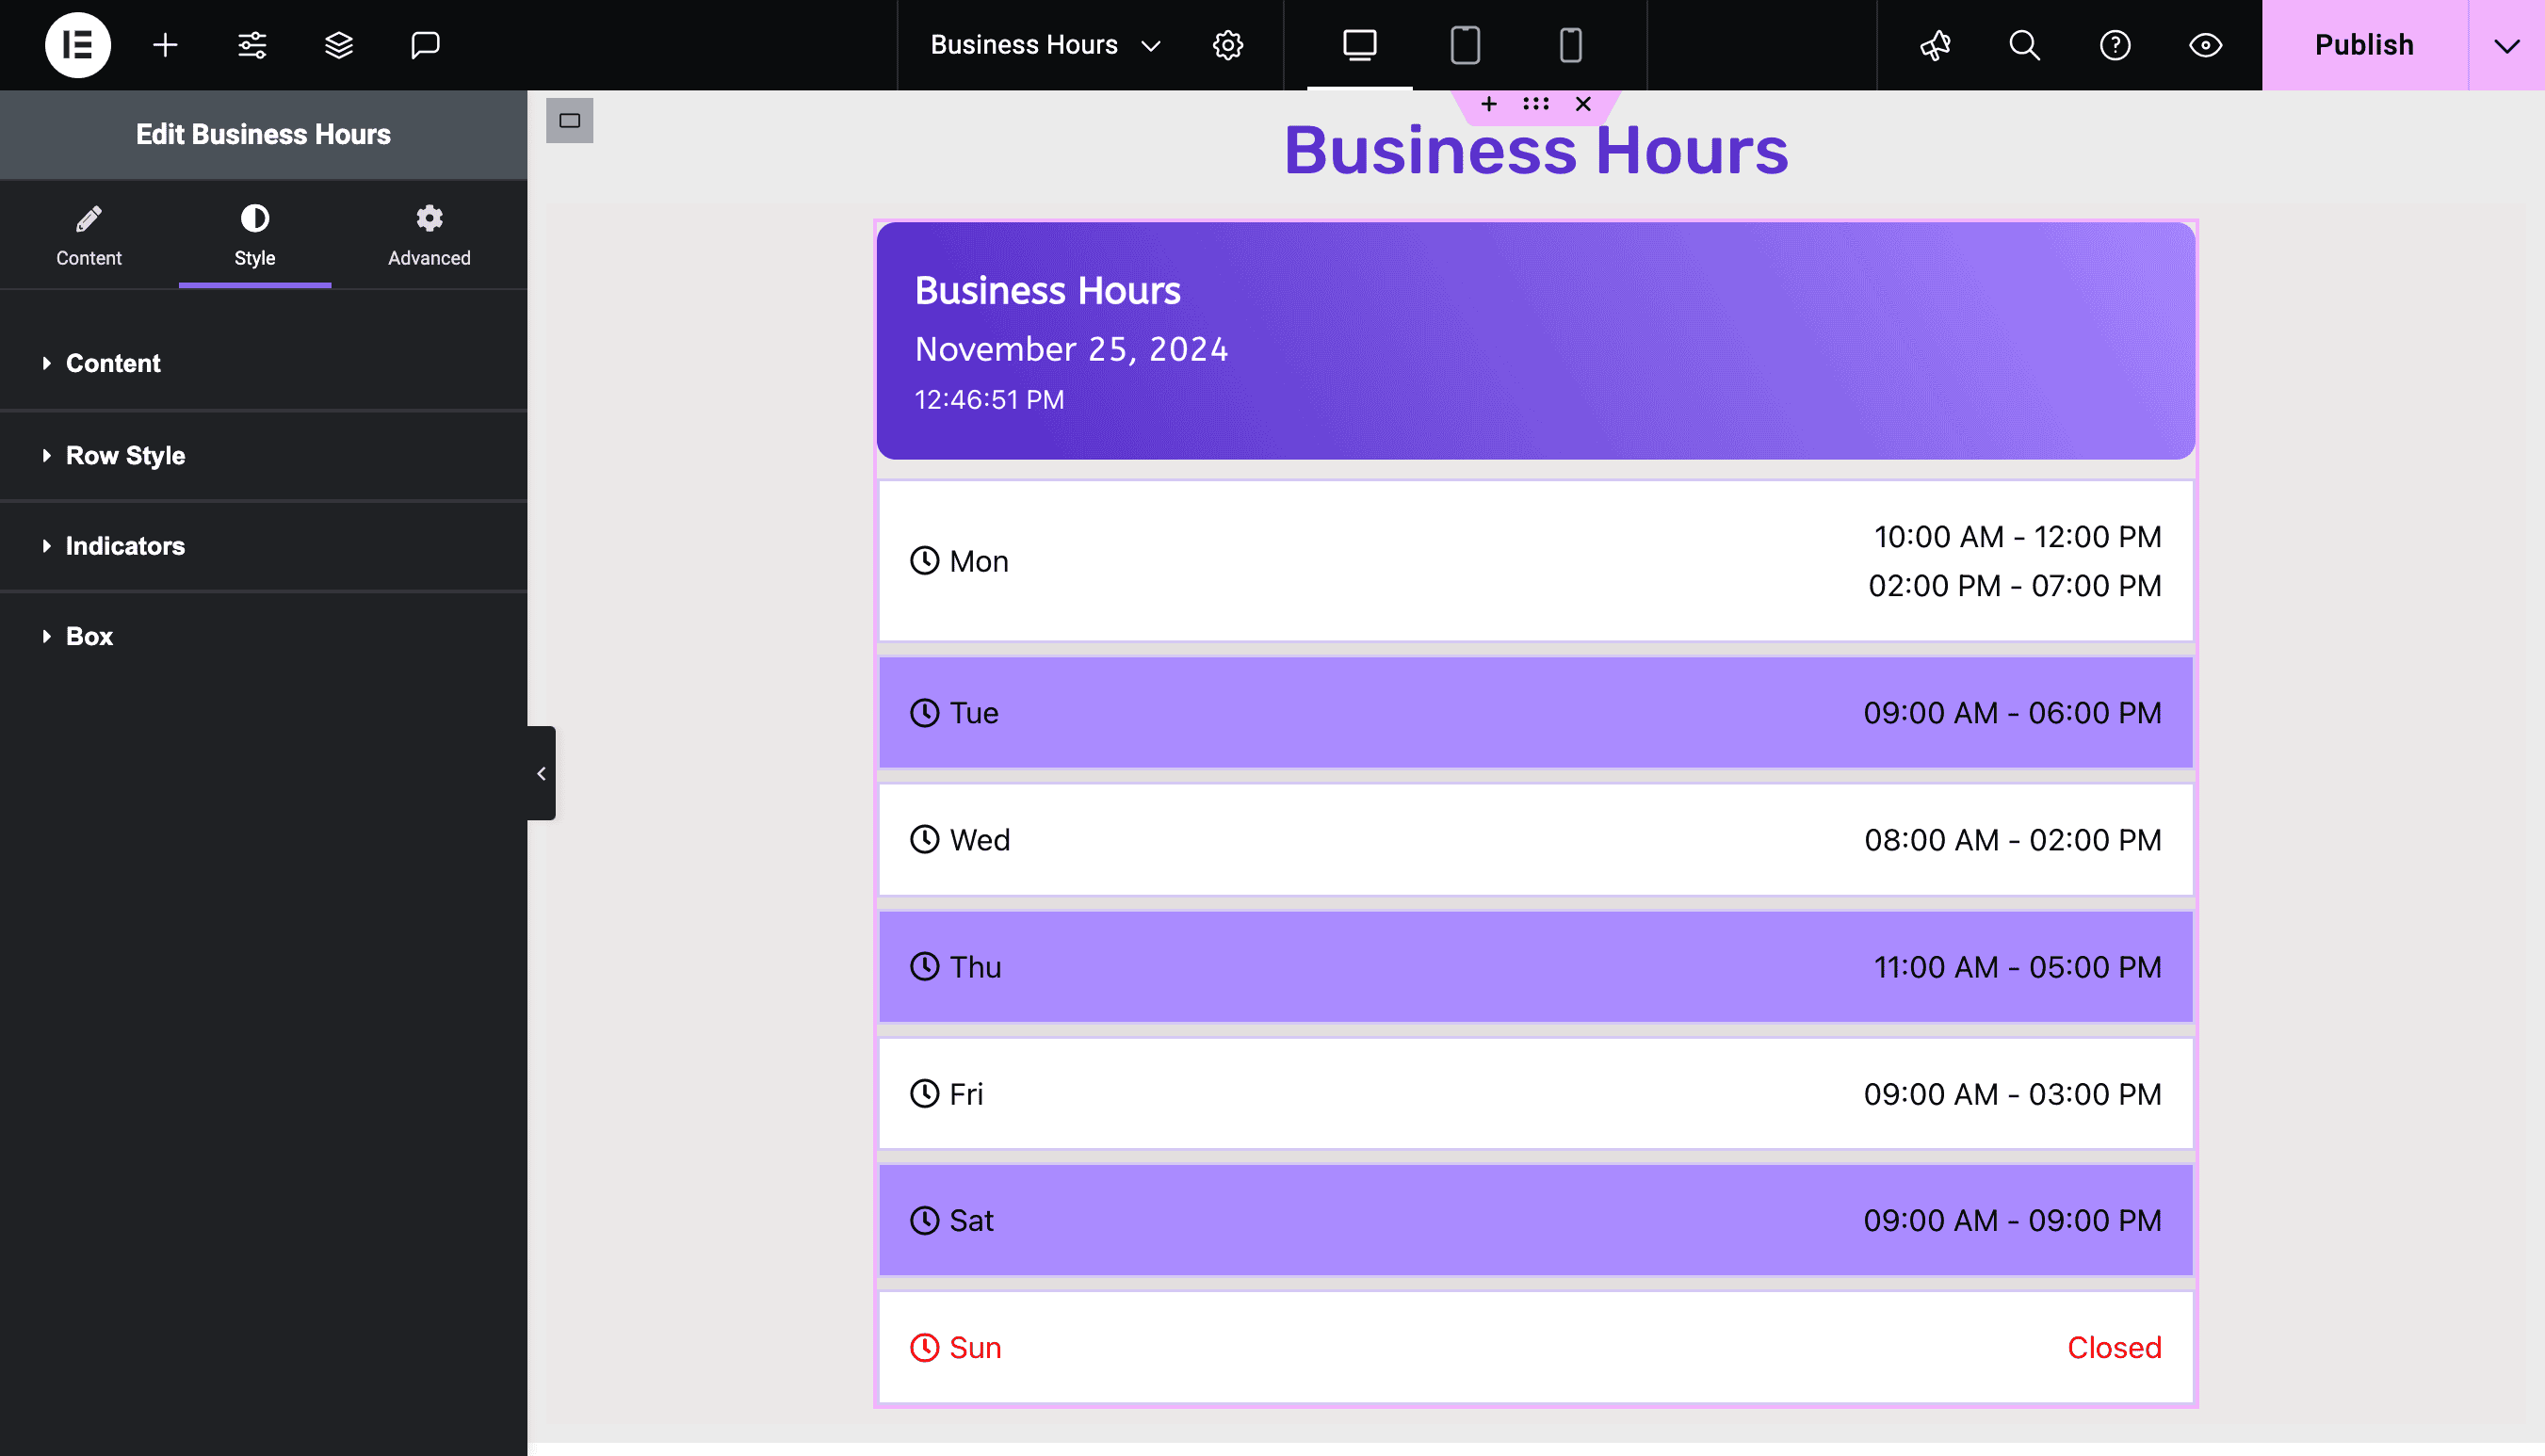
Business Hours allows you to fully customize its appearance. The styling options will enable you to adjust every element to suit your design preferences. You can change the style of individual days, time slots, labels, icons, and more, giving you complete control over how your business hours are displayed.
To explore all the styling options available for the Business Hours widget, you can refer to the detailed documentation guide, which provides a thorough overview of the customization features. Once you’ve finished customizing your page, preview how the business hours will look on the frontend.
Take a look at the different stylish designs for the Business Hours widget in Elementor.
Get the Business Hours widget now
With Elementor Addon Elements, you can access the Business Hours widget along with 40+ other powerful widgets. We enhance Elementor’s capabilities with creative and time-saving widgets, making your workflow smoother and more efficient. The time and effort you save with these widgets quickly make the addon pay for itself. Get the Business Hours widget and more with Elementor Addon Elements today.
Start Using Business Hour Widget in Elementor
In conclusion, adding business hours to your website is a simple yet effective way to improve the user experience for your visitors. By following the easy steps in this guide, you can quickly integrate this feature into your site, making it more informative and user-friendly. This small addition not only enhances your website’s professionalism but also helps customers know when to reach out or visit, improving overall customer satisfaction.


