
Want to display multiple versions of content in a sleek, user-friendly way? Instead of using long pages or tabs, add a content switcher to your WordPress site. With the Content Switcher widget, you can allow users to toggle between product views, pricing plans, menus, or templates — all without writing a single line of code.
In this tutorial, we’ll show you how to create an interactive content switcher using Elementor Addon Elements in just a few simple steps.
Key Takeaways
- What a content switcher is and why it improves user experience
- How to install and use the Content Switcher widget
- Different ways to display content using templates or sections
- Tips for styling your content switcher effectively
The Need for a Content Switcher
Let’s say you have multiple versions of similar information, like product variations, pricing options, or menu items. Displaying them one after another on the same page clutters the layout and overwhelms the reader.
Instead, a Content Switcher lets you show different pieces of content in the same space, allowing users to toggle between views without scrolling endlessly.
Example
Imagine you’re building a restaurant website. It features a wide variety of food items across multiple categories and price ranges. Listing everything on one page would result in a poor user experience due to excessive scrolling.
By using the Content Switcher widget, you can allow users to switch between menu sections (like breakfast, lunch, and dinner) effortlessly, all in a compact and elegant layout.
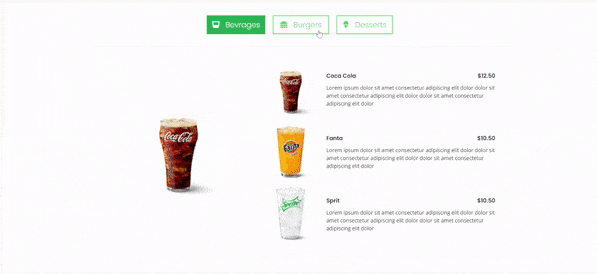
Here is a sneak peek of what we will be achieving.
Steps to create a Content Switcher in Elementor
Step 1: Install & Activate Plugin
In order to use Content Switcher Widget, you have to first install and activate Elementor Addon Elements Plugin on your WordPress website.
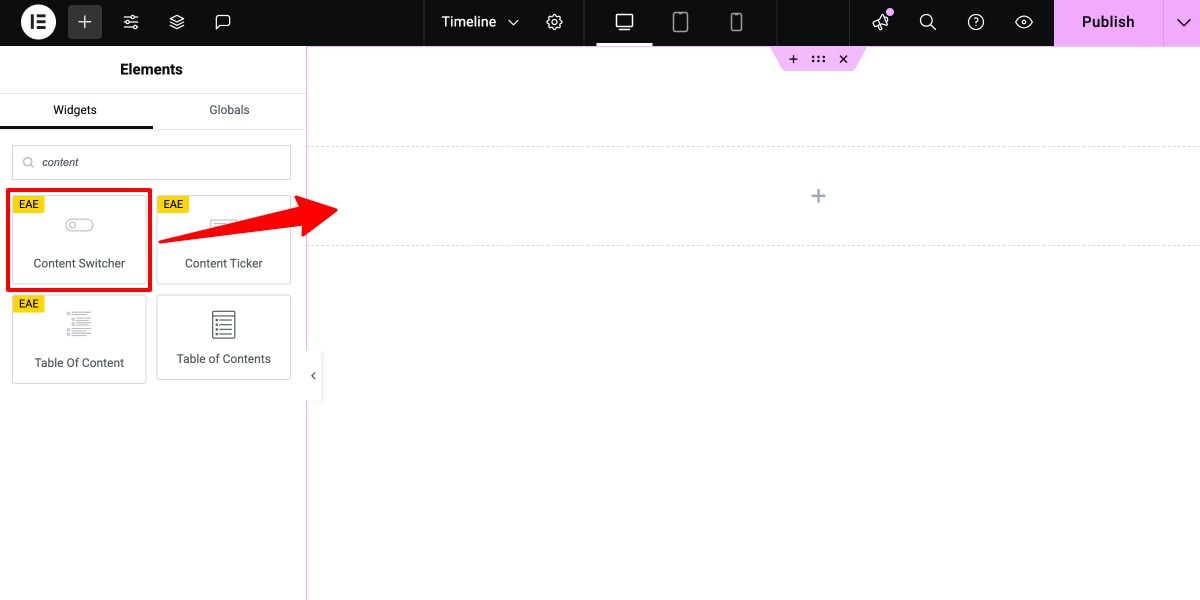
Step 2: Add Content Switcher Widget
Create a page or template in Elementor Editor and drag the Content Switcher widget.
Step 3: Configure the widget
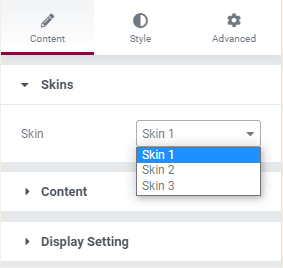
Skins
Under the skin option, you can select the display style for the switcher. There are some pre-build layouts available to select from.
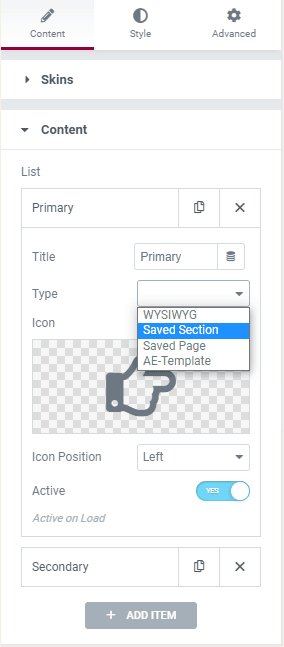
Content
This option lets you add the content inside the switcher.
By default, you will get two items Primary and Secondary to add content in. To add more items click on the Add Item button. You can add any number of items under the Skin 1 layout. But for Skin 2 & 3 only two items can be added.
Primary/ Secondary Label:
For the Primary and Secondary items, you can change the label text.
Next, you can choose the content to display from any of the available content types, like WYSIWYG editor, AE – Templates, Saved Sections, and Pages.
After that, you can insert an icon with the label text and adjust its position. Next, Enable the Active option to display the list item on page load.
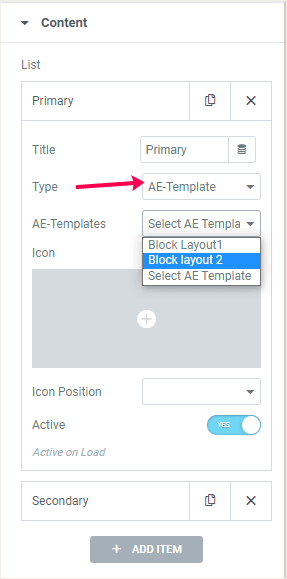
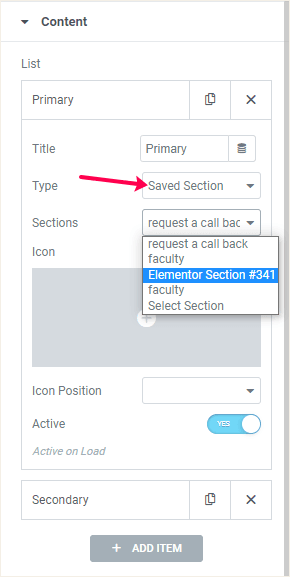
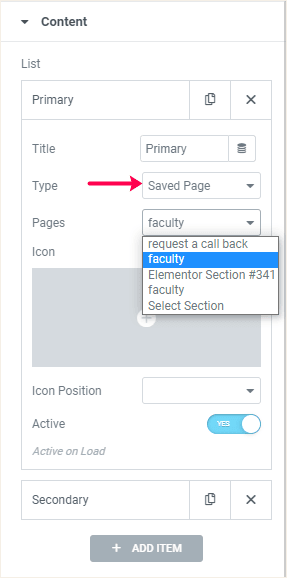
Content Type
- AE – Template:- Here you can use an existing AnyWhere Elementor Template that you had created previously. As soon as you pick this option, you will get a drop-down menu with a list of all the saved templates to select from.
- Saved Sections: You can use the existing Elementor Template that you had created previously. As soon as you pick this option, you will get a drop-down menu with all the saved section to select from.
- Saved Pages: You can use the existing Pages that you had created previously. As soon as you pick this option, you will get a drop-down menu with a list of the saved pages to select from.
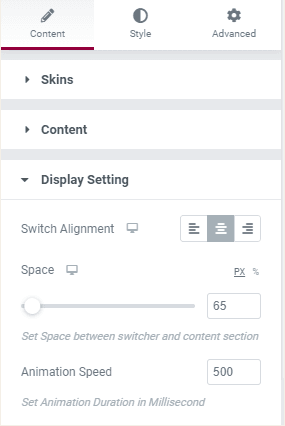
Display Settings
This setting option lets you adjust the settings for the switch bar. You can adjust the alignment of the switch button like the left, right, or center. Next, you can adjust the spacing between the content and the switch bar.
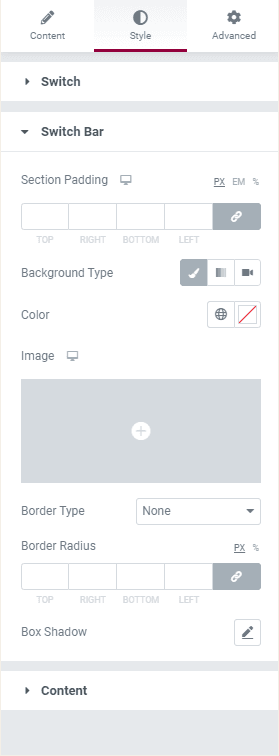
Step 4: Styling the switcher
Under the Style tab, you will get different styles options to style every element of the widget, like Switch, Switch bar, and Content. Adjust the typography and the color for the Switch Content.
Want to Display Stylish Pricing Tables with Your Switcher?
Pair your content switcher with professionally designed pricing tables to create a more engaging pricing section. Check out our guide on how to create a pricing table in Elementor.
FAQs About Content Switcher in Elementor
What is a content switcher in Elementor?
A content switcher lets you toggle between multiple content views (like pricing or menu layouts) using a switch or tab-like interface.
Do I need Elementor Addon Elements Pro to use the Content Switcher?
No, the Content Switcher is available in the free version of Elementor Addon Elements.
Can I use dynamic templates inside the content switcher?
Yes, you can use AE Templates or saved sections/pages for dynamic content loading.
Will the switcher work on mobile devices?
Absolutely. The Content Switcher is fully responsive.
Make Your Website Interactive in Minutes
Interactive content keeps your visitors engaged, and the Content Switcher widget makes it effortless. Whether you’re creating pricing toggles, menu views, or service comparisons, this tool lets you present content dynamically without coding.
Ready to take your Elementor site to the next level? Install the plugin and start switching content like a pro.
Take a look at the demo and documentation for the Content Switcher widget in Elementor.


